Making Gussets for the CNC Router Using the CNC Router.
byRon Thompson
5-19-2010
| I
needed gussets for the gantry because it doesn't seem to be rigid
enough. I wanted to make these in cast aluminum using the lost foam
method, but I didn't want to make multiple foam patterns. Besides a
gusset is something you can use in other projects. I decided to make a
foam pattern and use that casting as a permanent pattern for future sand
casting. I started by modeling what I wanted in Solidworks.  This is the finished, machined version. Cool, but not what I need to cast. I need draft. 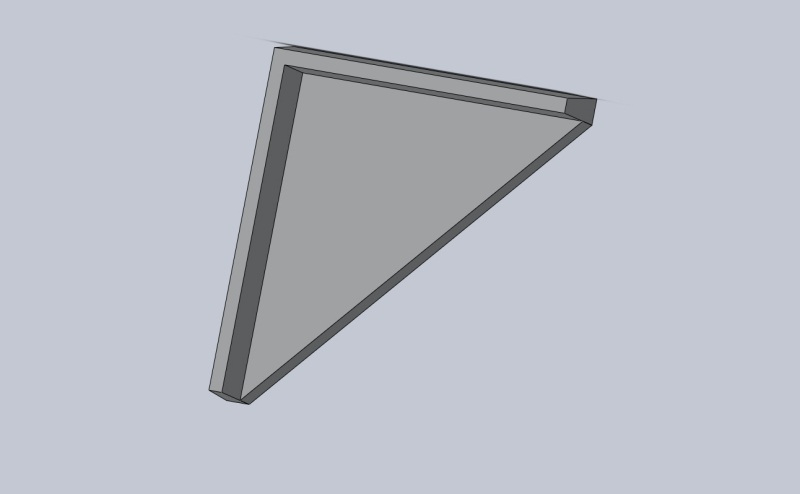 This
is what the finished pattern will look like for sand casting. Better,
but still not what I need the foam to look like for CNC routing. I need
tabs to hold it in place until the machine finishes. If it were to cut
completely through, there is a good chance it will move and be damaged. 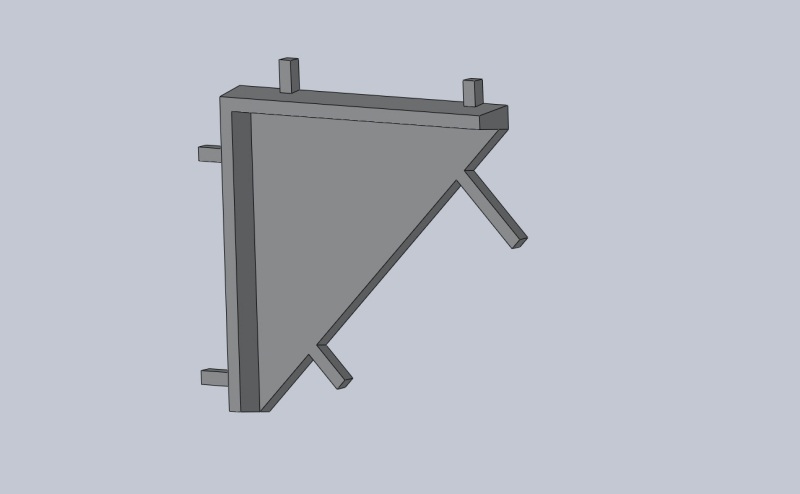 So
I stuck on a few tabs. It doesn't matter how long they are, because I
will constrain the routing to an area around the part just wider than
the end mill. I used the blue foam from the home supply store. It is 1/2" thick, so I used white glue (like Elmer's school glue) to laminate a double layer 1 inch thick.  The
first cut went bad (lower left in the photo, above). For some reason my
Z axis quit and the router dropped. I now have a neat hole in the
table. I went in the house for a while and it was like this when I
returned. I thought the Z motor or driver fried! It wouldn't even jog.
But when I removed power for a few seconds and then plugged it back in,
everything worked. I retried the part and it did it again, see the top
of the photo. Unplugged and immediately reapplied the motor power and
everything is OK again! The driver is pretty cool and the motors are
not too hot to keep your hand on. Anyway, the third time was the charm.
The first part shows the triangular pattern left from the
roughing passes. Added 5-26-2010 I think I discovered the cause of the Z axis driver quitting. My slap dash "temporary" wiring job was to blame. Now don't get me wrong, I used good wire. While waiting for the right stuff to come in the mail, I bought a Wal-Mart extension cord and chopped it up. The wire was fine, if a little too large at 14 Ga. It was three conductor, so I had to double it up to get enough individual wires to run my unipolar stepper motors. And I did a good job soldering them to the motor leads. But the crappy electrical tape came loose and allowed the wires to occasionally touch! When that happened, the driver went into self defense mode and shut itself off. Much better than letting the smoke out. That Hobbycnc Pro is one tough board. I re-taped with a better grade of electrical tape (and used quite a bit more) and everything seems fine. Even if the bright orange wires look funny.  I
am using Mach3, and you can see the feed rate was programmed at 50
inches per minute. I had that overridden to just over 80 IPM. The
machine will go faster, but it shakes too much. 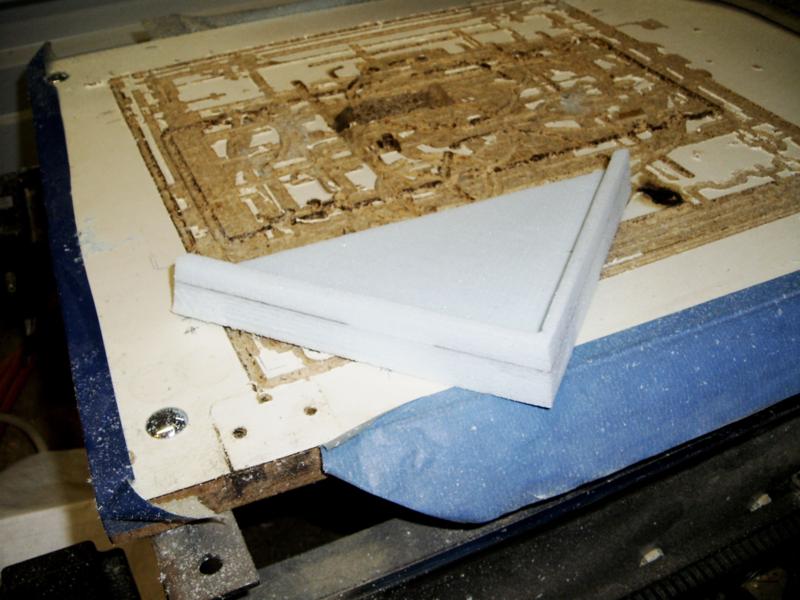 I
just cut the tabs with a pocket knife. This is the pattern after a
minute or two of light sanding with a medium grit sanding sponge. The
black is the printing on the foam sheet and shows where it is glued
together.  Another
view showing the sanding. Almost time to change the sacrificial top on
the table. This table is an old melamine covered cabinet door. The
melamine (and the glue) is a pain in the ass. I won't use it again. 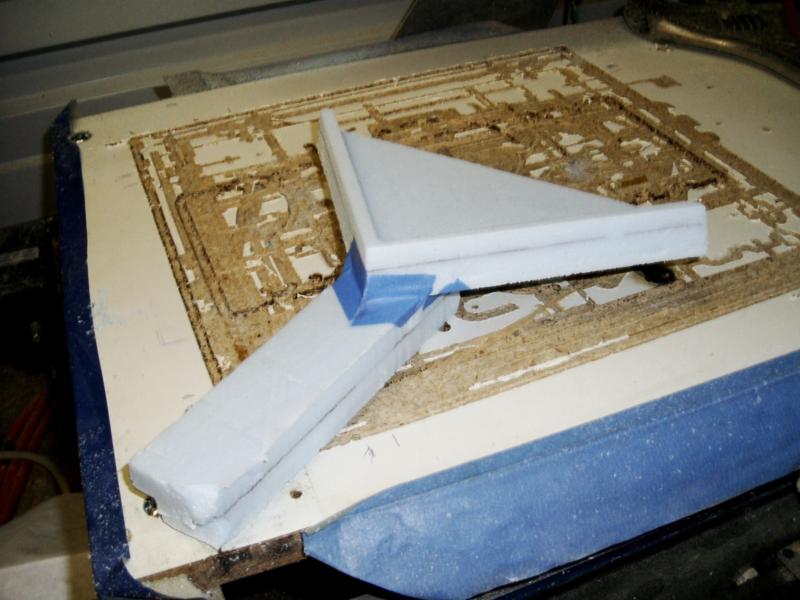 I decided to just tape on the sprue instead of waiting for glue to dry. Much quicker. 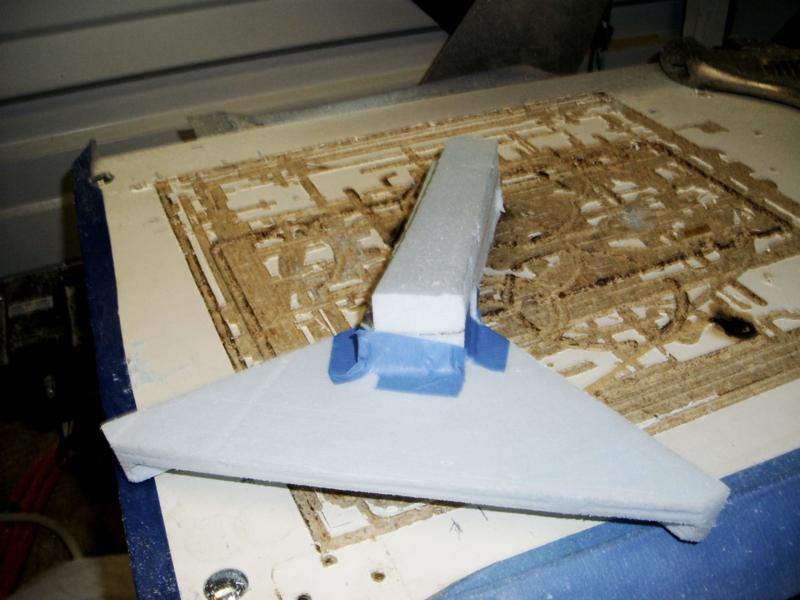 And the reverse view. 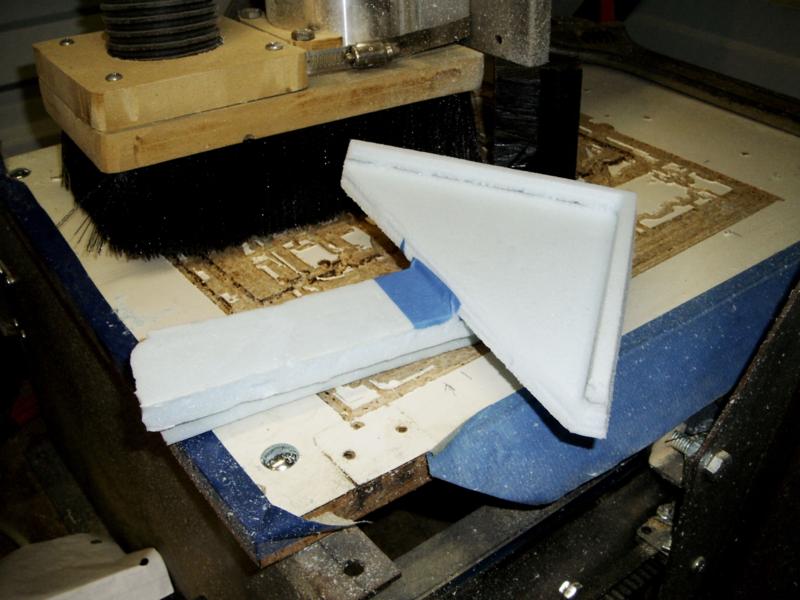 As
I was taking the pictures, I realized this would not sit well in the
sand. I was likely to have an area that the sand wouldn't get into. So
I reversed the part on the sprue. 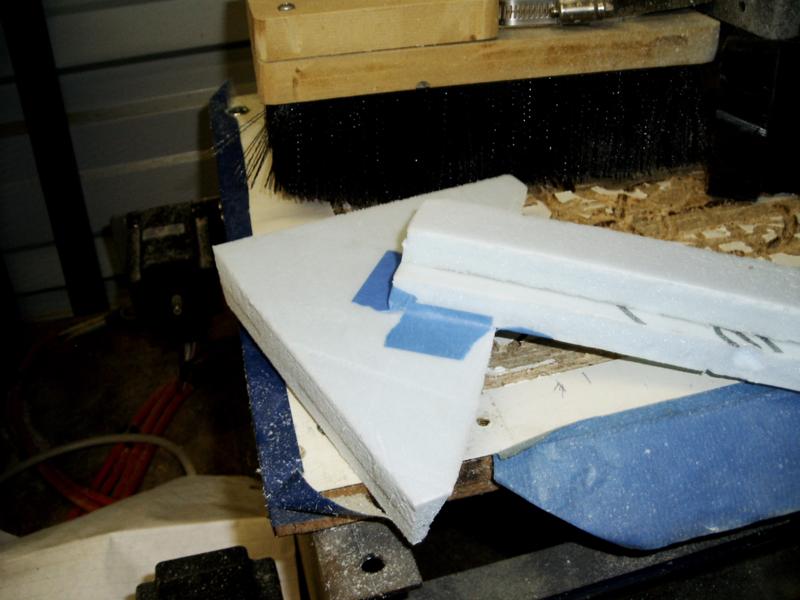 And
taped it as before. This is just masking tape. The blue seems to have a
little better glue, is all. Oh, and it costs a little more. If you look
close in the fourth picture from the top, you can see the blue tape
holding the foam to the table. Just a few strips around the edges and
smoothed down good and it holds the foam for routing. I press down on
the foam as I tape it to make sure it sits tightly against the table.  Right out of the sand. I hit it with a water hose to cool it off. The surface finish sucks for a couple of reasons. One is I forgot to beat the side of the container as I was filling it with sand. This is a crucial step to settle the sand tightly around the foam. If you don't, the sand will be free to move a little as the molten aluminum fills the mold. The second mistake was the depth. I should have put it deeper in the sand. This not only compresses the sand better, but gives better head pressure to fill the mold. 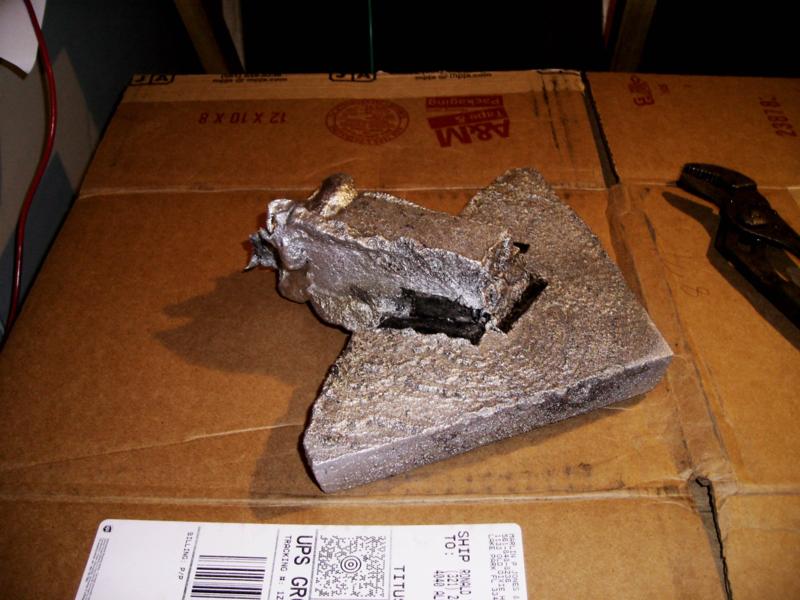 You
can see the masking tape charred black. This is a good way to give a
casting a dark patina. Here you can see the molten metal radiated in a
wave pattern because the sand wasn't packed tight. I intend to machine
or belt sand every side, so this is still a usable casting. |