The tweaking so far has been great! I'm not making perfect parts, yet, but I'm getting there. The round things look more round and the dimensions are pretty close. I don't know what kind of tolerance to expect with this machine, but I am under .005" at this point. Not too bad for squirting plastic!
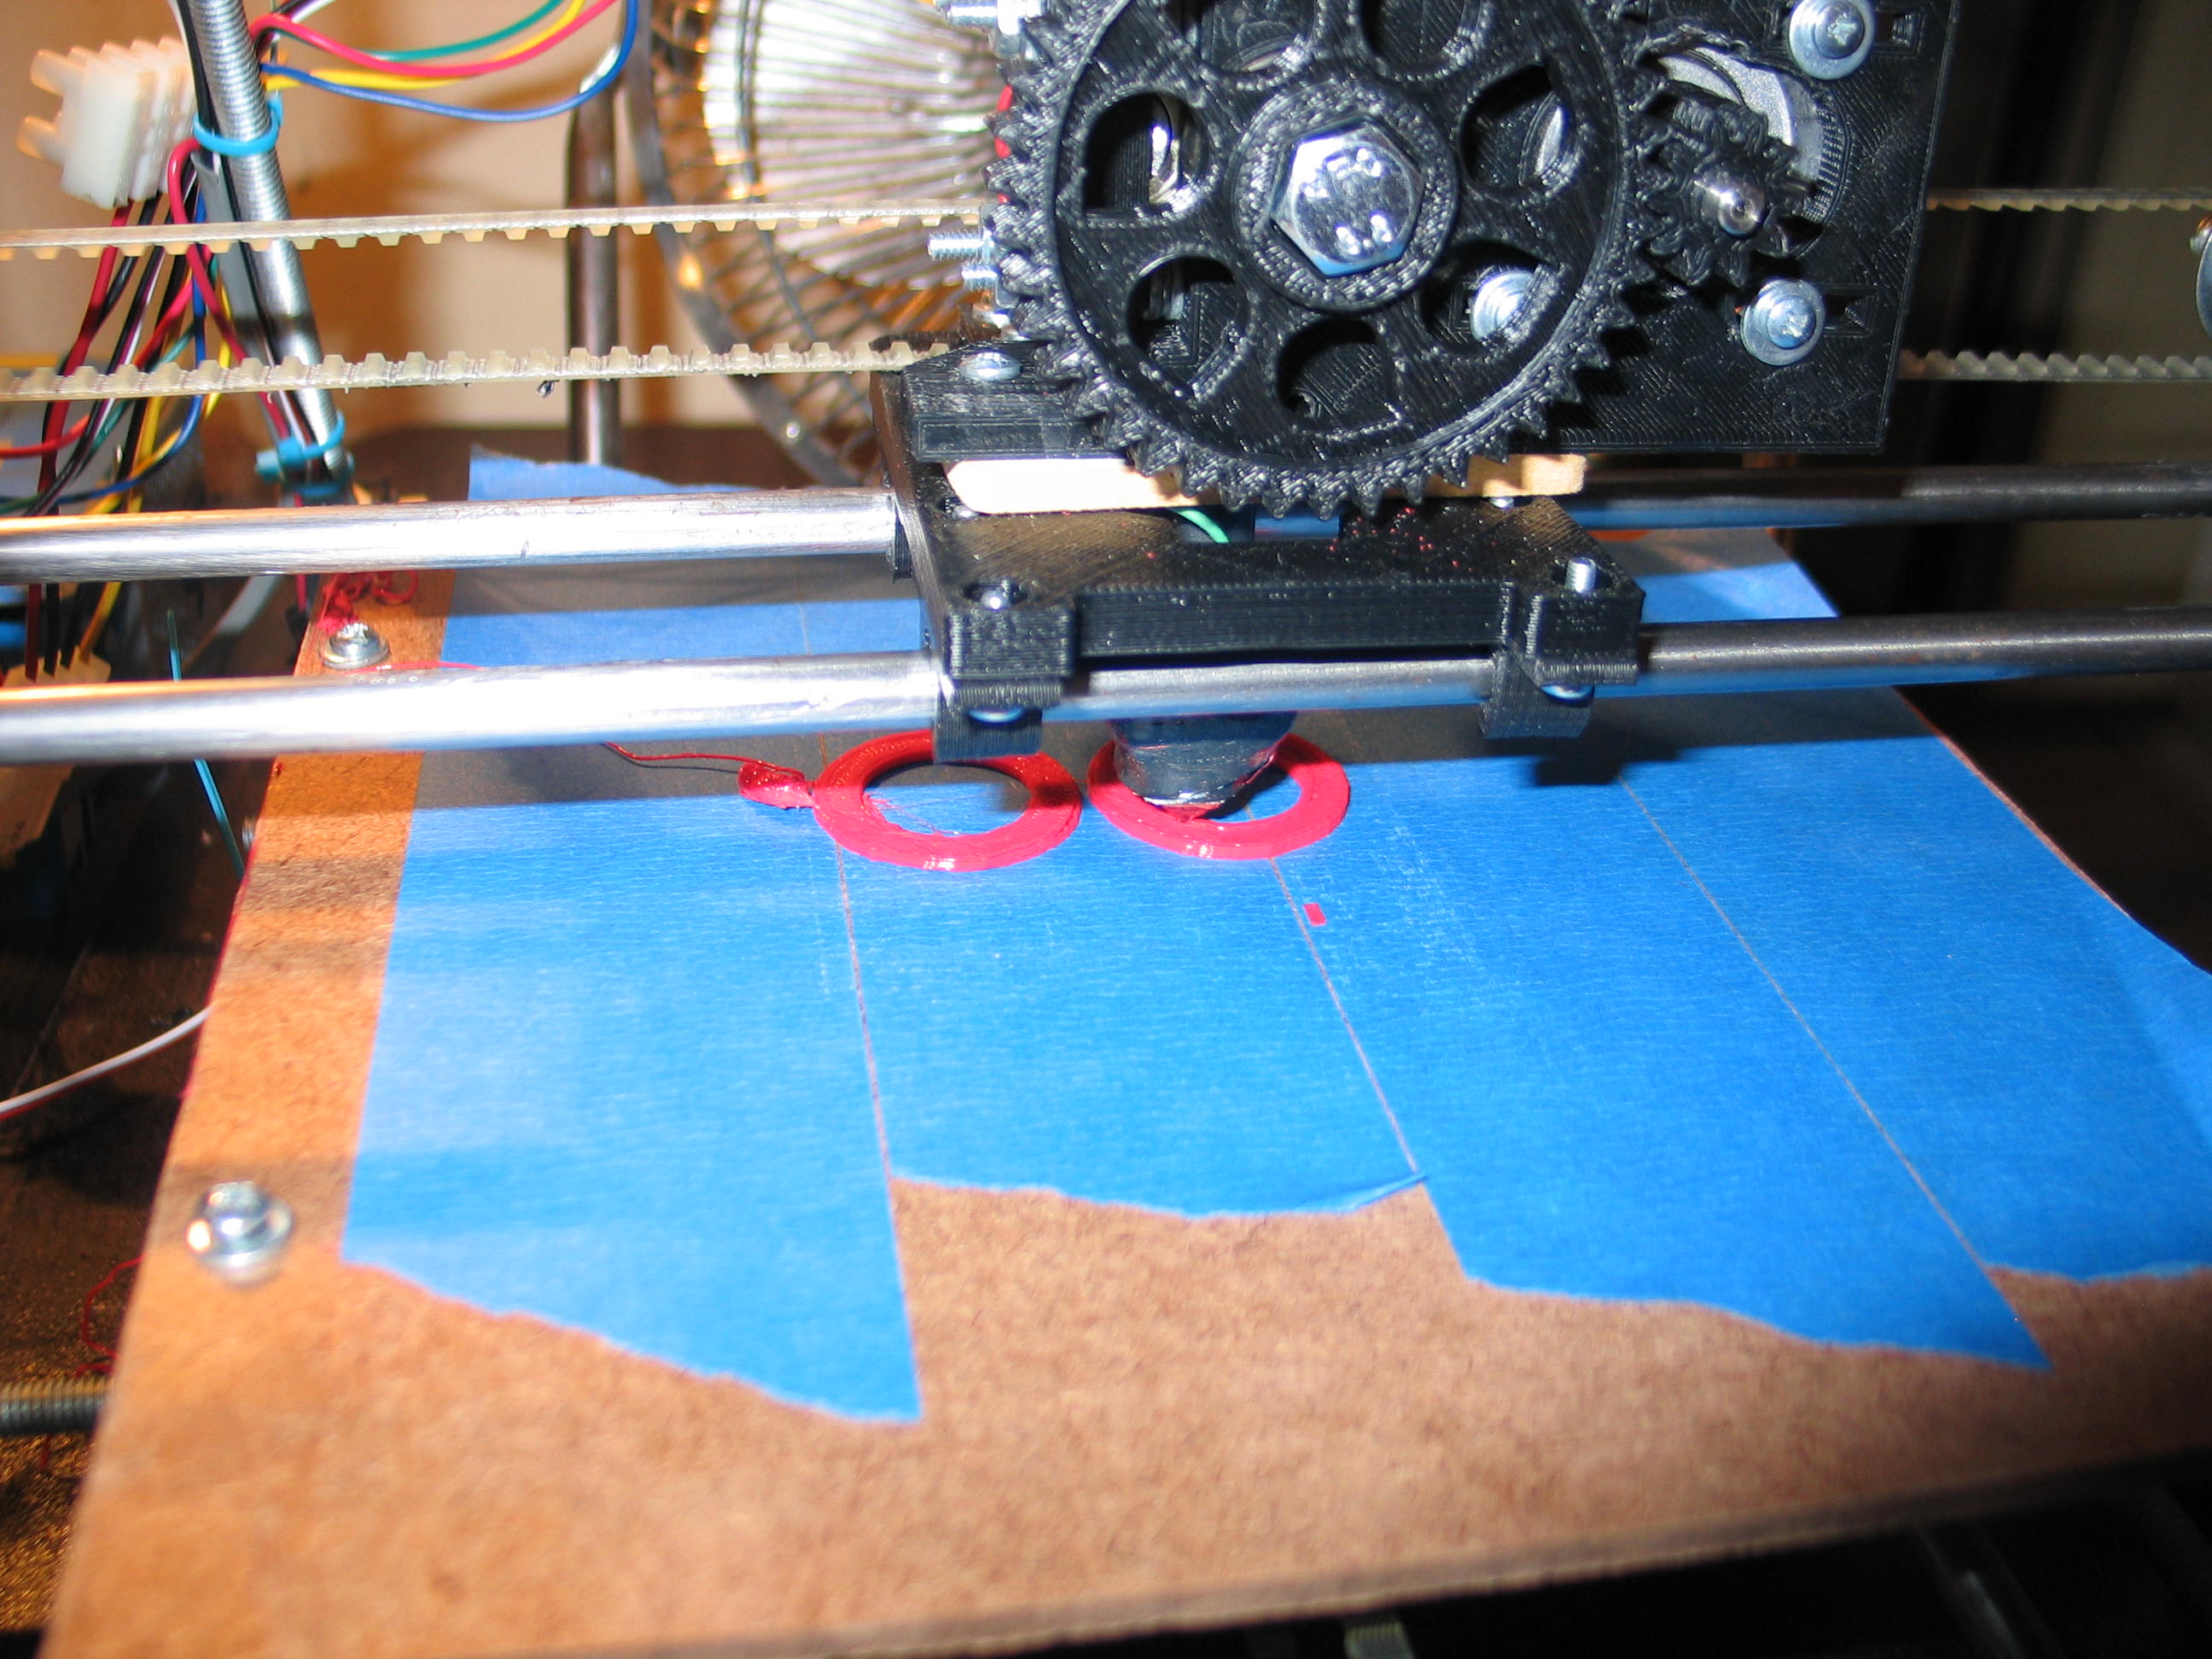
This
part is supposed to be a Greg
Frost Bearing Guide. I still am not to the point of making
this successfully.
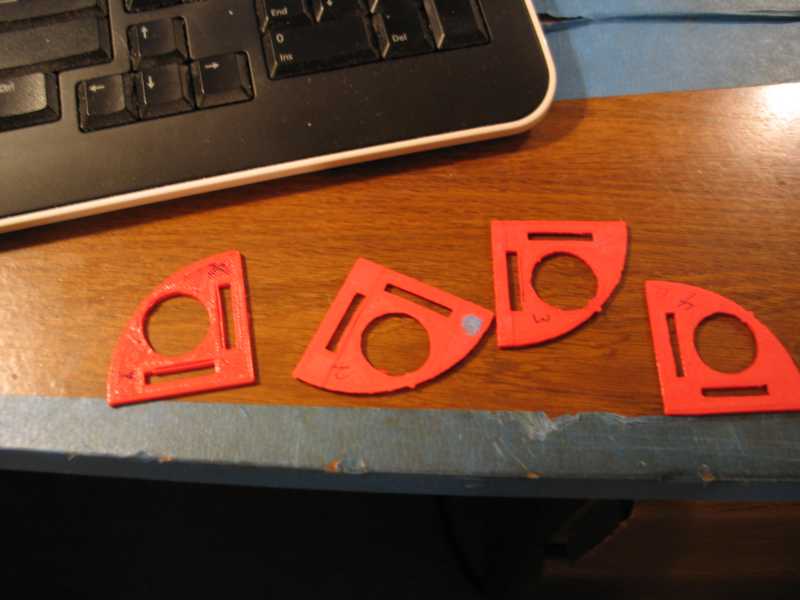
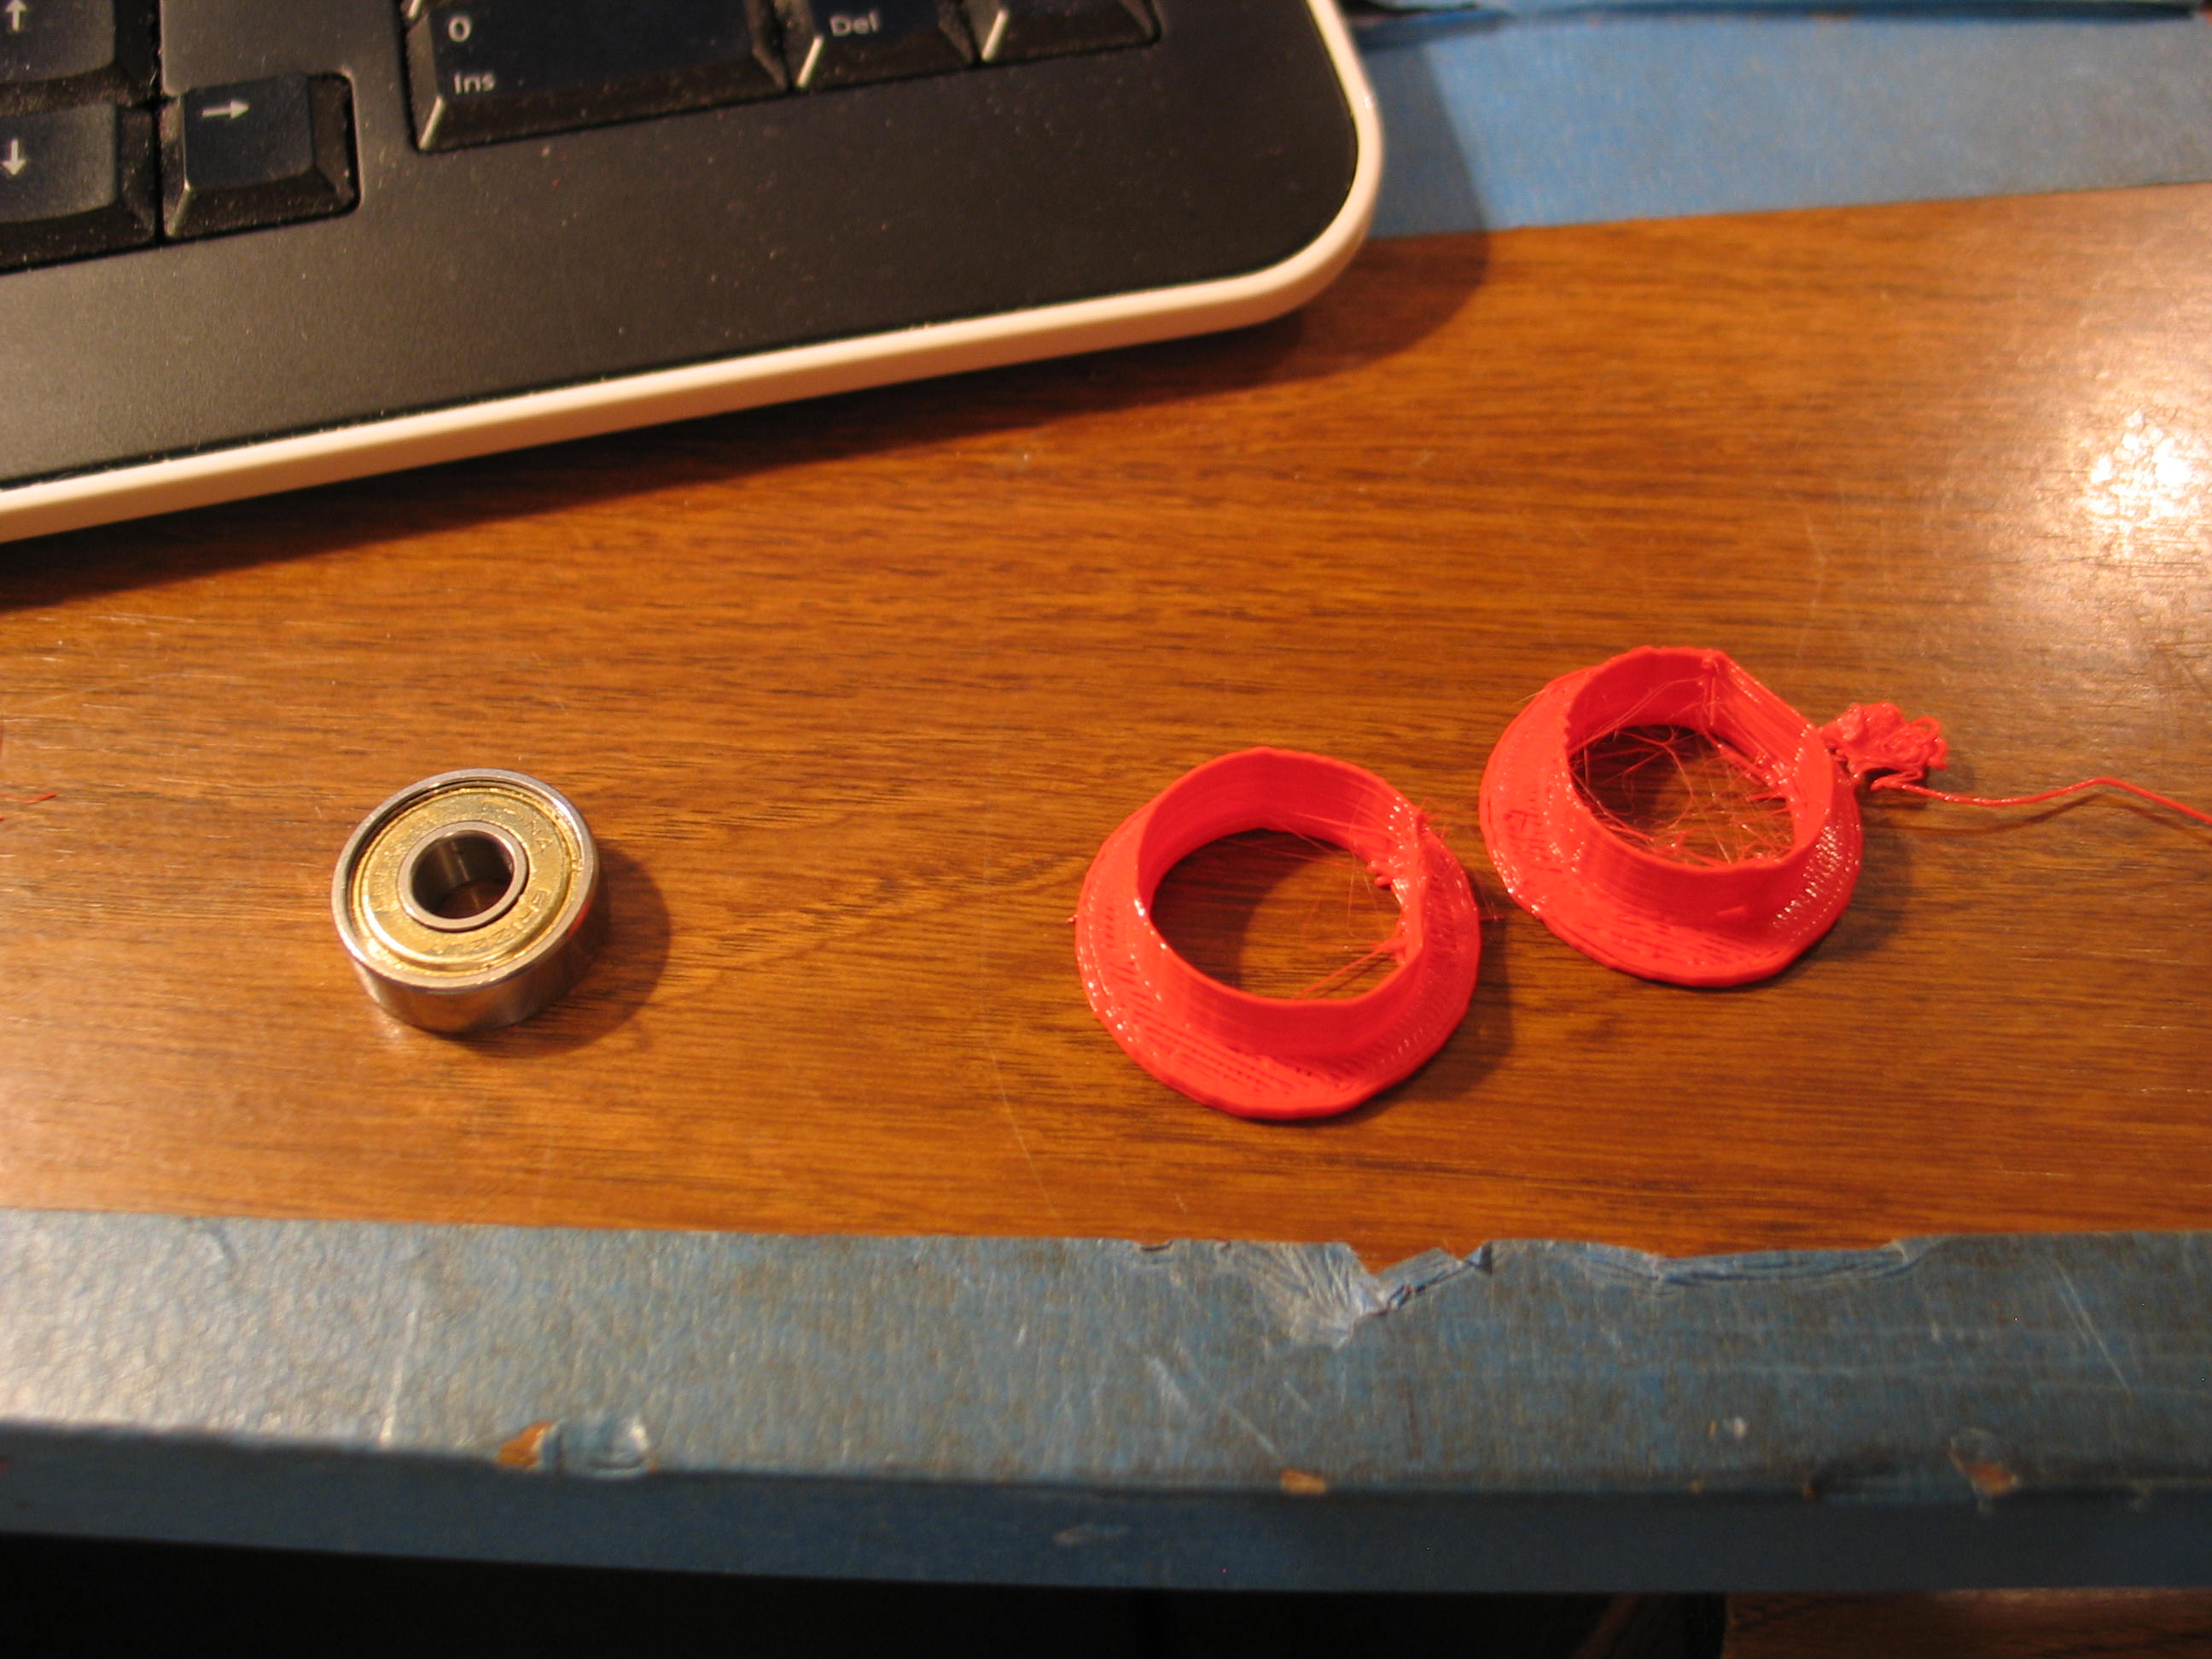
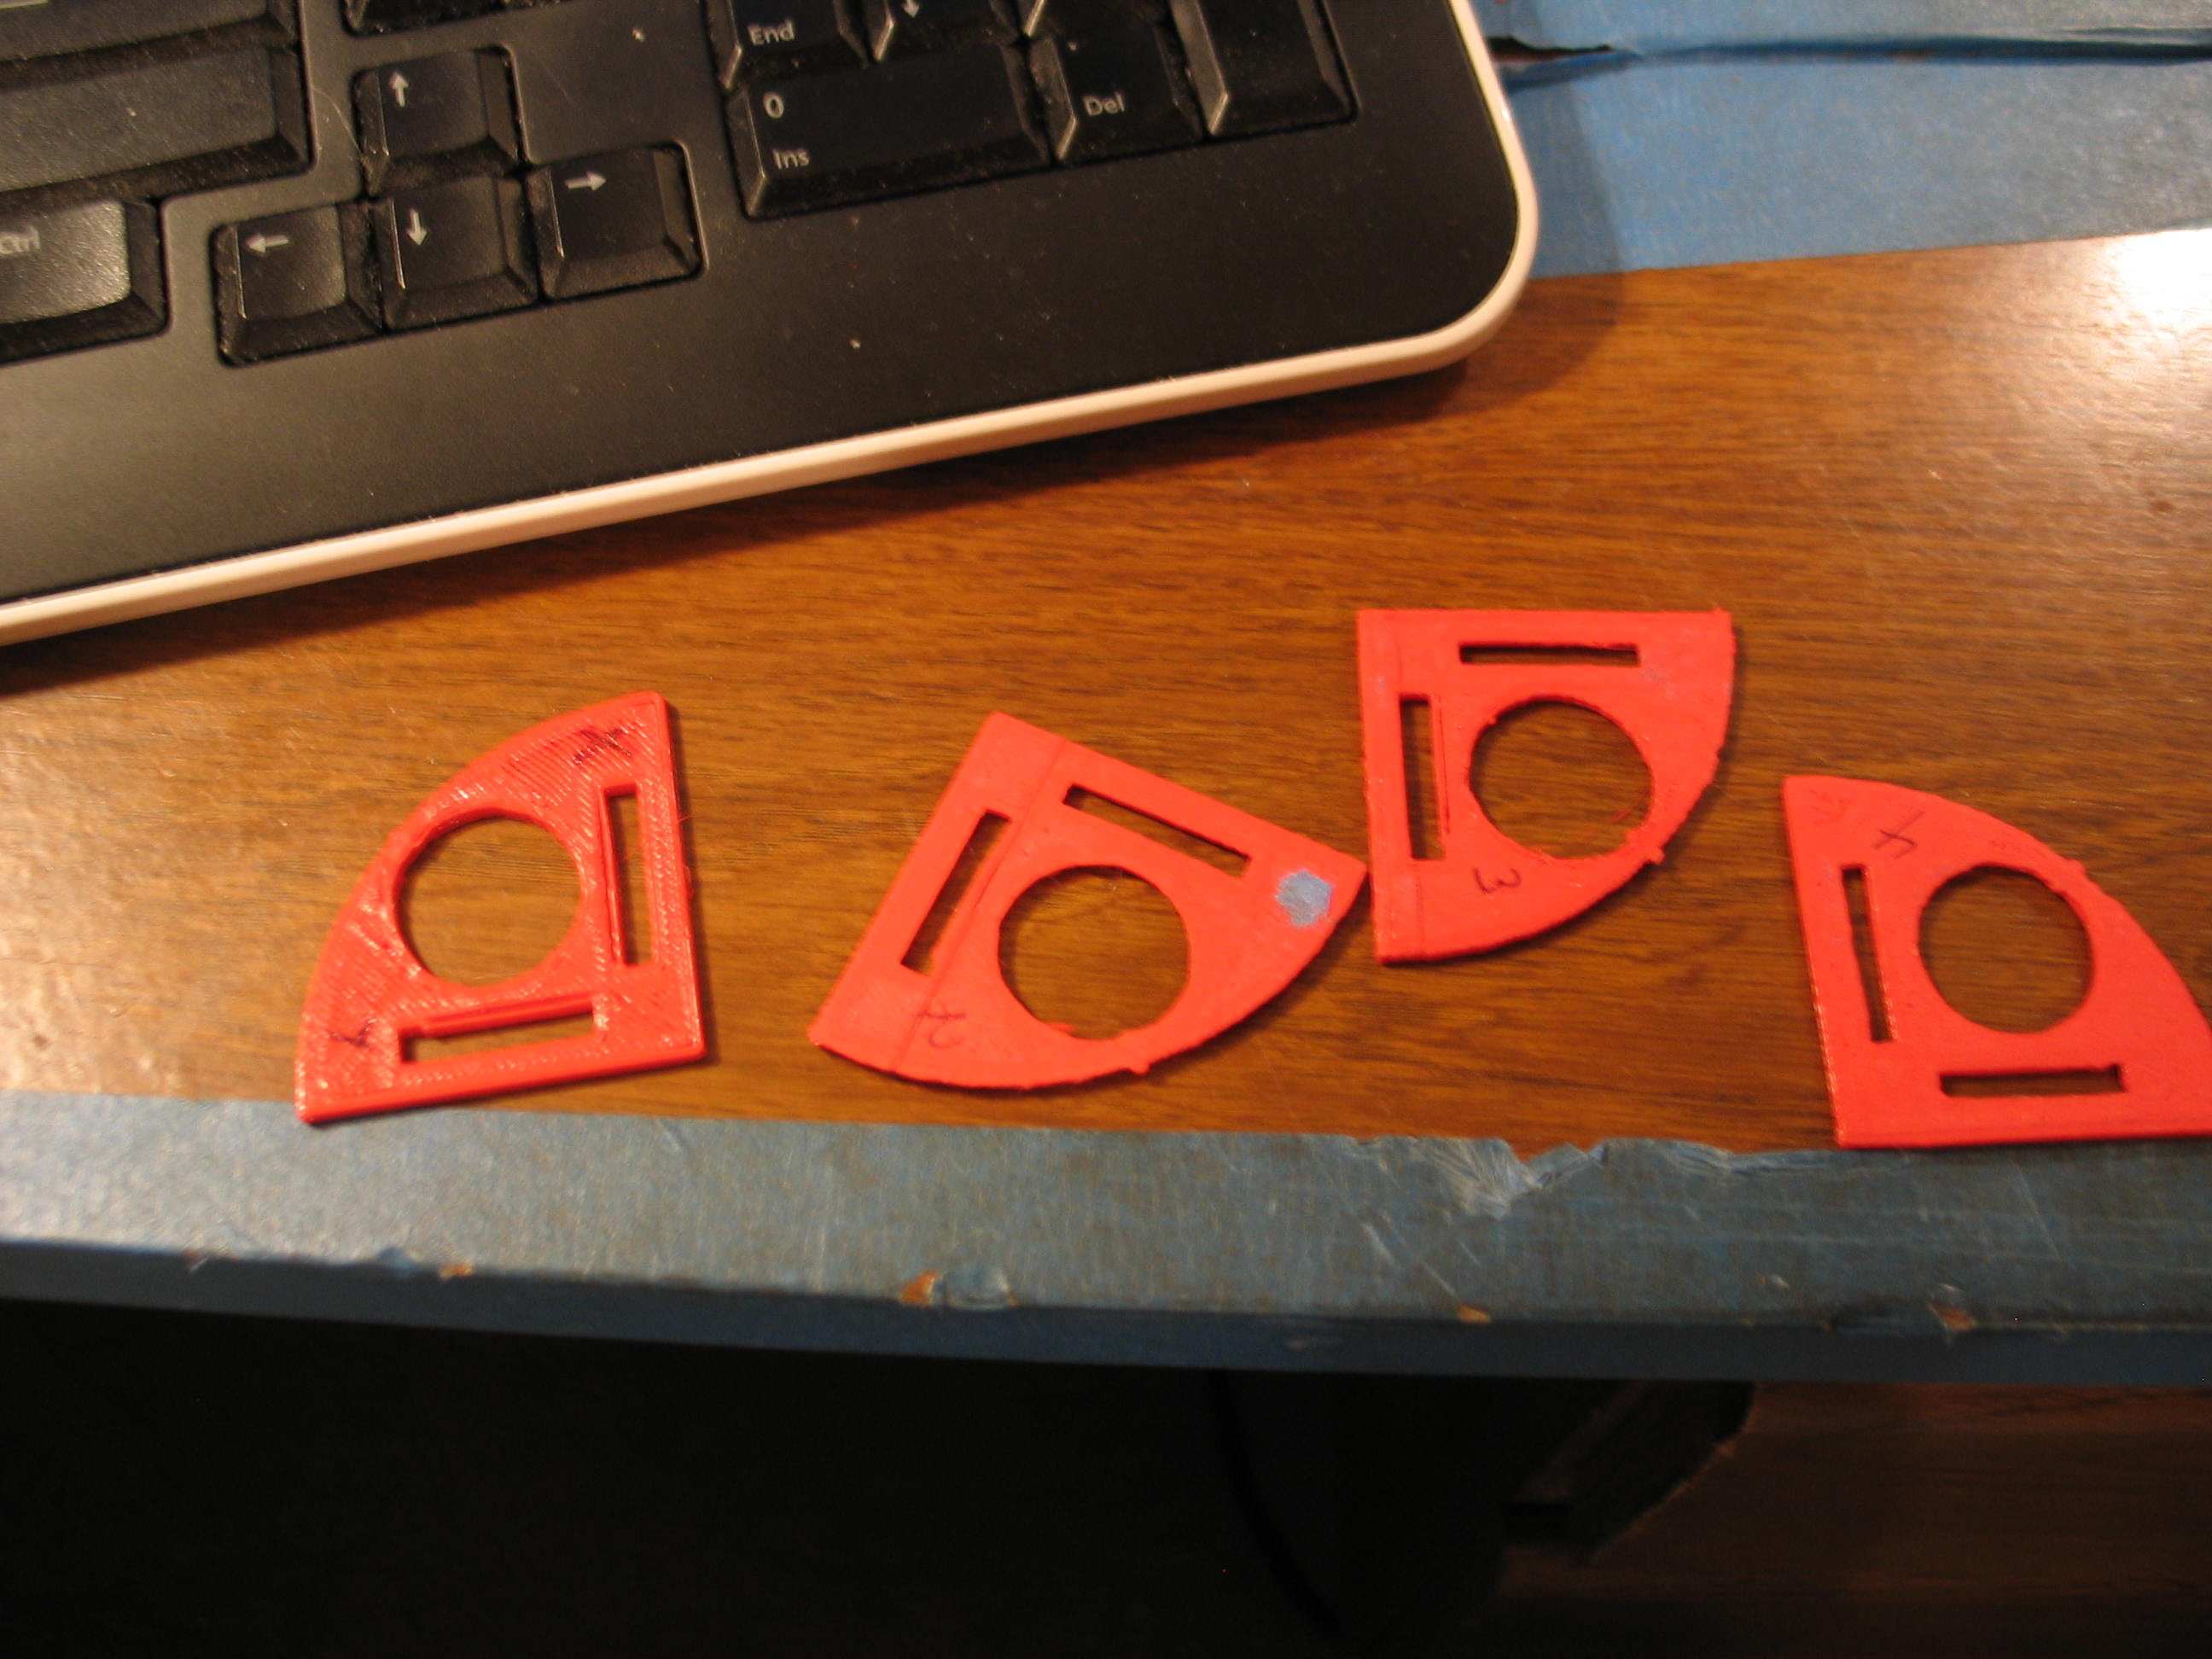
One reason it's rounder is I used A Better Nickel Calibration Test from Thingiverse. In the photo above, you can see the parts I printed as tests. The front is marked with a fine point sharpie to keep the X and Y straight, and the back is numbered so I don't forget the sequence. In the end, they go in the trash. I feel confident if I need plastic washers, I can knock them out!
One reason it's rounder is I used A Better Nickel Calibration Test from Thingiverse. In the photo above, you can see the parts I printed as tests. The front is marked with a fine point sharpie to keep the X and Y straight, and the back is numbered so I don't forget the sequence. In the end, they go in the trash. I feel confident if I need plastic washers, I can knock them out!
Jamie
Cunningham in Tampa (http://www.backyard-workshop.com)
asked about
where the machine homes to. (He has the build fever, as well.)
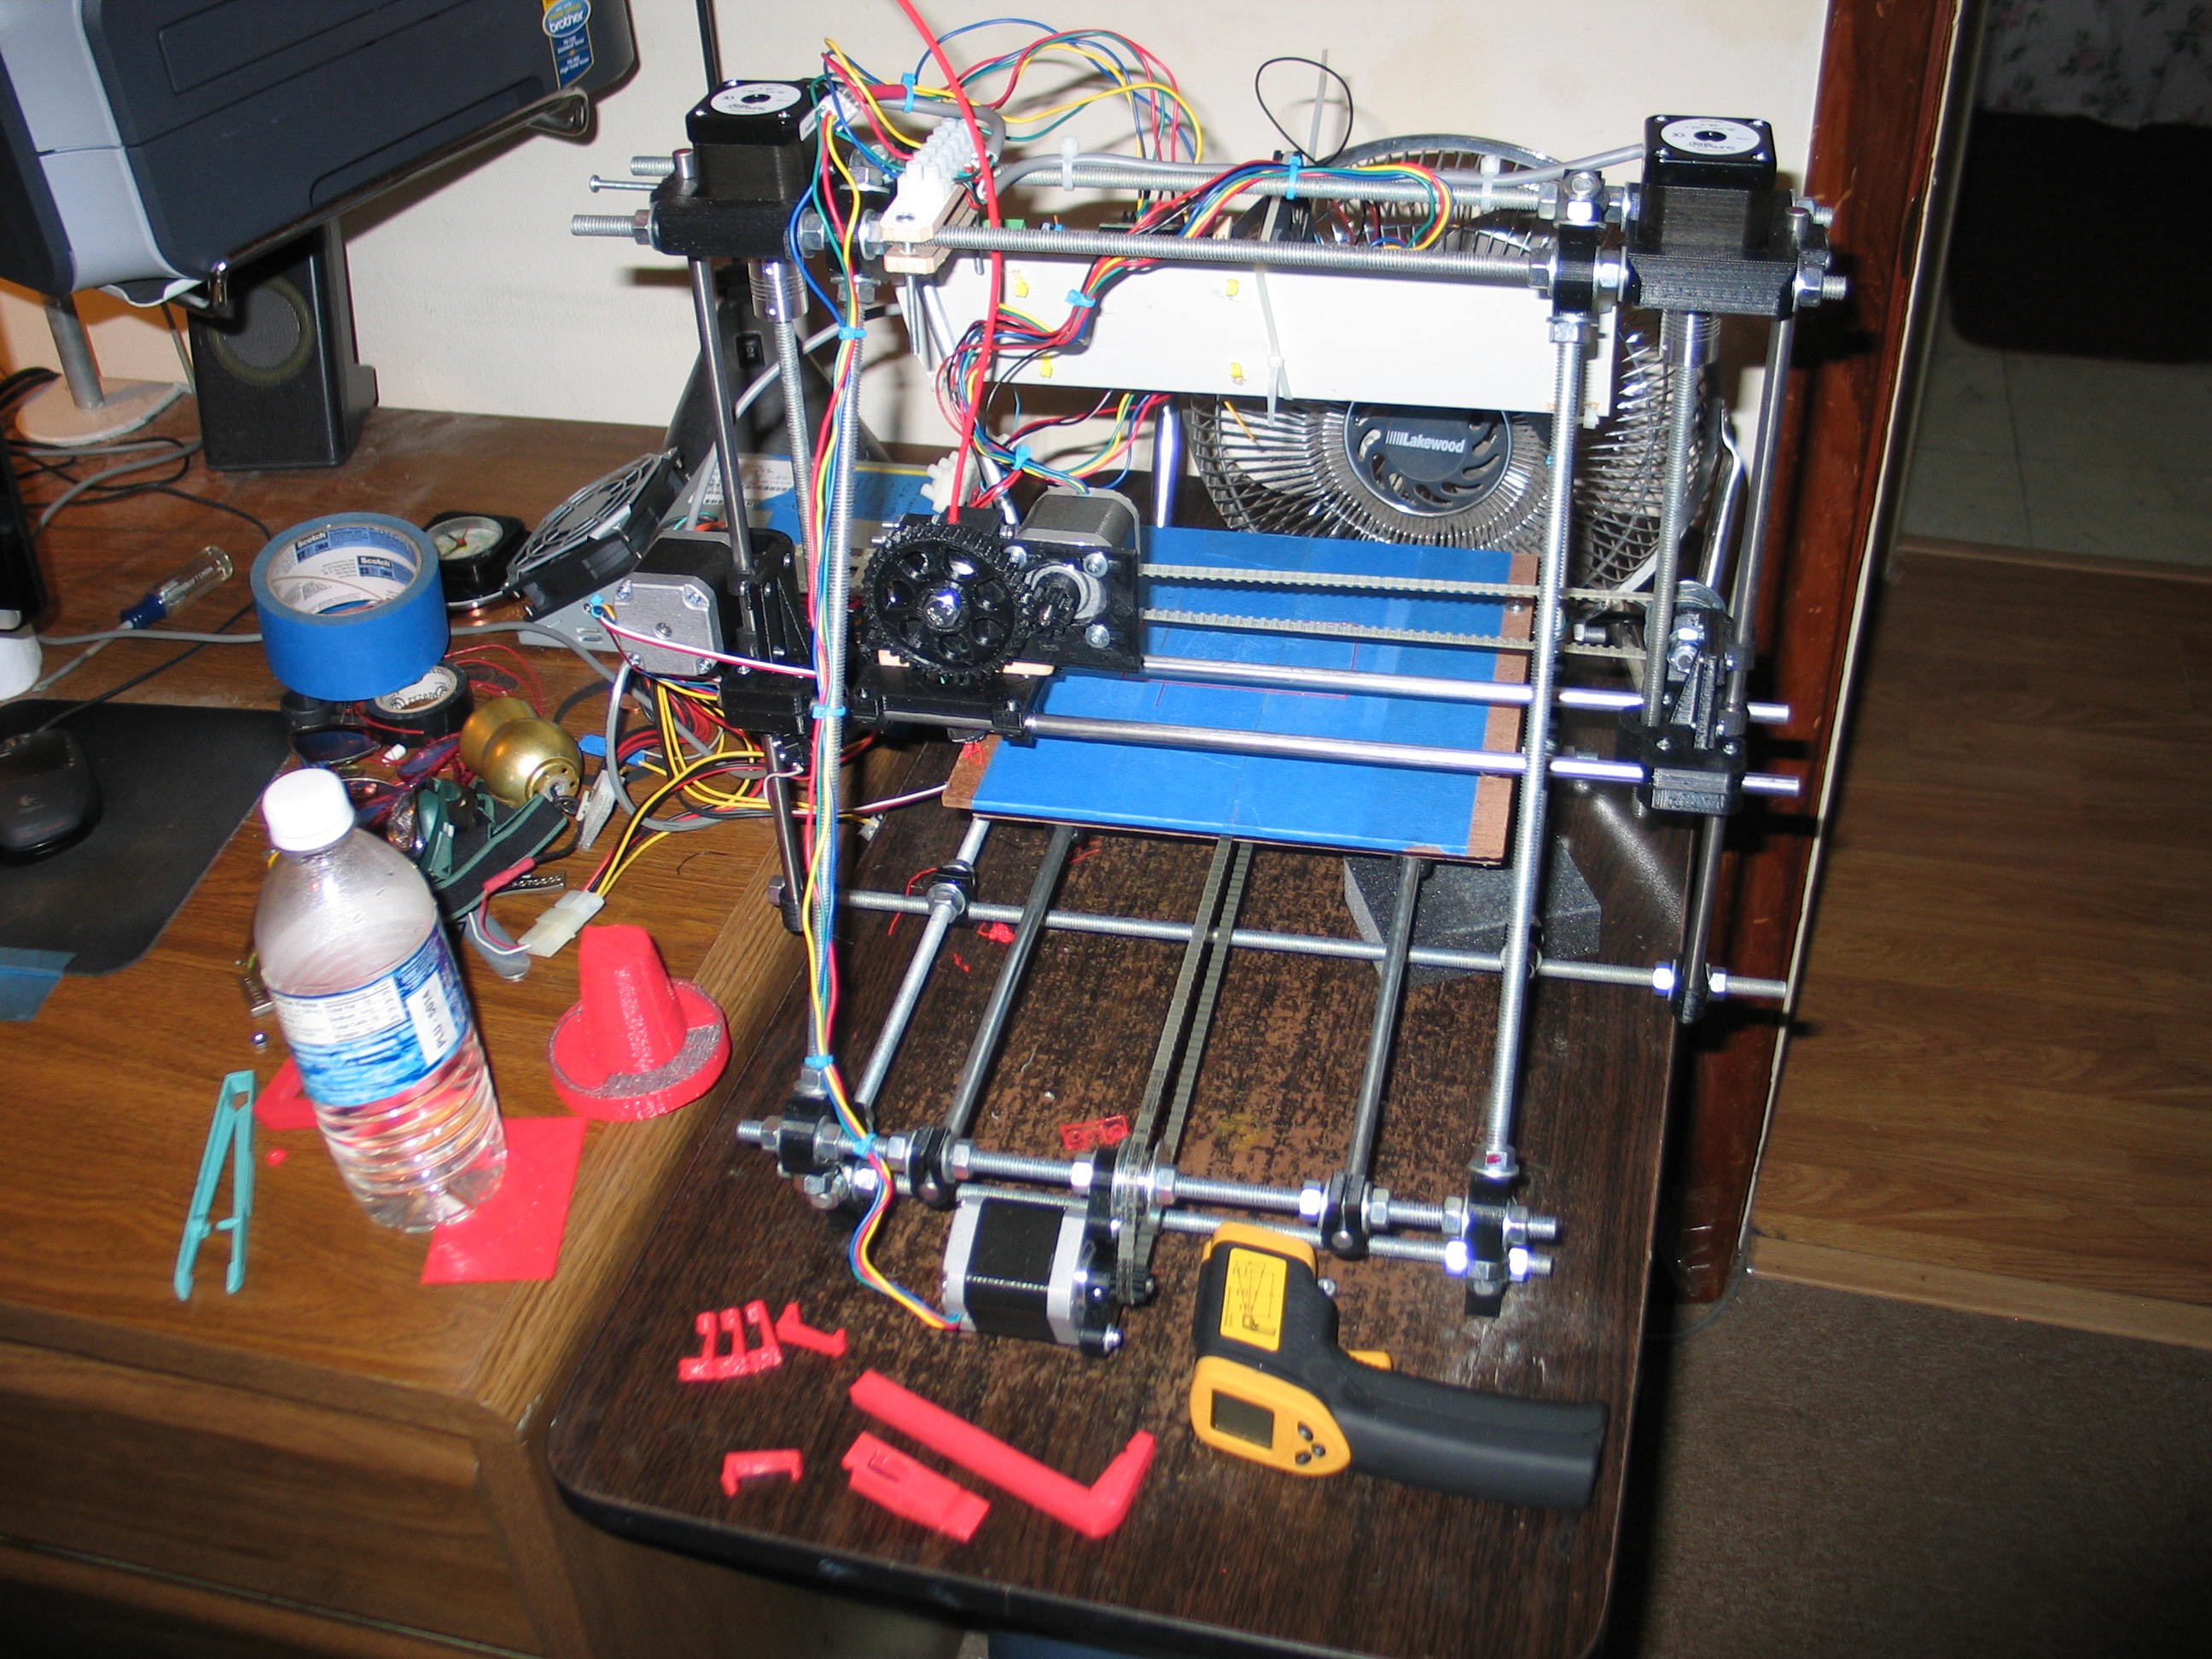
This photo (above) shows the machine homed to minimums. If I had it to do over, I'd mount the electronics on this side and turn the machine around. As it is now, I enter a G0 Y180 to bring the table forward to remove parts. This gets old after a while. I thought about just moving the X and Y home switches to the opposite ends of their axes. But I have become used to this and the 0,0 is on the lower left of the build platform as I expect it to be. Maybe I can home to Max instead of Min.
This photo (above) shows the machine homed to minimums. If I had it to do over, I'd mount the electronics on this side and turn the machine around. As it is now, I enter a G0 Y180 to bring the table forward to remove parts. This gets old after a while. I thought about just moving the X and Y home switches to the opposite ends of their axes. But I have become used to this and the 0,0 is on the lower left of the build platform as I expect it to be. Maybe I can home to Max instead of Min.

OK,
enough fooling around. I
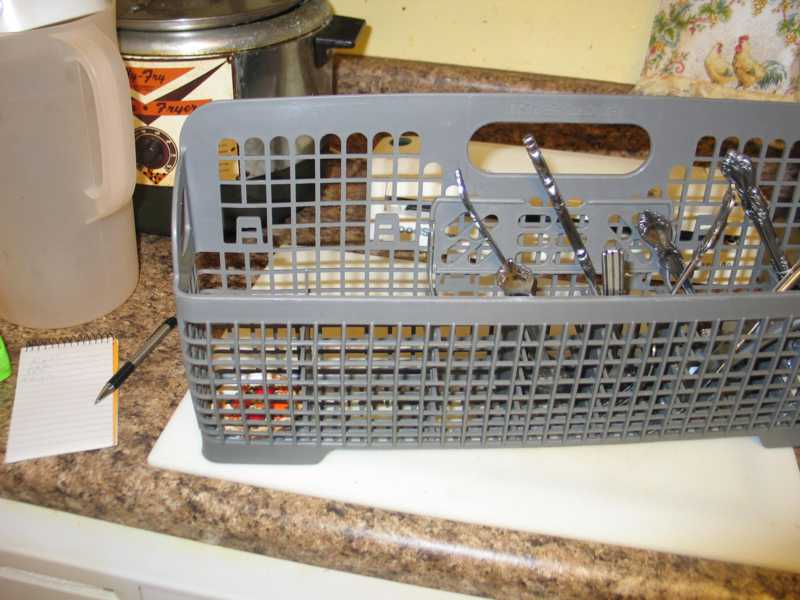
have a job that fits the machines capabilities as it is. The photo
above is the silverware rack from out dishwasher.


I modeled this in Solidworks and saved it as an STL file that Pronterface and skeinfoege can read. I modeled it in inches. It didn't matter.
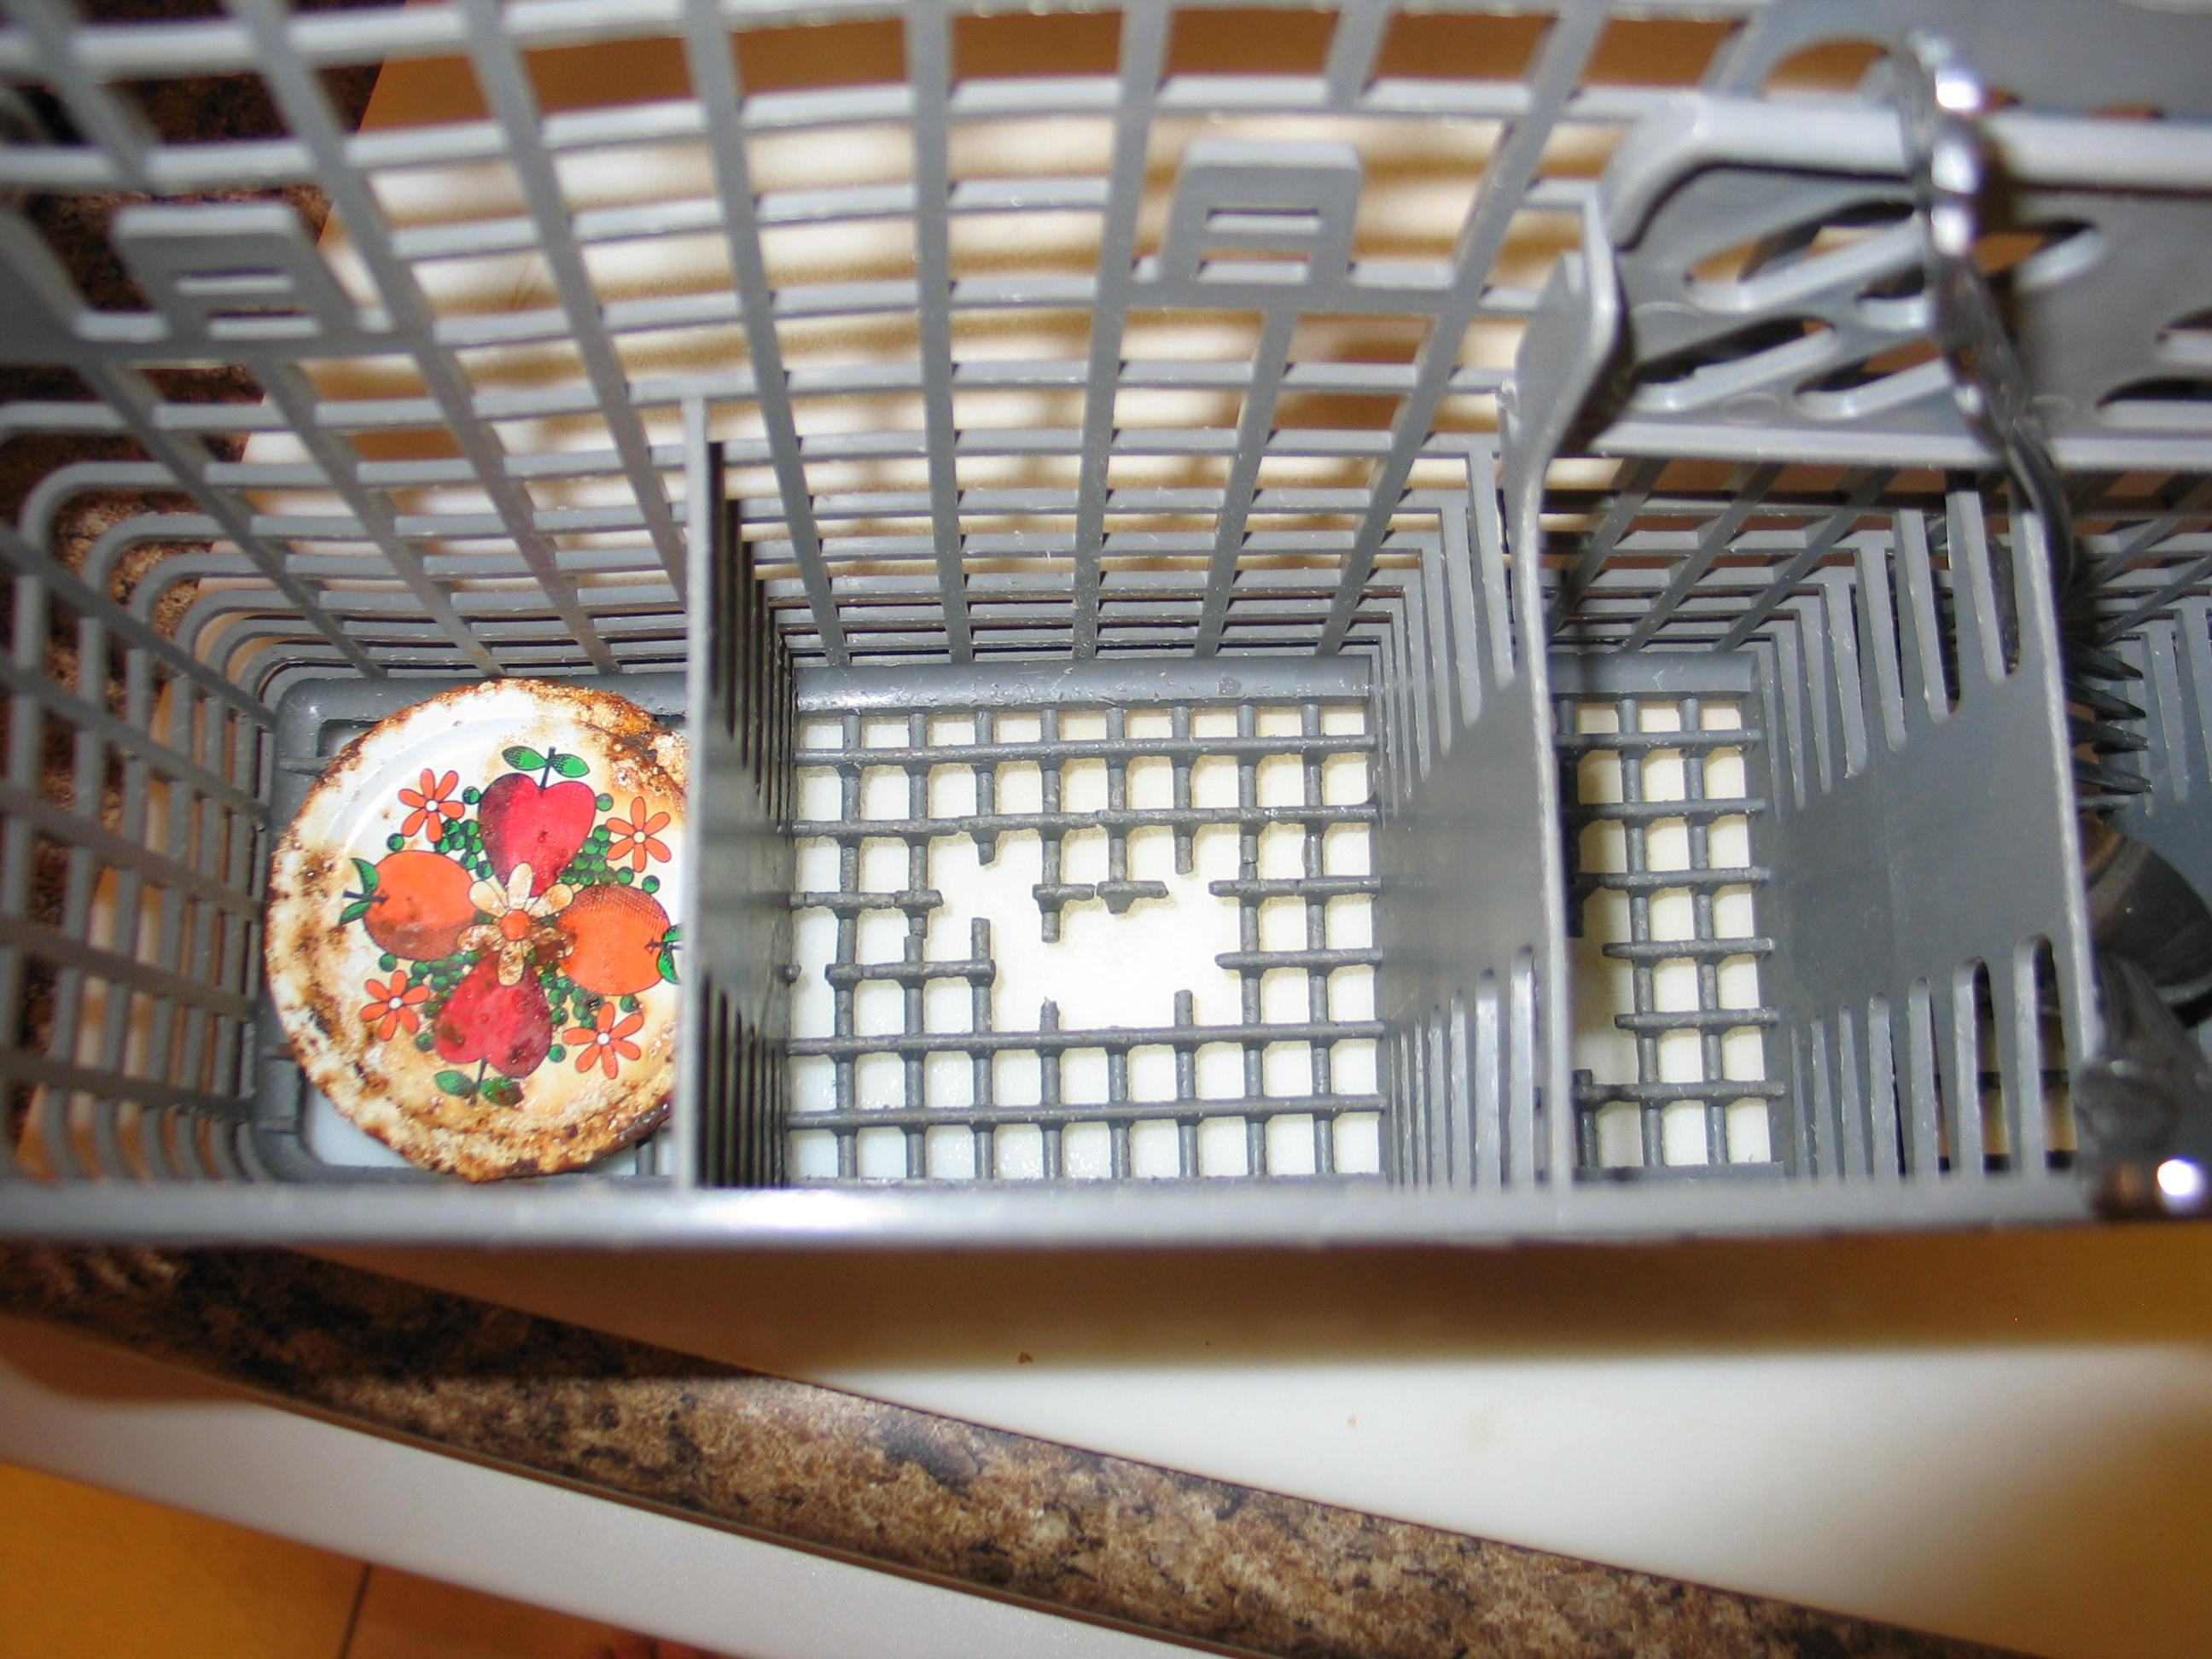
The
bottom has suffered and
the holes make it difficult to load. My wife put an old jar lid in the
first place to break out, and it has done OK, but the lid is rusting.
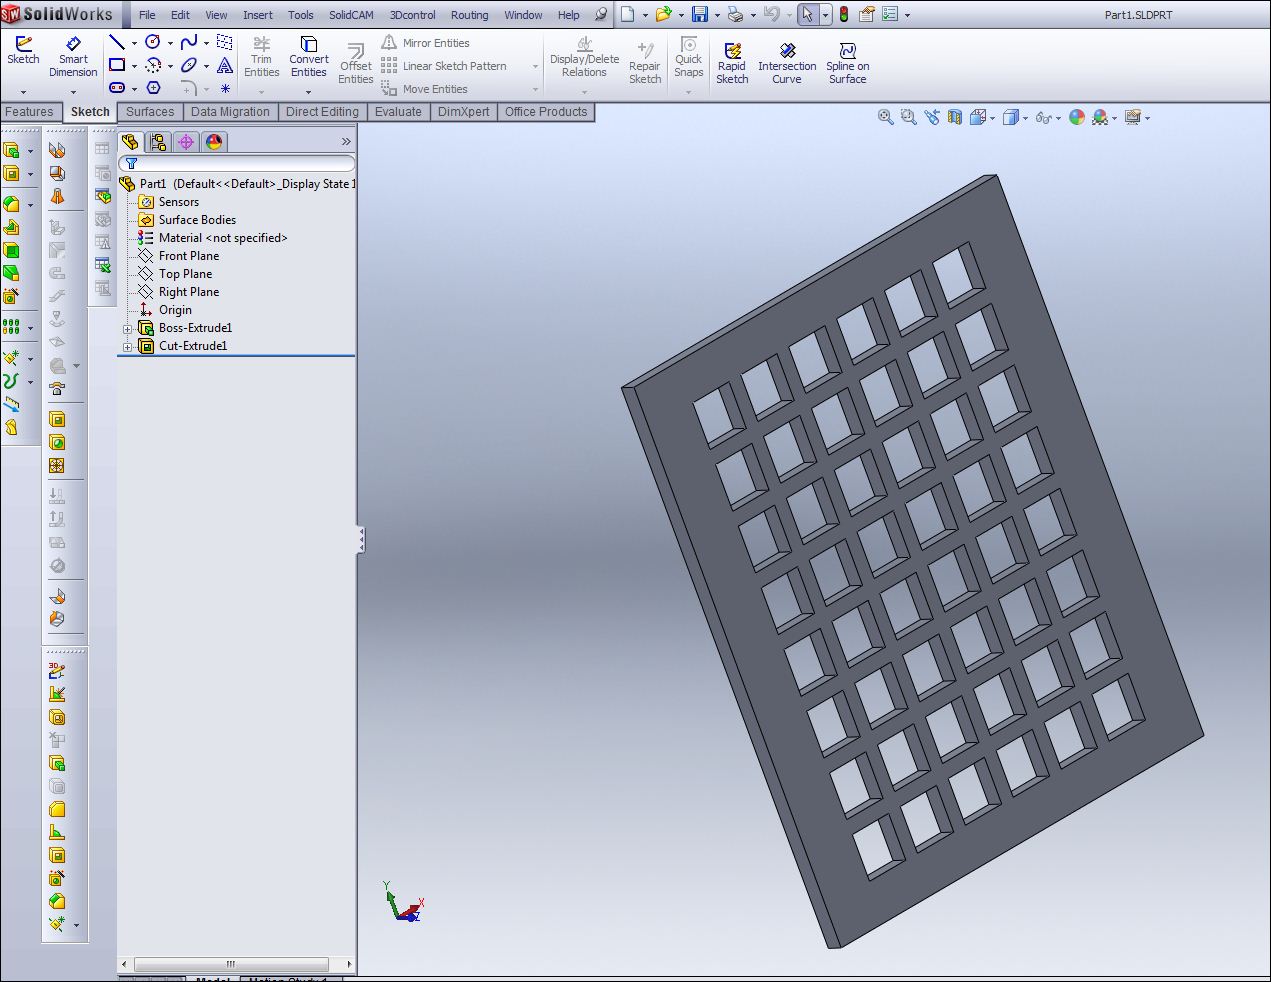
I modeled this in Solidworks and saved it as an STL file that Pronterface and skeinfoege can read. I modeled it in inches. It didn't matter.

What
did matter is I
mis-measured. The above part was supposed to be 3 inches on each side.
It actually printed .050" larger. Not too shabby!
The problem was soon apparent, as it didn't fit. I measured the top of the opening, but failed to allow for the taper of the basket.
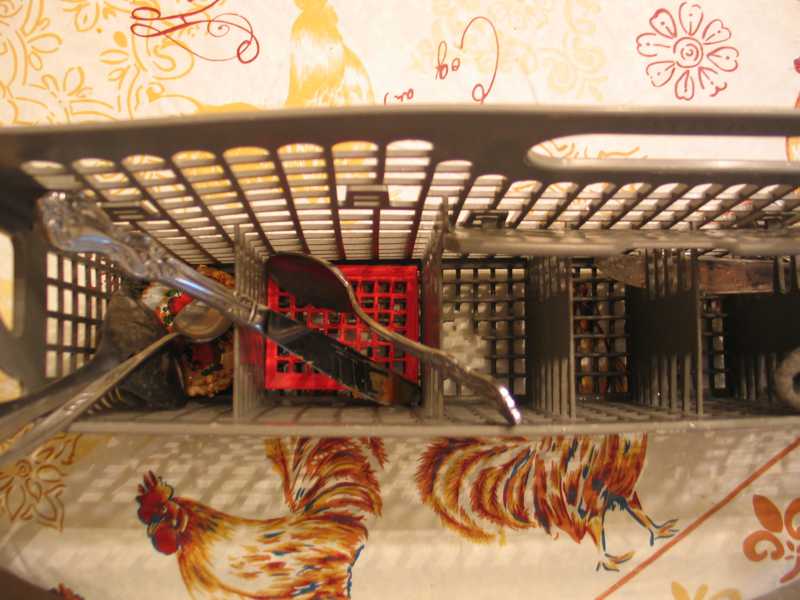
I redid the part at 2 1/2" X 3" and it dropped in OK. I wasn't trying for a tight fit. The first one was 1/4" thick. I decided to make this one .100" After all, it IS a prototype.
I'll run it a few days and see how it does. If it holds up, I'll make them for the rest of the positions. This is PLA, so the wet environment may be a problem. If it is, I'll remake it in ABS.
If you want to make it, the part files have been uploaded to Thingiverse.
I'll say it again, THIS THING ROCKS!
By the way, the SD RAMPS kit I ordered arrived today...
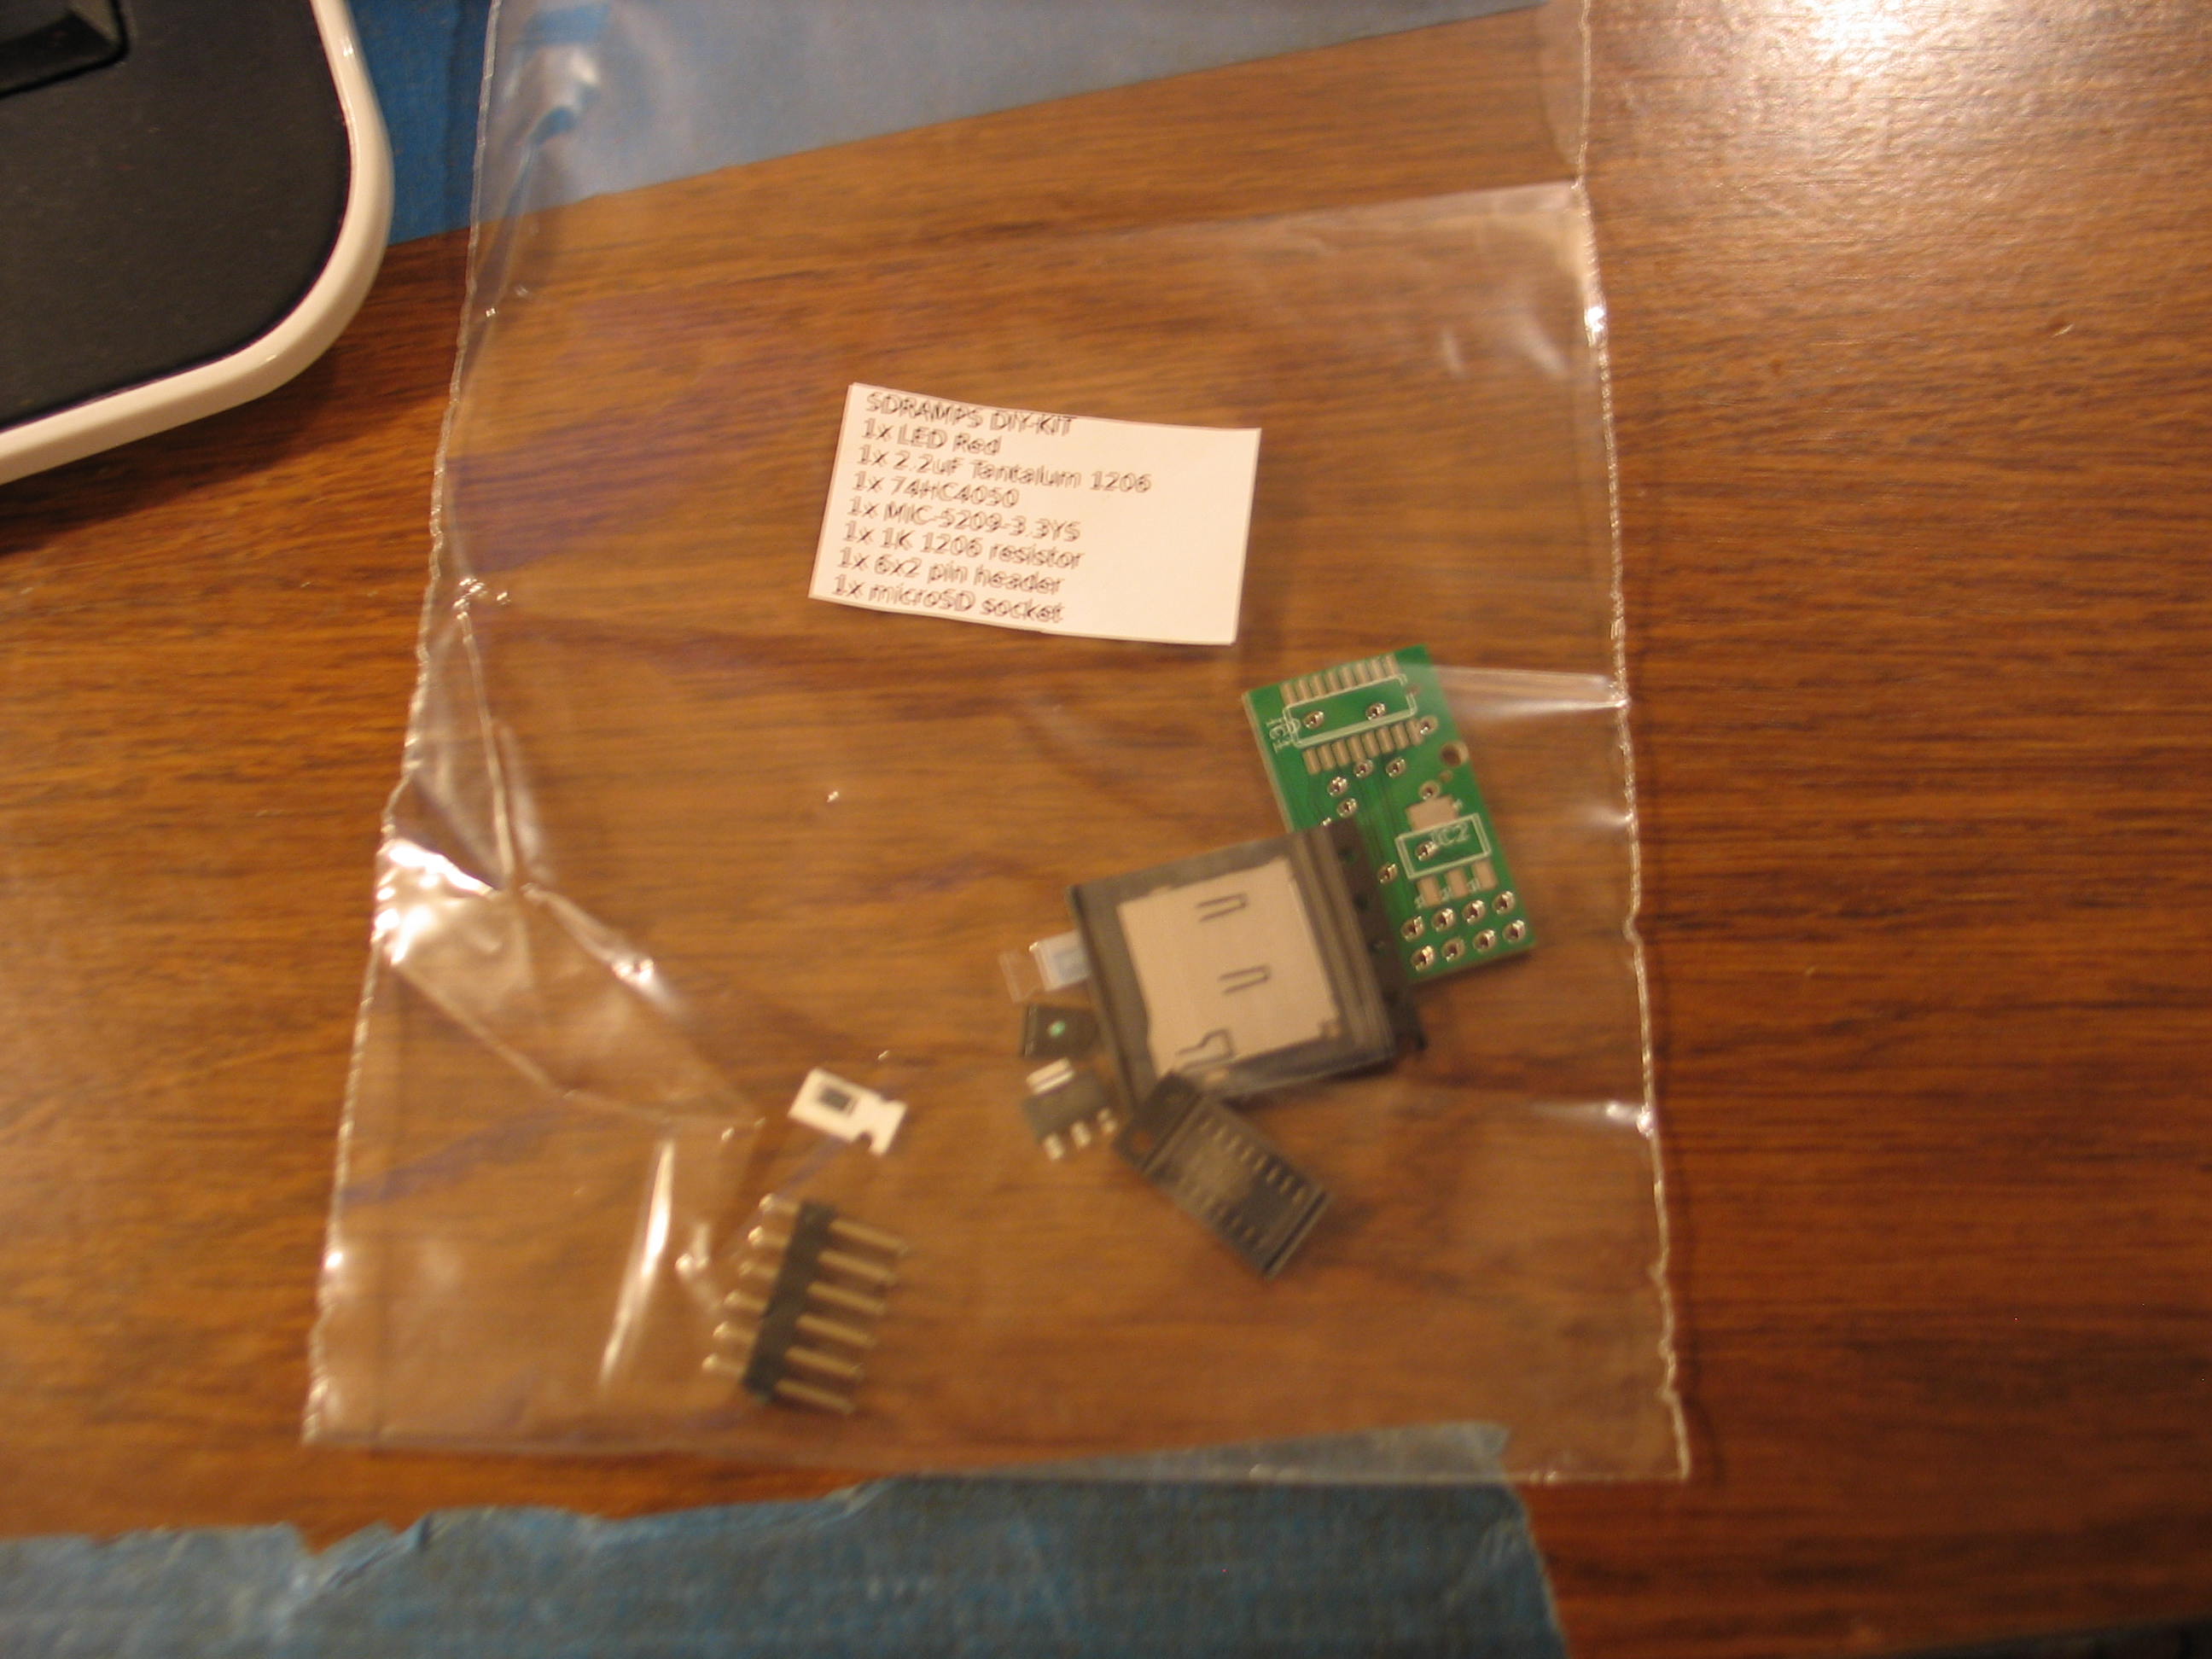
...Just about a week since I ordered it from Norway. I was impressed. The seller is tijnekind and the auction number was 300585017000. 9.99 Euro and .99 Euro shipping. I paid just under $16.00 US through Paypal.
This will be an adventure. Surface mount parts! I am hoping to try an electric skillet reflow technique I read about.
The SD RAMPS won't plug into my RAMPS 1.2 board, but I have been assured that it can be made to work. It's just a matter of making the connections.
Yeah, that's what she said.
Navigate
in this series
First
Previous
Next
Last
Please leave a comment on the bottom of the page. Was this useful? What would you like to see different? Thanks.