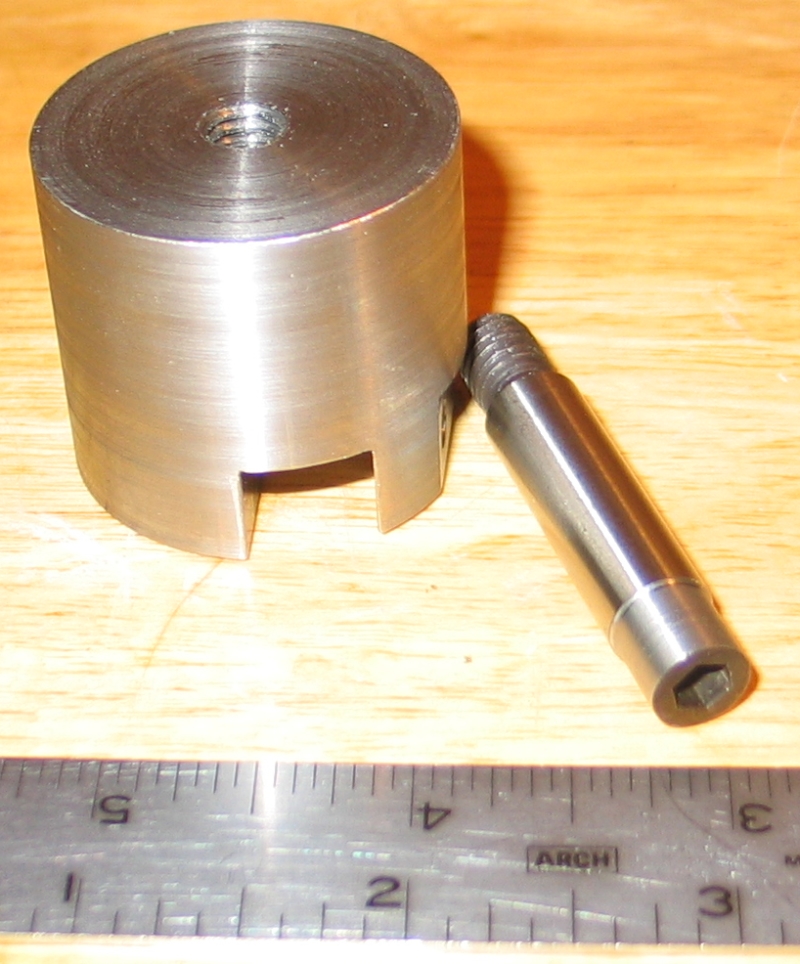
The Taig has an ER-16 spindle, so the largest collet it will hold is 10MM. ER-16 collets will hold .5MM over and under their rated size, so I guess I could push it to 10.5MM. I decided on 3/8" as a good common size in the US.
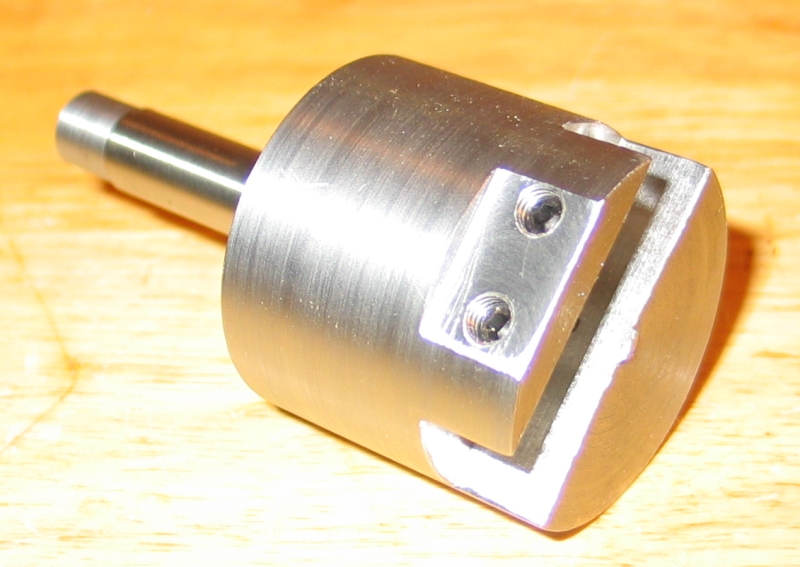
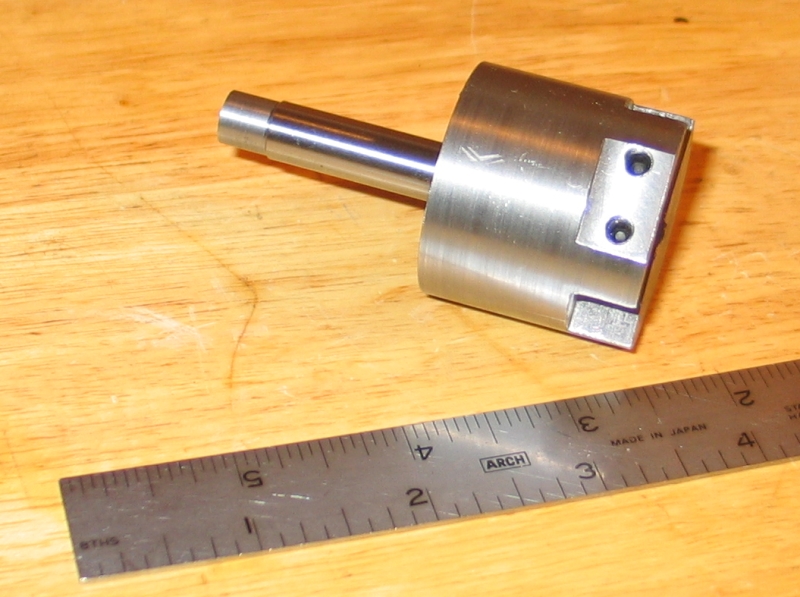
The above photo is what I wound up making. Like a fly cutter, but without the angle on the tool holder.
I started with a chunk of 12L14 steel 1.5" in diameter. I was just going to turn the shank as a solid with the body, but I decided on another route.
I
reduced the diameter of the head, but left the socket for easy removal.
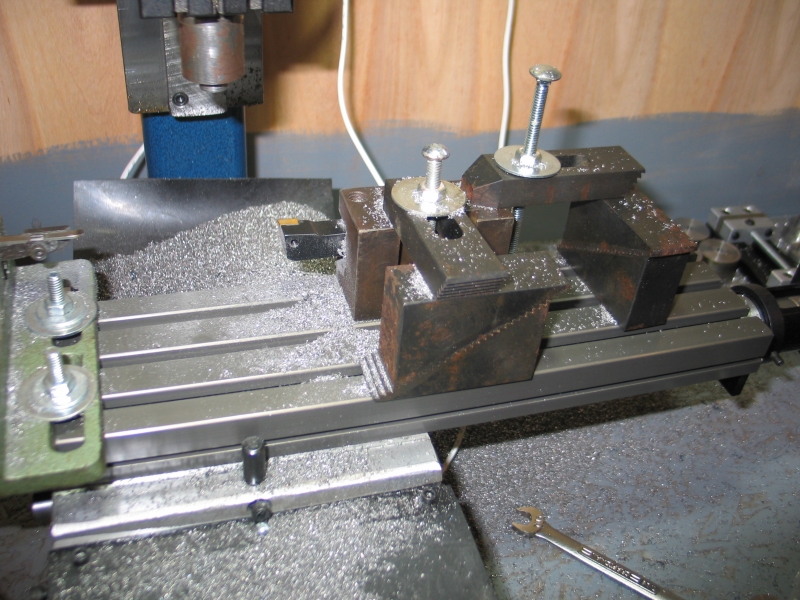
I did this on the Taig CNC mill with a lathe toolholder clamped to the
bed. The shoulder was in the ER-16 collet and held very well. The photo
below shows the lathe tool setup. And yes, the Taig produced all those
chips, and more!

After
I reduced the head, I reversed the new shank in the collet to put the
threads down. The 12L14 was sawn to length in the band saw, then faced
and drilled on my large Monarch lathe. I also started the tap in the
lathe, then finished tapping by hand.
I screwed the body on the shank mounted on the mill and turned the body to make it concentric.
I screwed the body on the shank mounted on the mill and turned the body to make it concentric.
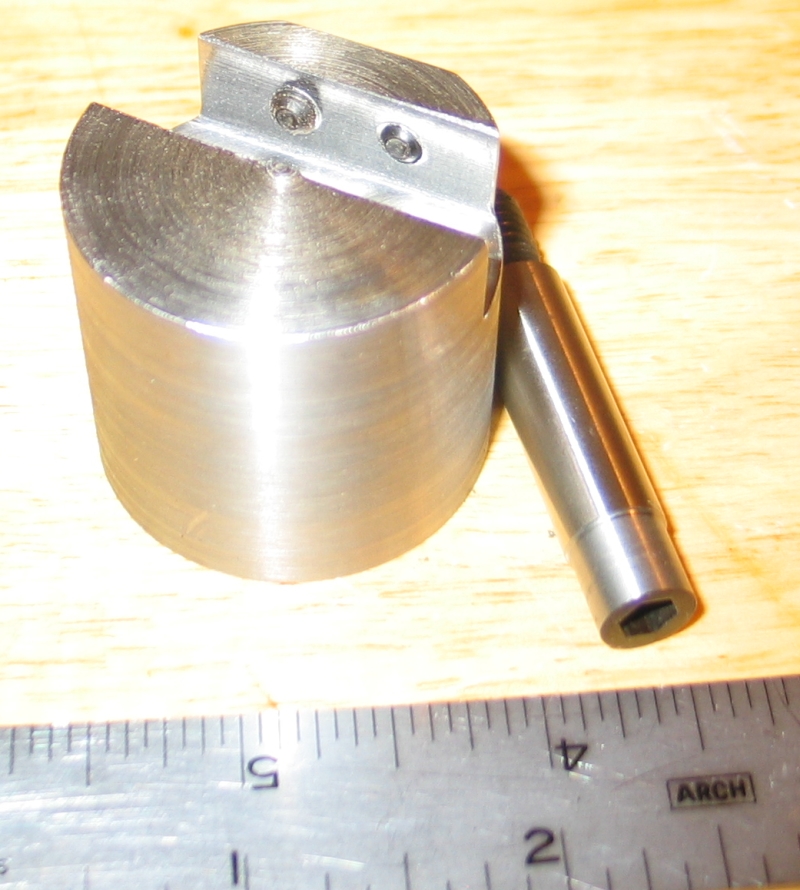
I
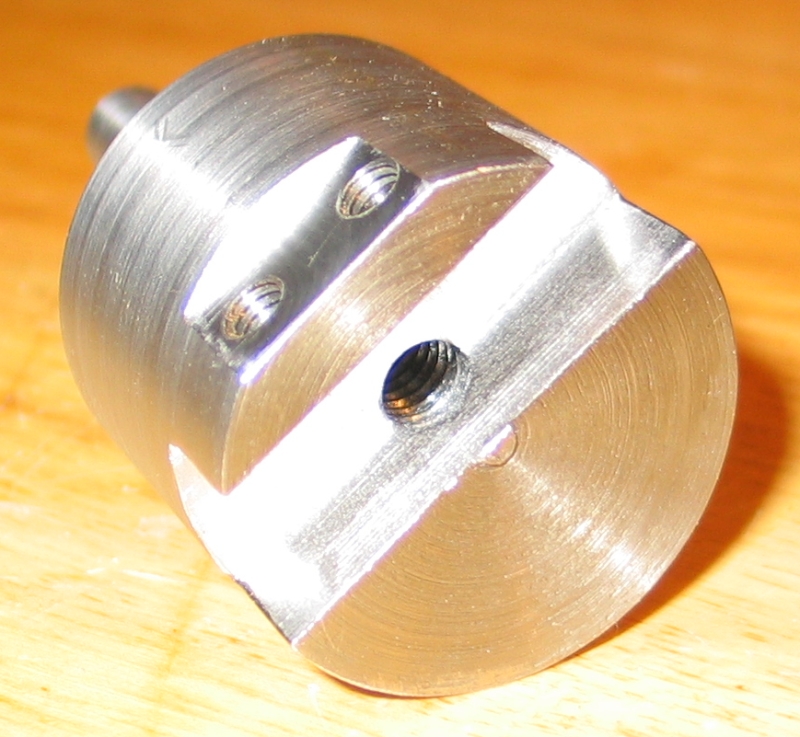
removed the body from the shank and put it in a vice to cut the slot
for the tool. The edge of the slot is exactly on the center line, as
you can see where it cut the center thread. The slot is 7/16" wide, one
width of a 7/16" endmill. I just cut this with a back and forth motion
using MDI commands and dropping a very conservative .010" per pass. The
depth is .380" for a 3/8" HSS tool.
I then repositioned the part in the vise to cut the flat. I should have just moved over and cut it in the same setup.
I tried to drill it without spotting it first but the drill walked, so I spotted the set screw holes with a center drill. After I did that, there were no problems. I had some 10-32 setscrews, so that is what I used.

A few minutes with a file to remove the sharp edges and it's ready to go. The shank relocates well and it runs very true on the slowest speed of about 1100 RPM. Not bad for a pleasant afternoon in the shop.
I then repositioned the part in the vise to cut the flat. I should have just moved over and cut it in the same setup.
I tried to drill it without spotting it first but the drill walked, so I spotted the set screw holes with a center drill. After I did that, there were no problems. I had some 10-32 setscrews, so that is what I used.
A few minutes with a file to remove the sharp edges and it's ready to go. The shank relocates well and it runs very true on the slowest speed of about 1100 RPM. Not bad for a pleasant afternoon in the shop.