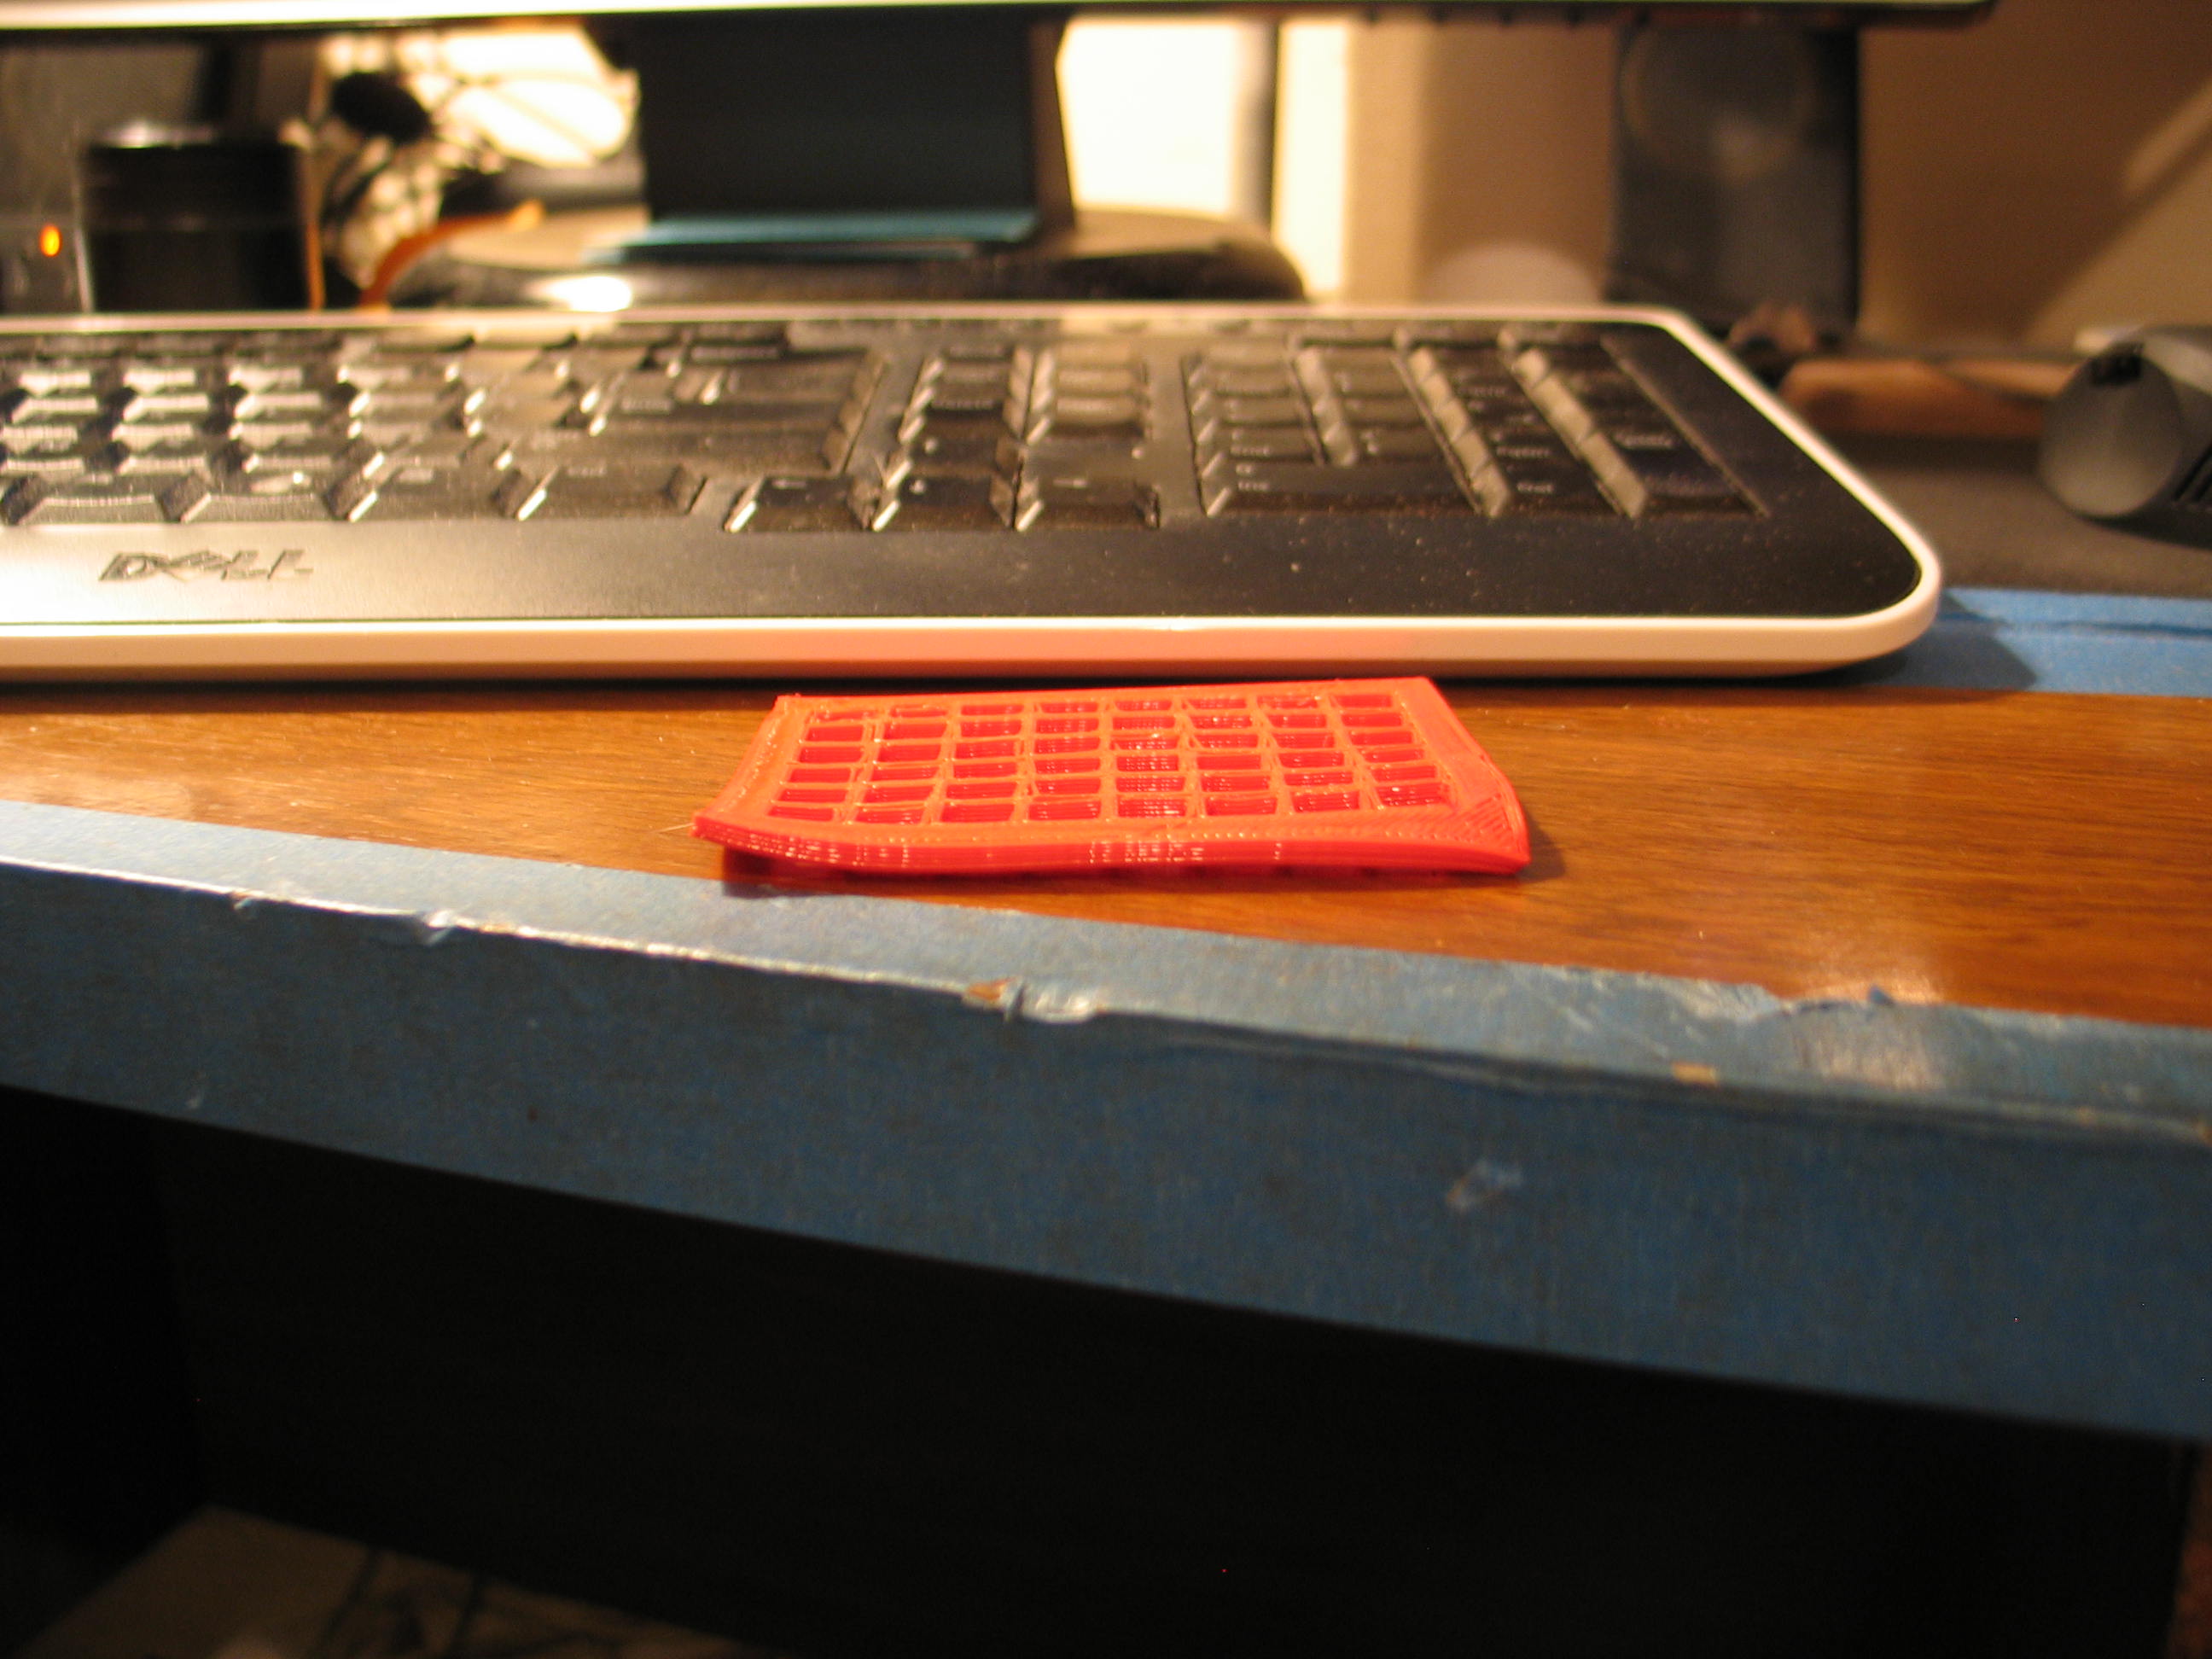
This is the dishwasher hack...er, repair part from last time. It has been through 1 cycle, so far. The dishwasher has a sanitize cycle that gets pretty hot and then a dry cycle that is like an oven.
It's possible that this will be the extent of degradation of this PLA part, but more cycles will tell the tale. If it doesn't degrade further, it will be serviceable as is.
Possible fixes are to make it thicker and/or to make it from ABS plastic.
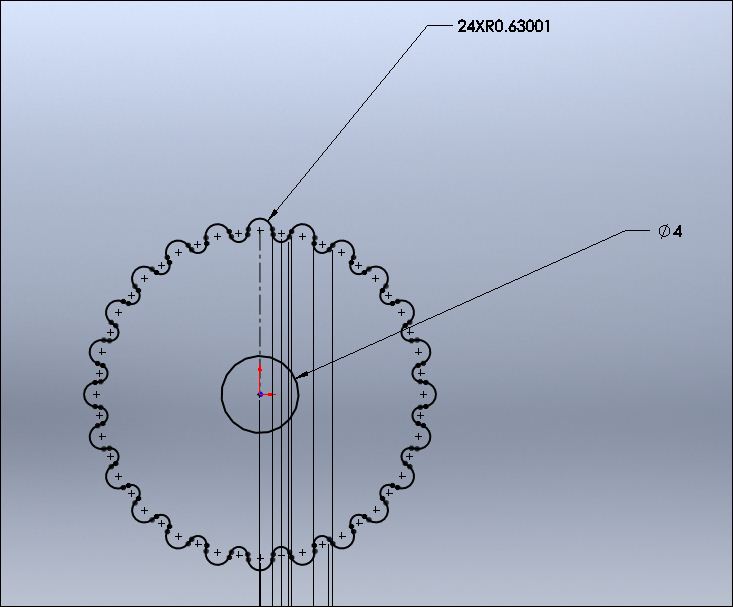
On to new things. Below is a part from Thingiverse called a HBP Quick Leveler. It was used for a Thing-O-Matic.

I
opened a sketch on the front plane. (If I start on the front plane,
that becomes the build platform on the Prusa Mendel.) I drew the
outline of the part. I didn’t like the sharp points, so I added fillets
at these points (A fillet is just a rounded corner and is pronounced
like skillet). I made the center hole 4MM to accommodate a 6-32 screw.
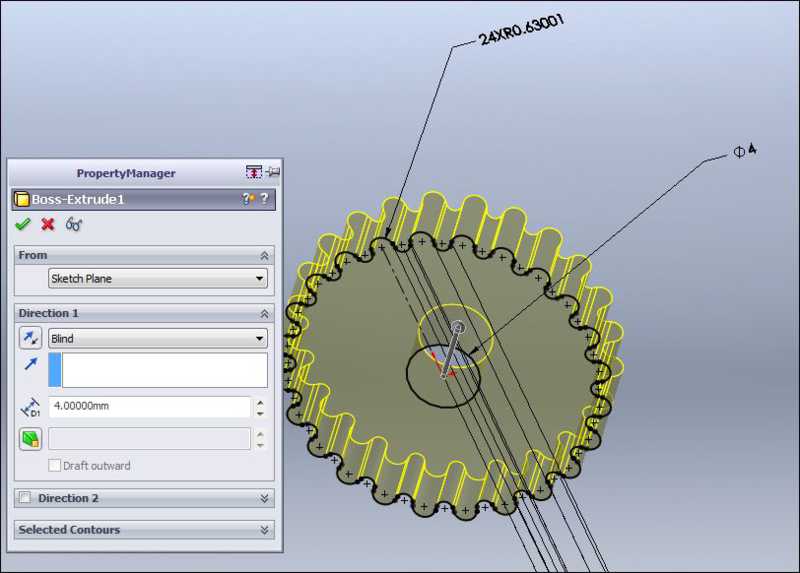
I used the extrude command to go from 2D to 3D. I gave it a thickness of 4MM. This part is made in metric, but Solidworks in smart enough to do conversions on the fly. If I had entered .125", it would have taken it and displayed the amount in MM.

I used the extrude command to go from 2D to 3D. I gave it a thickness of 4MM. This part is made in metric, but Solidworks in smart enough to do conversions on the fly. If I had entered .125", it would have taken it and displayed the amount in MM.

Next,
I selected the face away from the front plane and started a new sketch.
I used the polygon tool and chose 6 sides. I placed the polygon on the
origin because this is the center axis of the part. I then set the size
to 8mm, which is slightly larger than the 6-32 nut I want to go into
this hole. Your hardware may vary. Measure it to be sure.

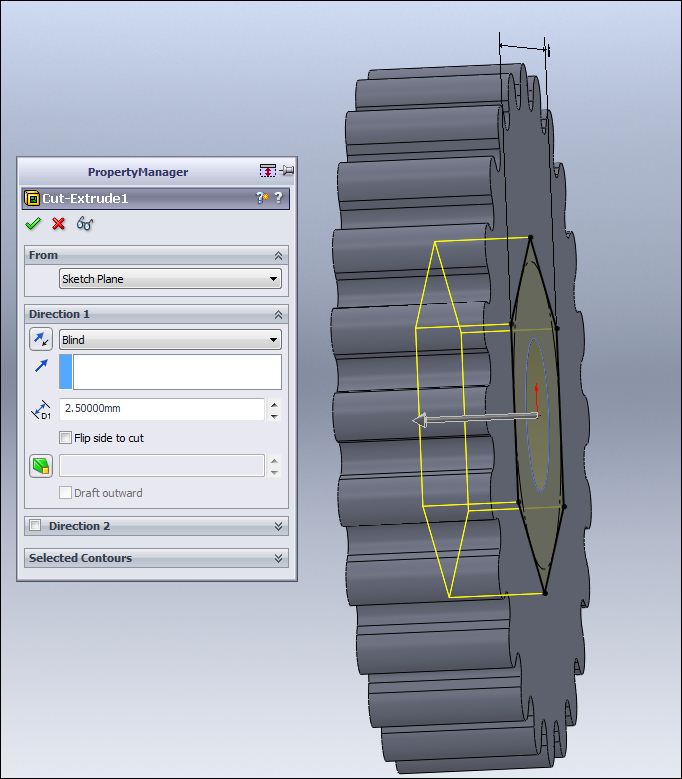
I
used the cut extrude command to make the hole 2.5mm deep.

Here is the first one, hot off the printer. If you are quick, you can insert the nut easily into the warm plastic. I used the screw and washer to pull it in straight and seat it fully.
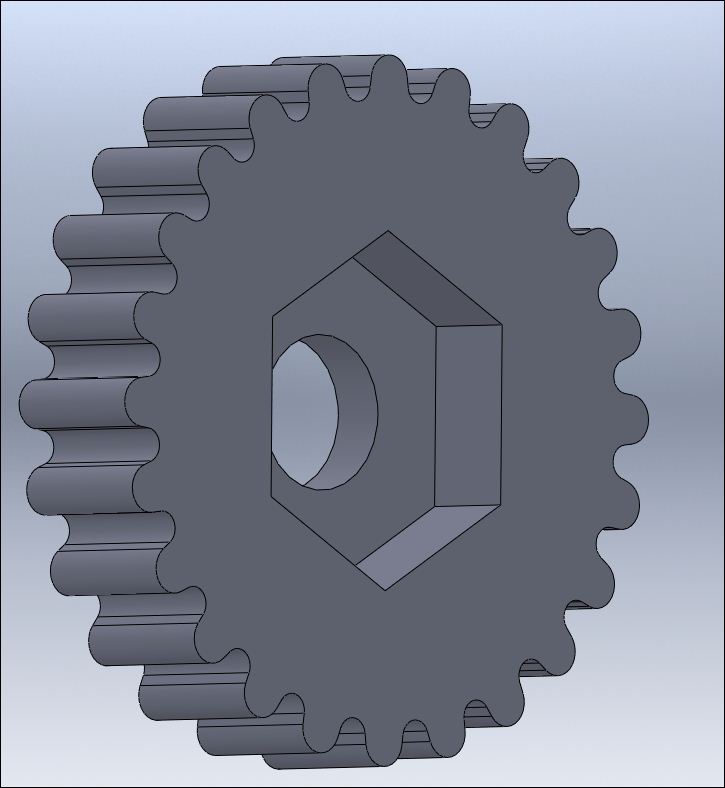
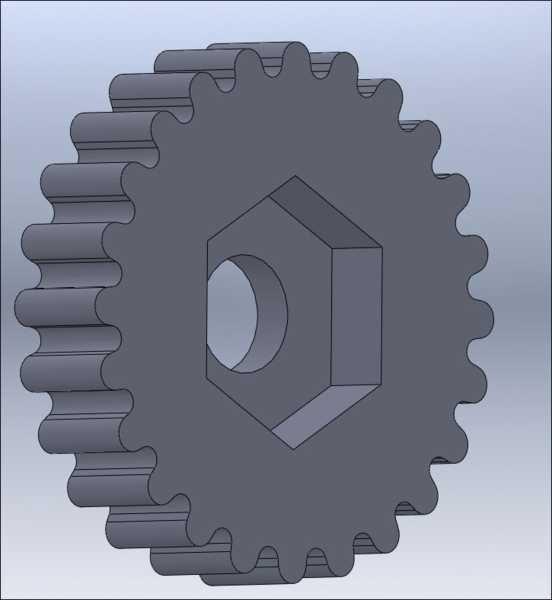
This
is what the part looks like in Solidworks. I saved it in the Solidworks
native format in case I want to modify it later. Then I also saved it
as
an STL file for the 3D printer.
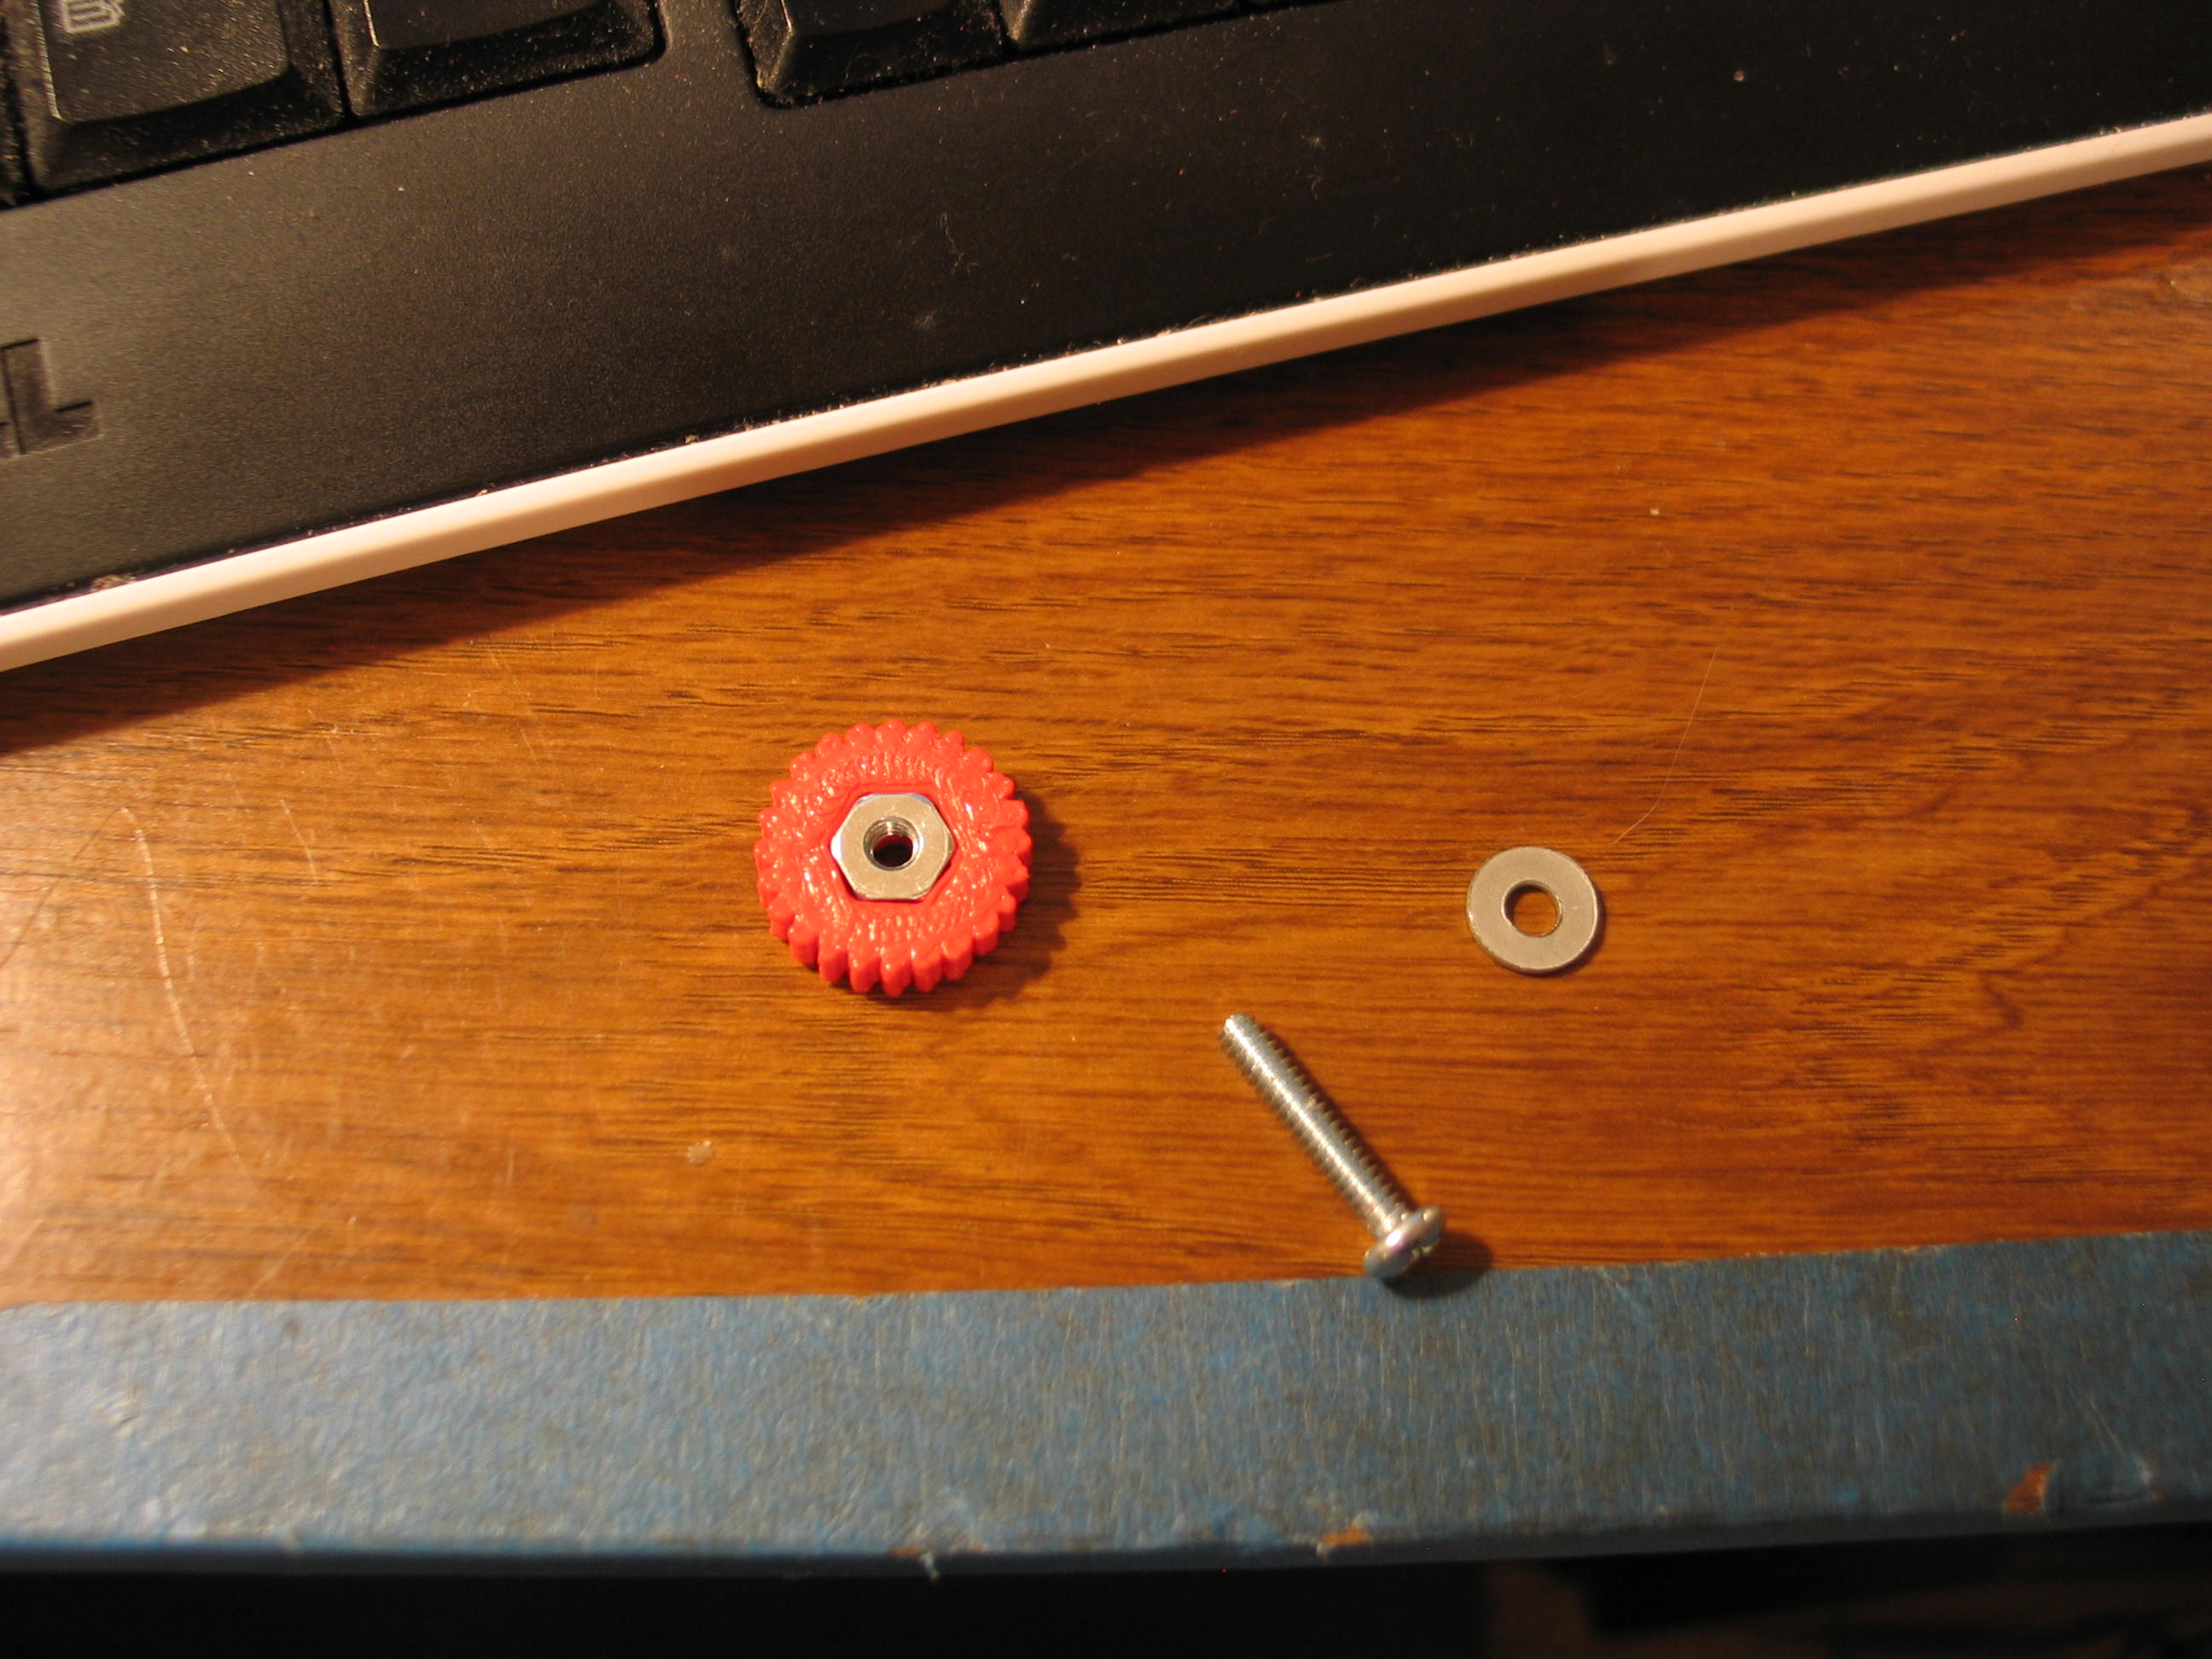
Here is the first one, hot off the printer. If you are quick, you can insert the nut easily into the warm plastic. I used the screw and washer to pull it in straight and seat it fully.
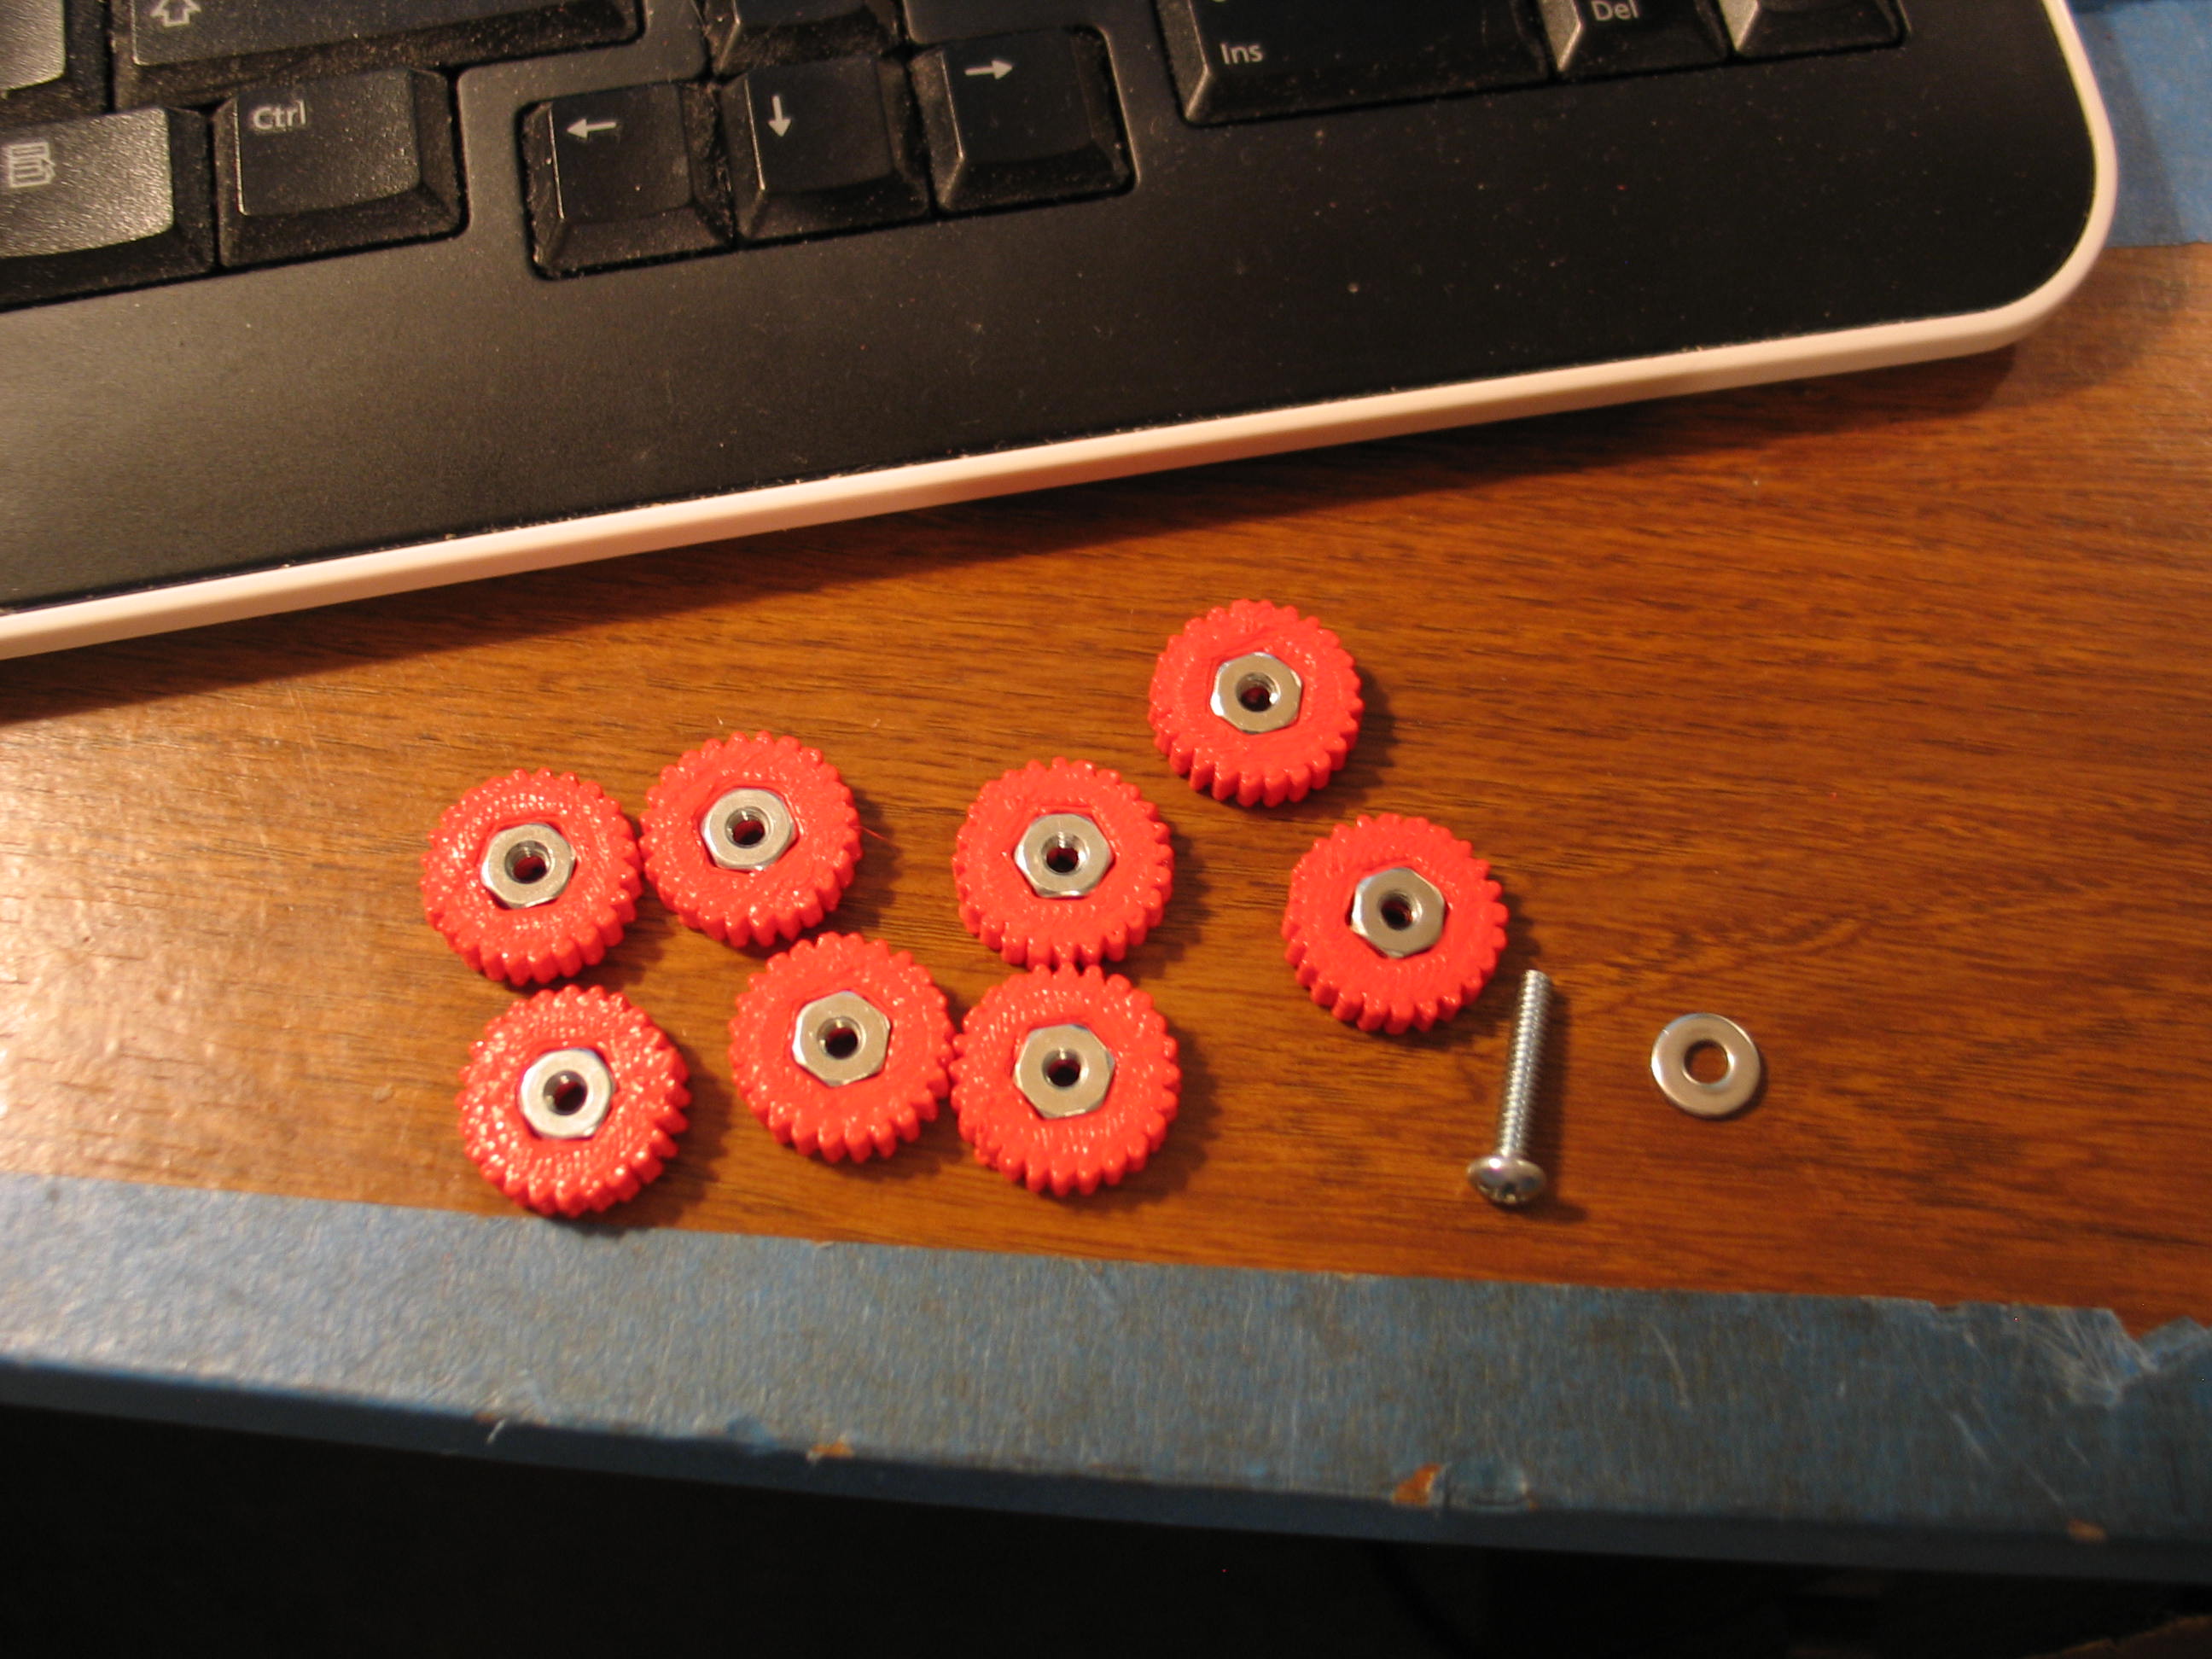
Art
to part, 10 minutes. Additional parts, printed individually, under 6
minutes each. It's possible to save time by printing more than one part
at a time, but I don't know how to do that yet.
I really enjoyed my Erector set as a kid. I saw these on my desk and started thinking of what else they (or similar parts) would be good for. Small cars or robots came immediately to mind.
If you want to make it, the part files have been uploaded to Thingiverse.
Want it? Click the buy now button to order 8 thumbwheels with 6-32 nuts.
These are a good sample part if you just want to see a 3D printed part for yourself, plus they can be useful. I use them as quick levelers on my Prusa Mendel.
Postage included. USA addresses only. Unless you tell me otherwise, I will send them to your Paypal adress of record, so make sure it's right.
Thanks!
Think it, draw it, print it. I may have a new motto!
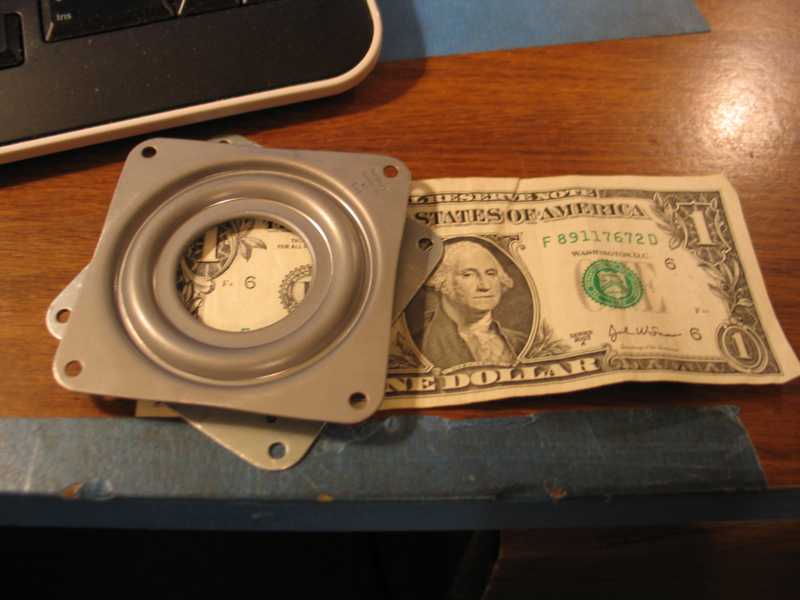
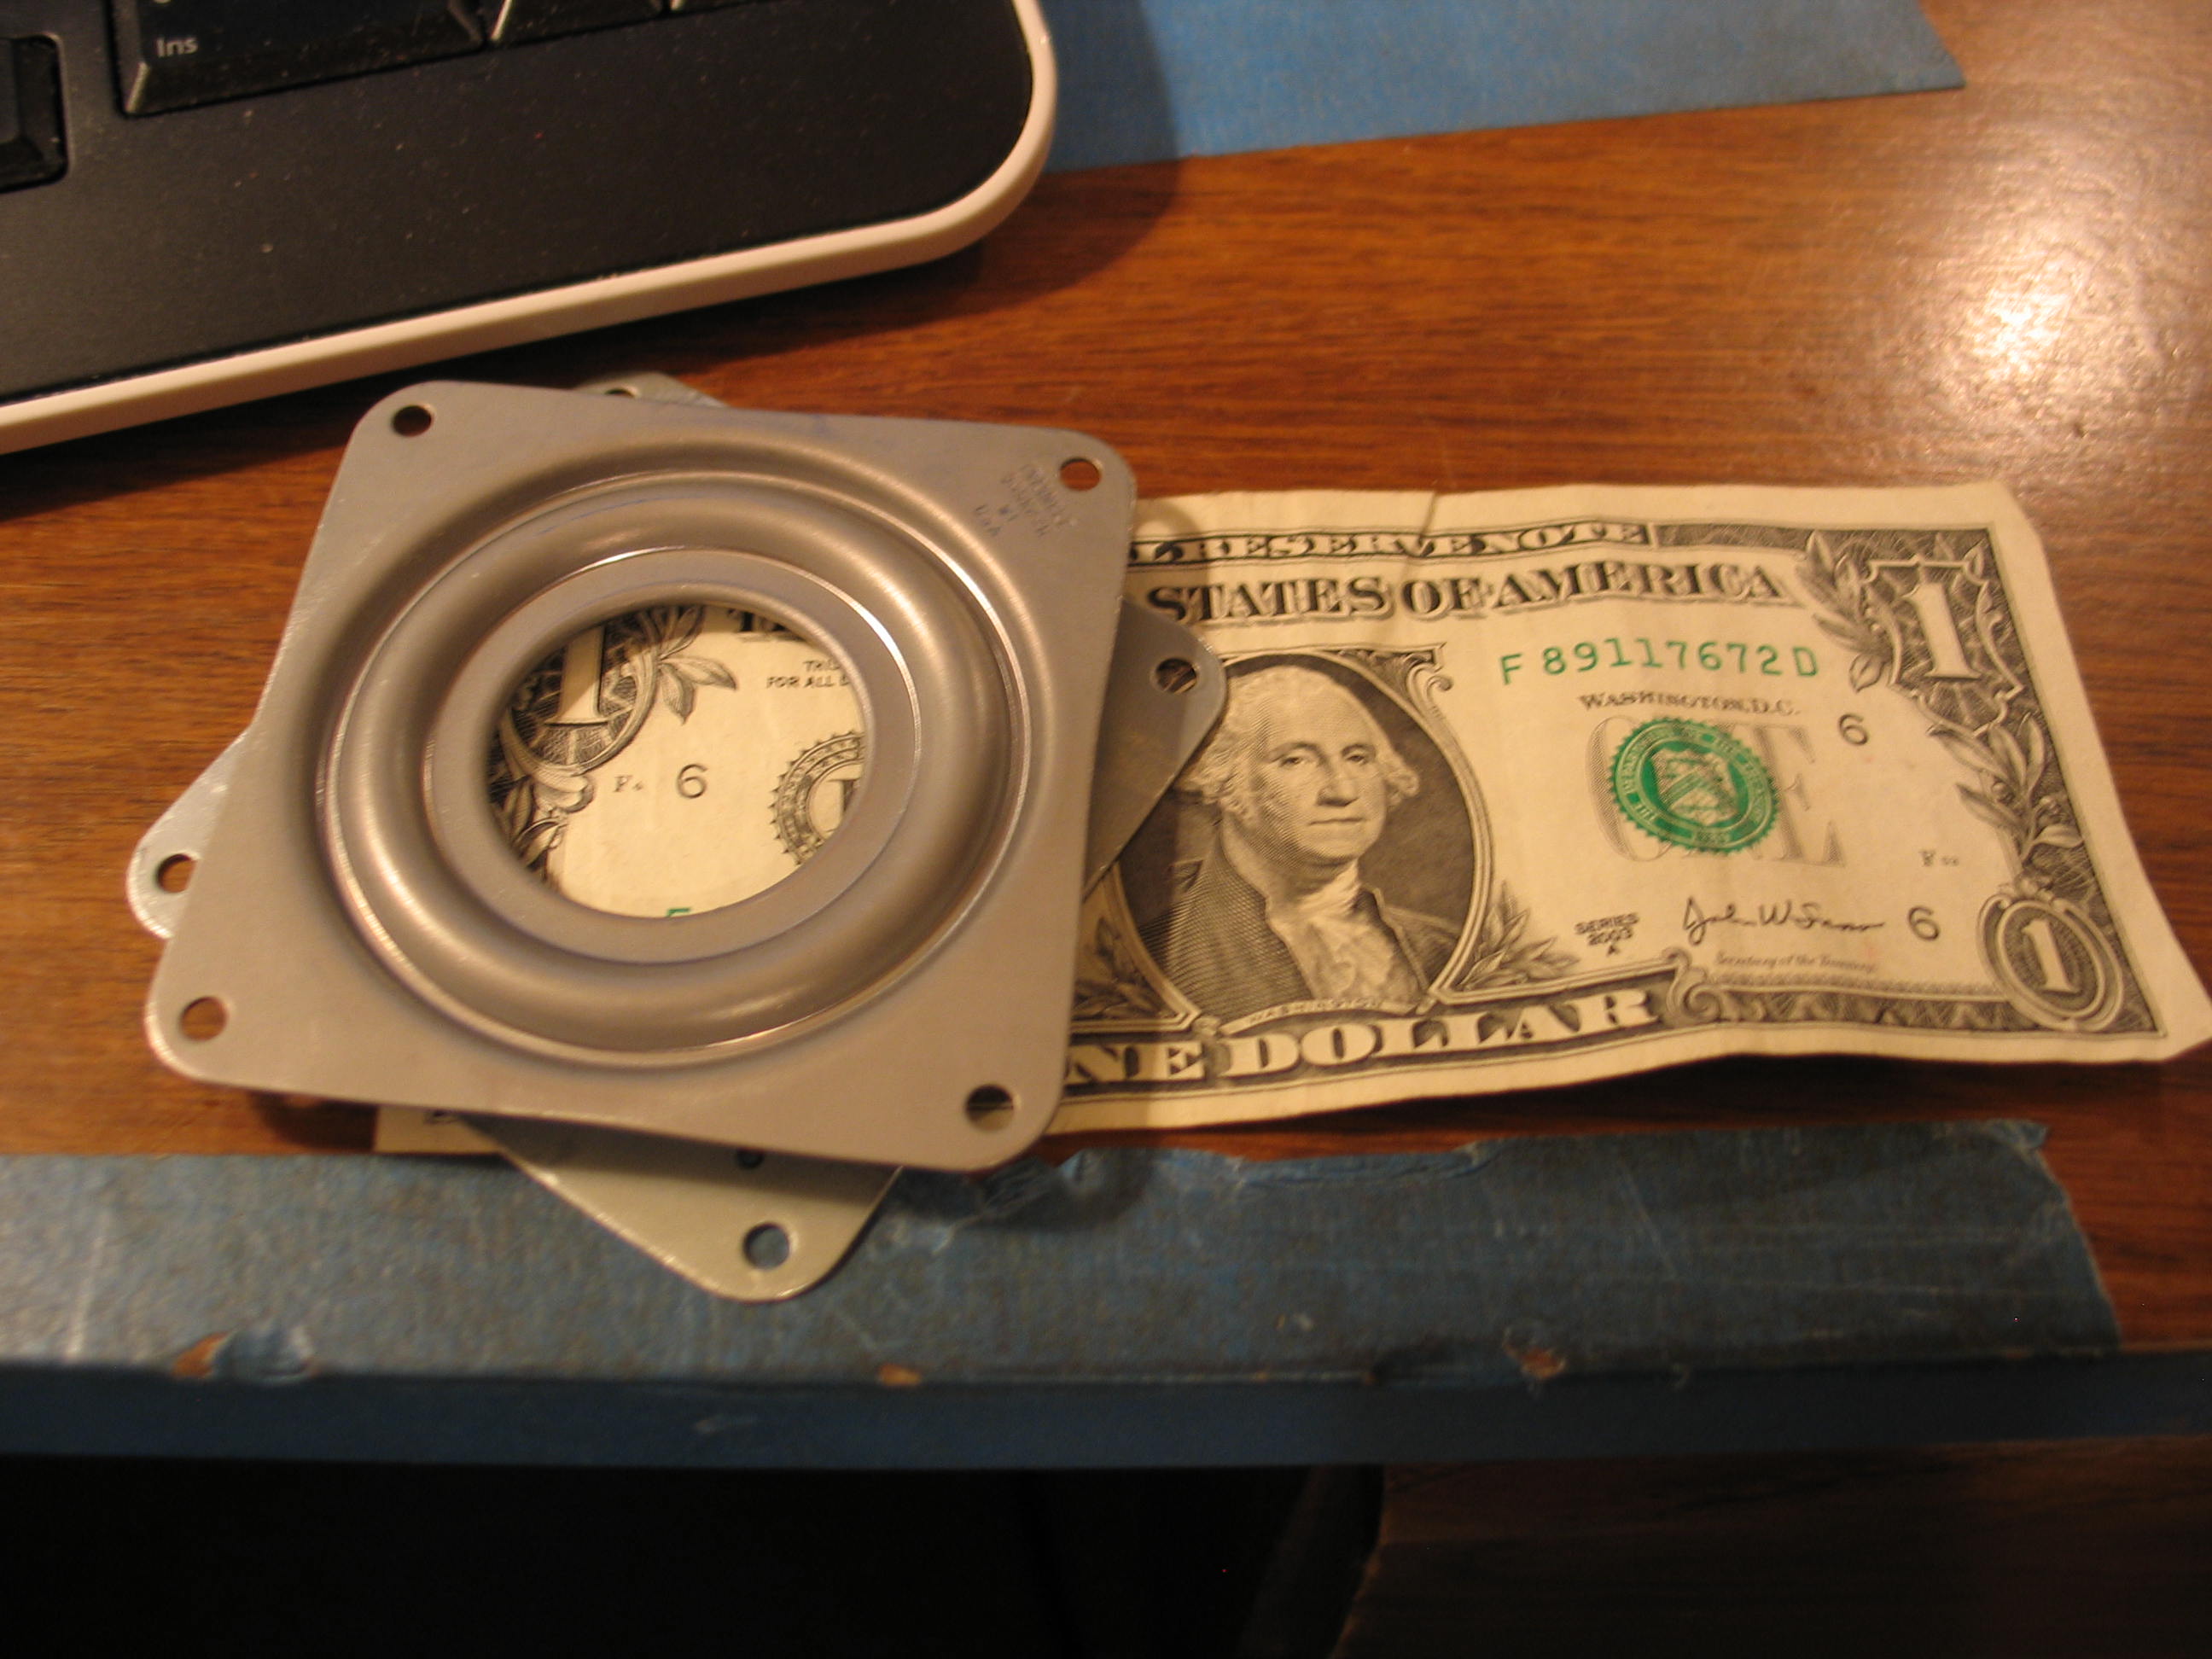
The lazy susan bearing arrived very quickly. It was auction number 310348441459 from seller caseyswood. Hard to beat at less than $4.
I am thinking a small bushing to go between this and the filament spool, and a small foot piece to keep it from scratching what ever you put it on...
And my other new motto, THIS THING ROCKS!
Please leave a comment on the bottom of the page. Was this useful? What would you like to see different? Thanks.
I really enjoyed my Erector set as a kid. I saw these on my desk and started thinking of what else they (or similar parts) would be good for. Small cars or robots came immediately to mind.
If you want to make it, the part files have been uploaded to Thingiverse.
Want it? Click the buy now button to order 8 thumbwheels with 6-32 nuts.
These are a good sample part if you just want to see a 3D printed part for yourself, plus they can be useful. I use them as quick levelers on my Prusa Mendel.
Postage included. USA addresses only. Unless you tell me otherwise, I will send them to your Paypal adress of record, so make sure it's right.
Thanks!
Think it, draw it, print it. I may have a new motto!
The lazy susan bearing arrived very quickly. It was auction number 310348441459 from seller caseyswood. Hard to beat at less than $4.
I am thinking a small bushing to go between this and the filament spool, and a small foot piece to keep it from scratching what ever you put it on...
And my other new motto, THIS THING ROCKS!
Navigate
in this series
First
Previous
Next
Last
Please leave a comment on the bottom of the page. Was this useful? What would you like to see different? Thanks.