I was off to such a good start...
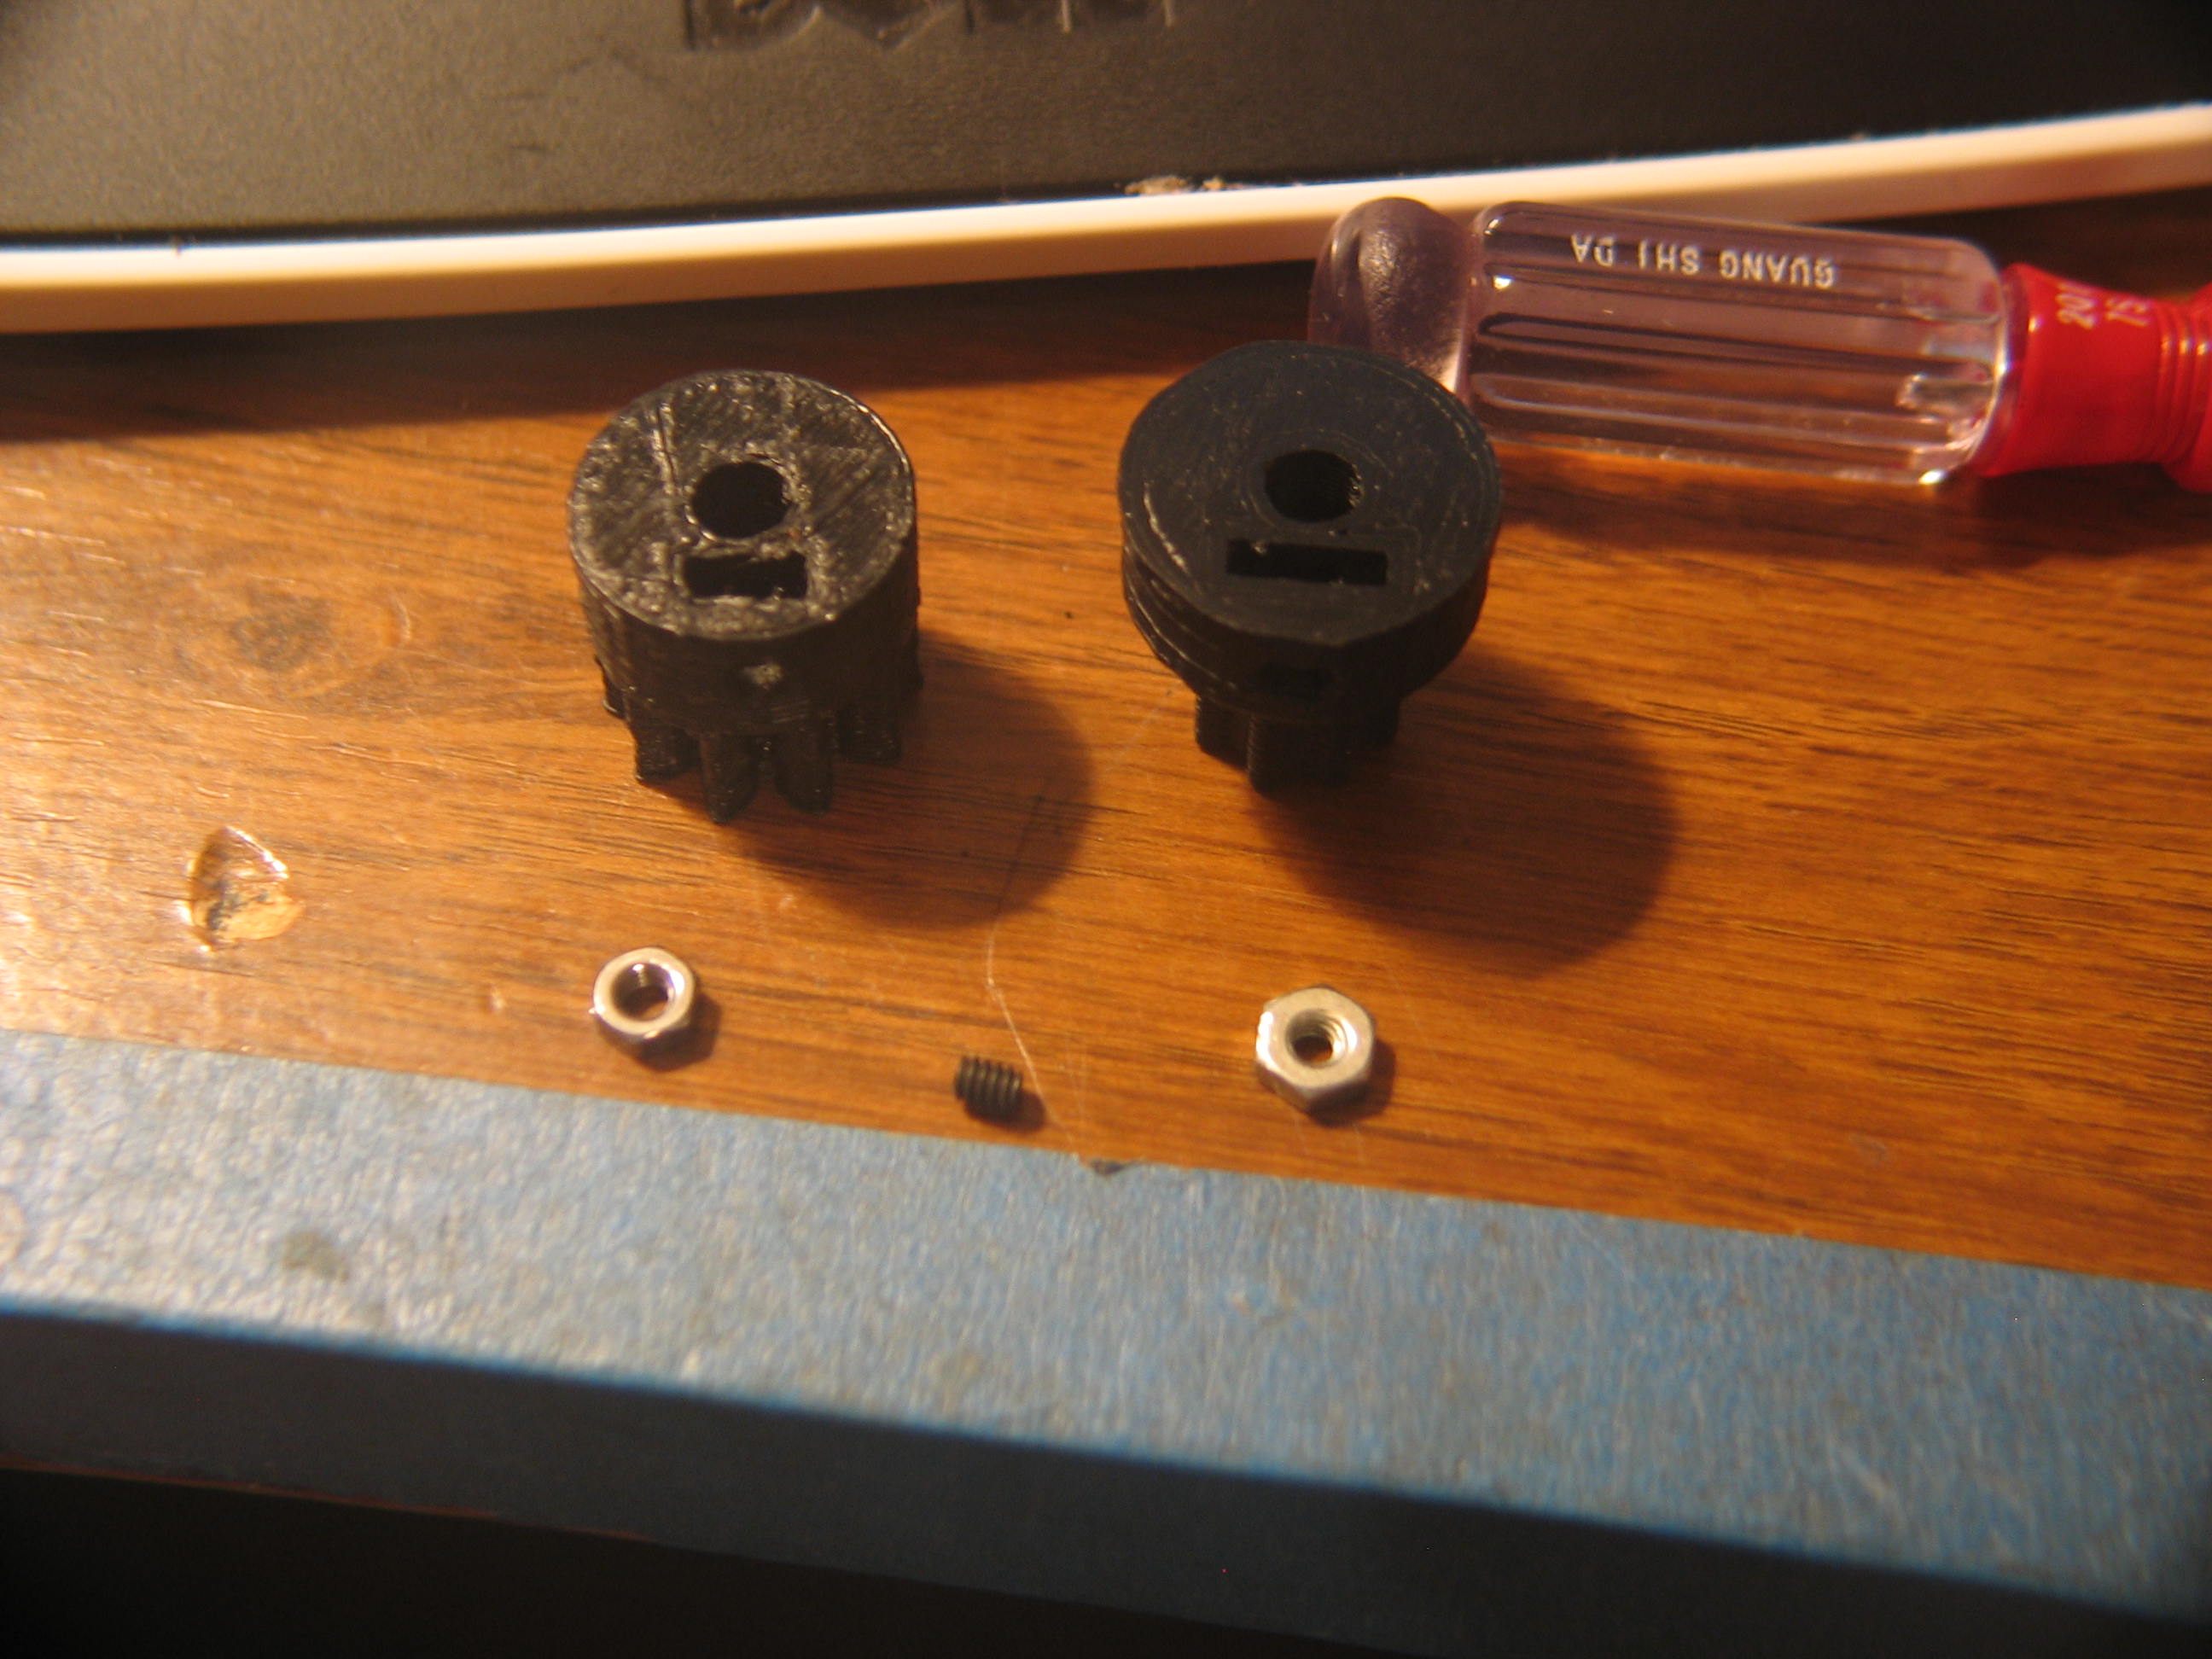
Hardware issues! The above printed parts, the Wades extruder small gear on the left, and the 8 tooth T5 belt pulley on the right both mount to the stepper motor shafts. The gear uses an M3 nut and it fits well. The pulley, on the other hand, has much too large a slot. The M3 nut just spins. My cure is to use a 4-40 nut and set screw. The set screw is so small, I had to traipse back to Ace hardware yet again for an Allen wrench (hex key). Luckily it was only 25 cents.
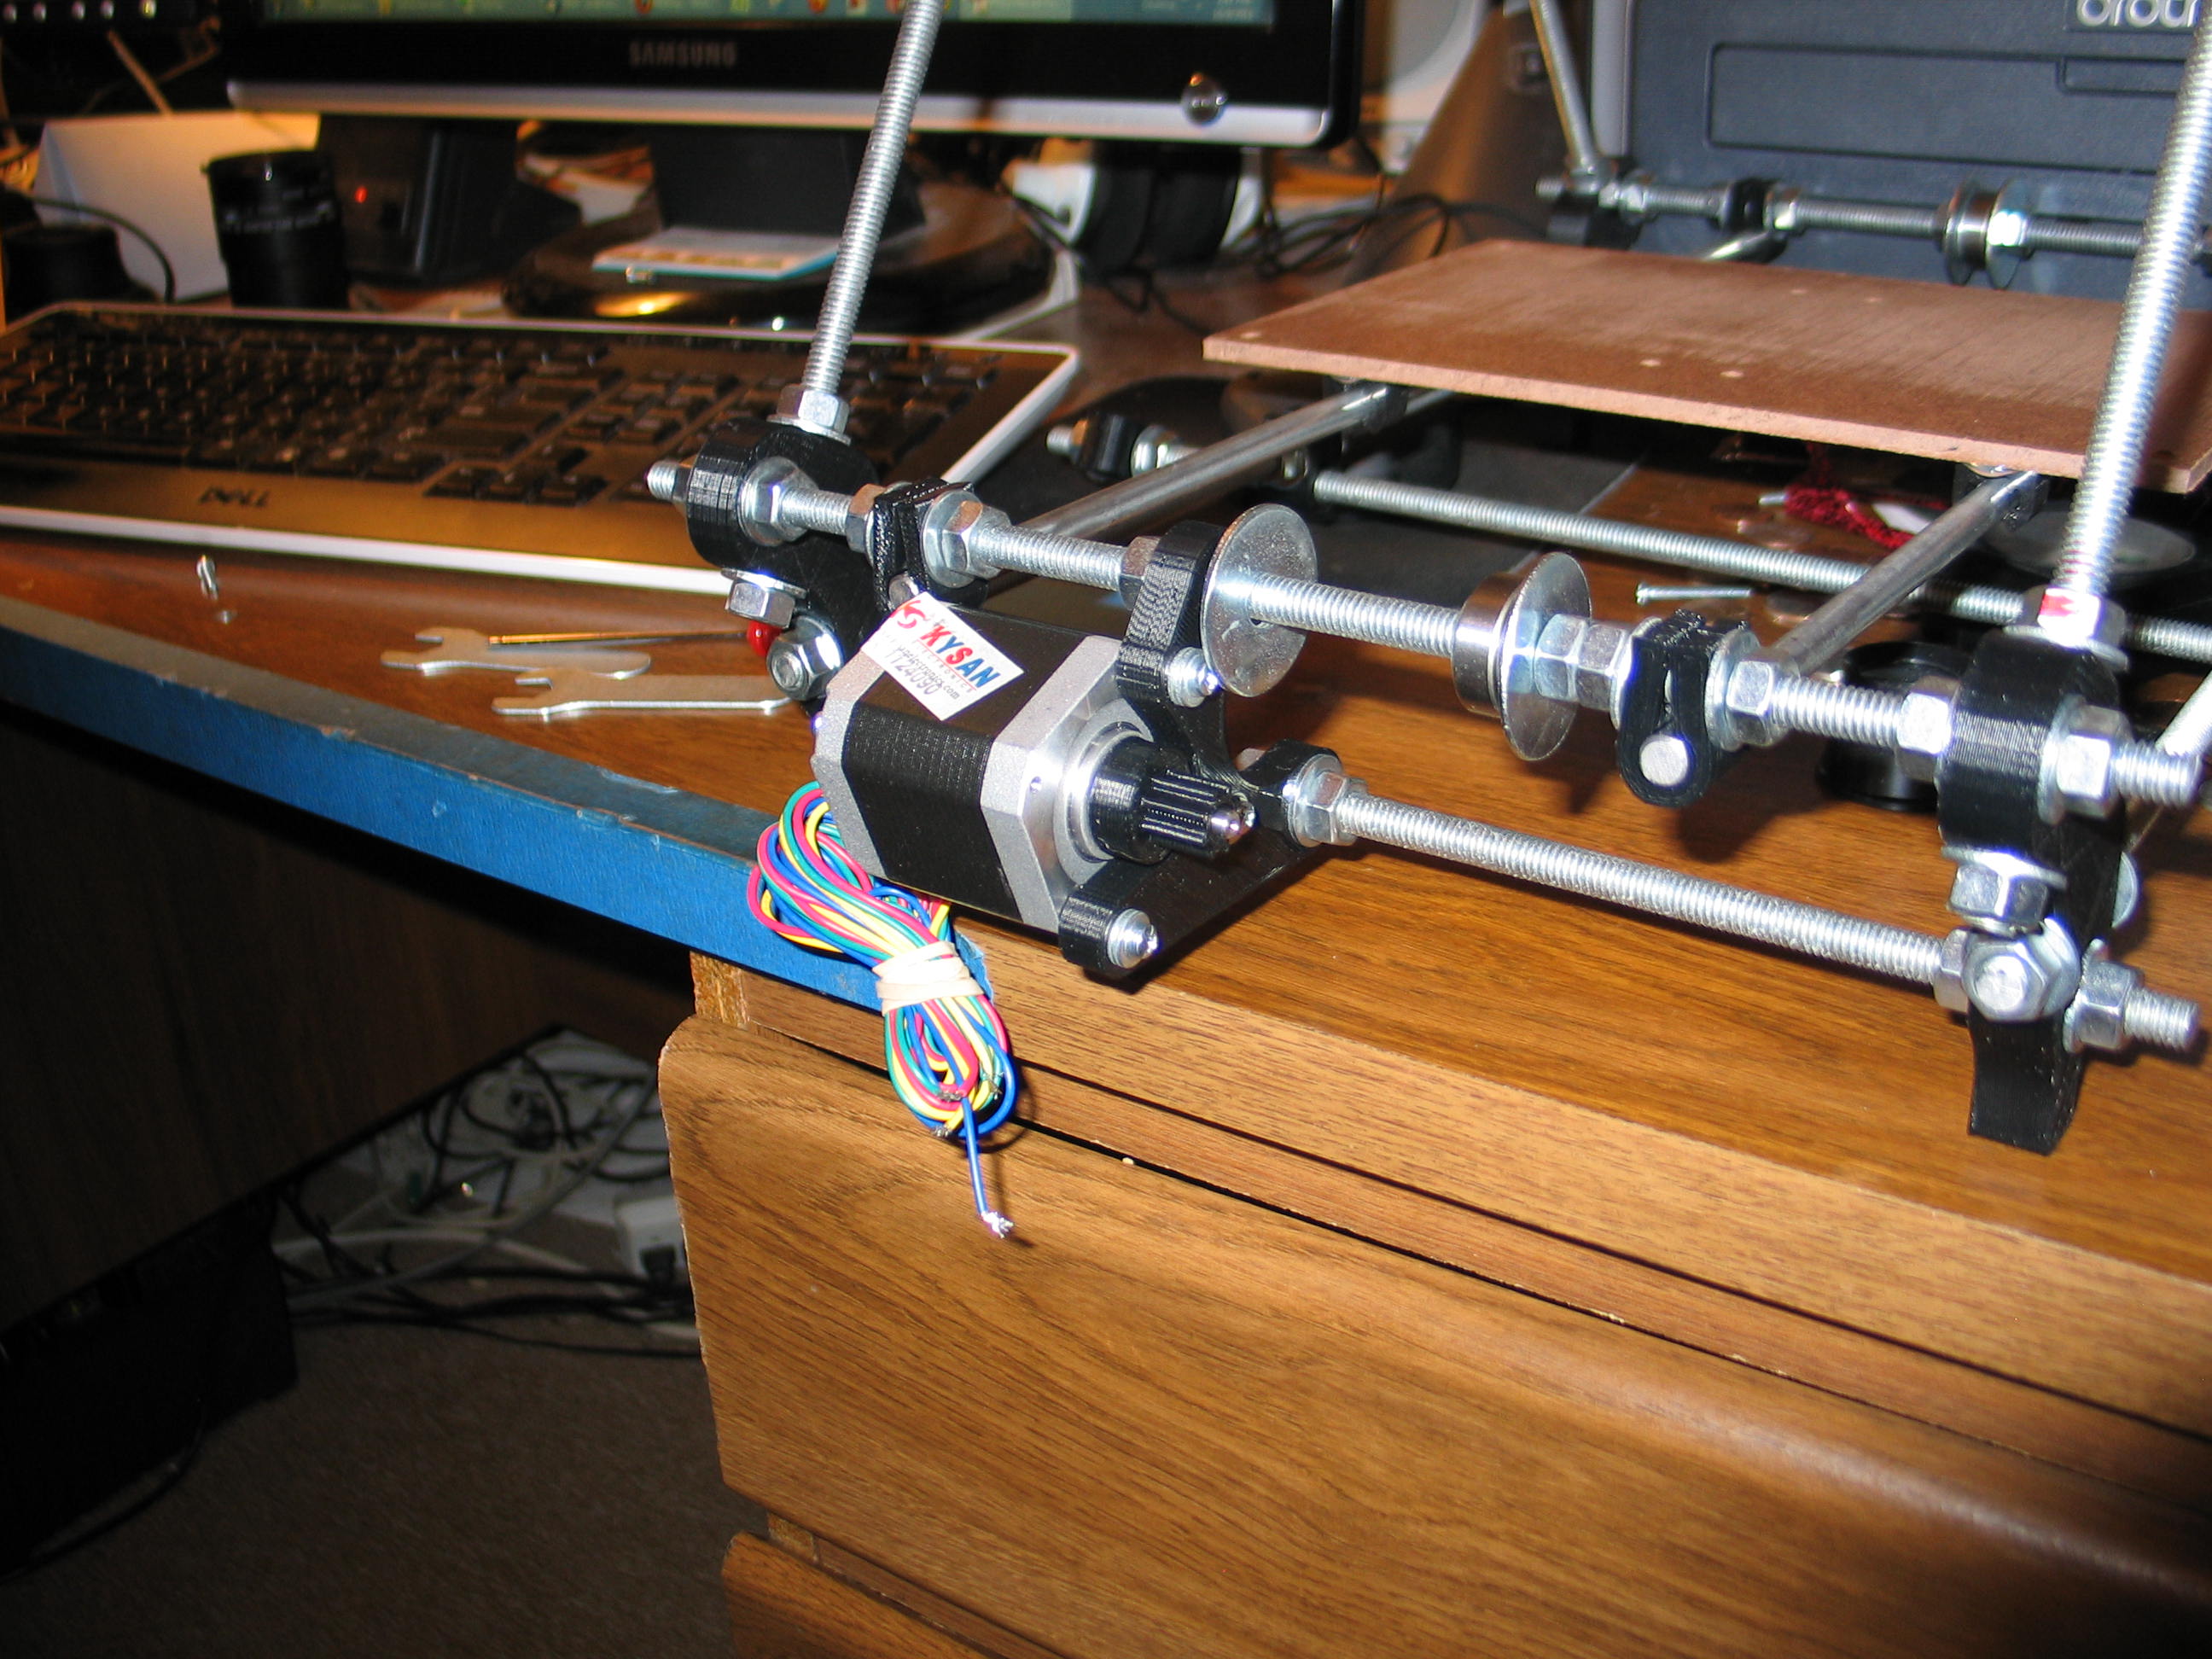
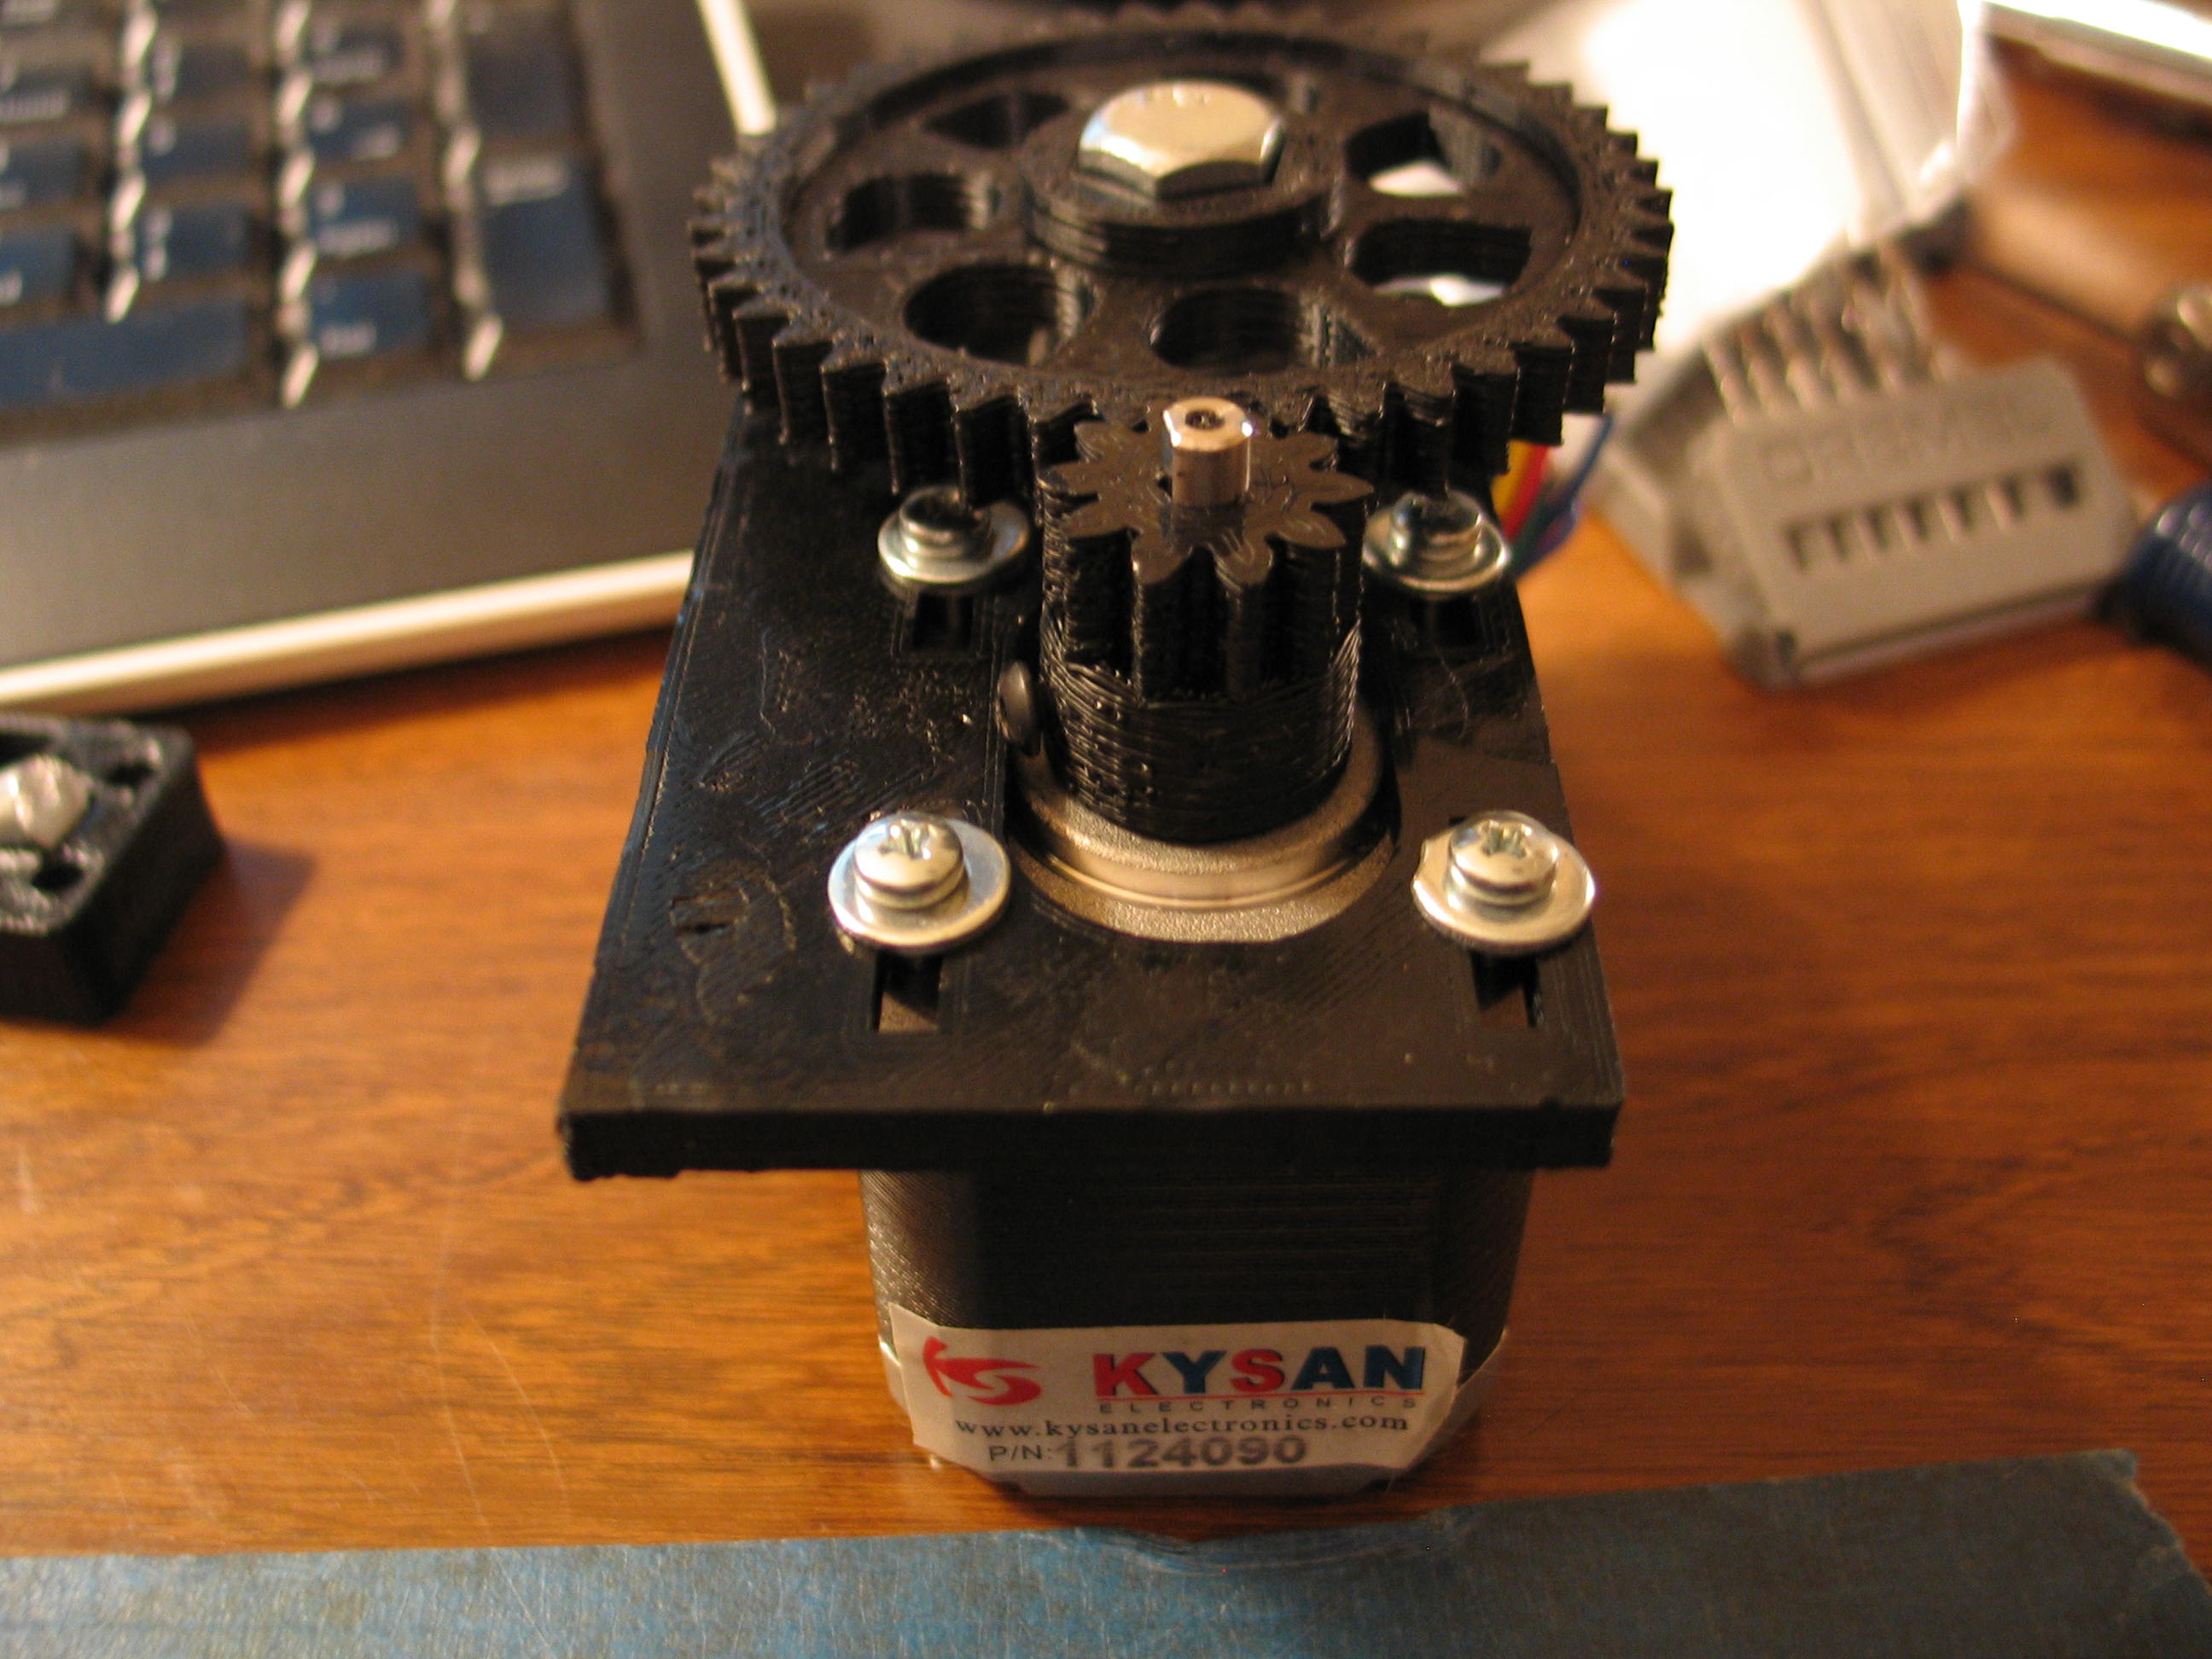
In the photo above,
notice the top mounting screw on the stepper motor. The fender washer
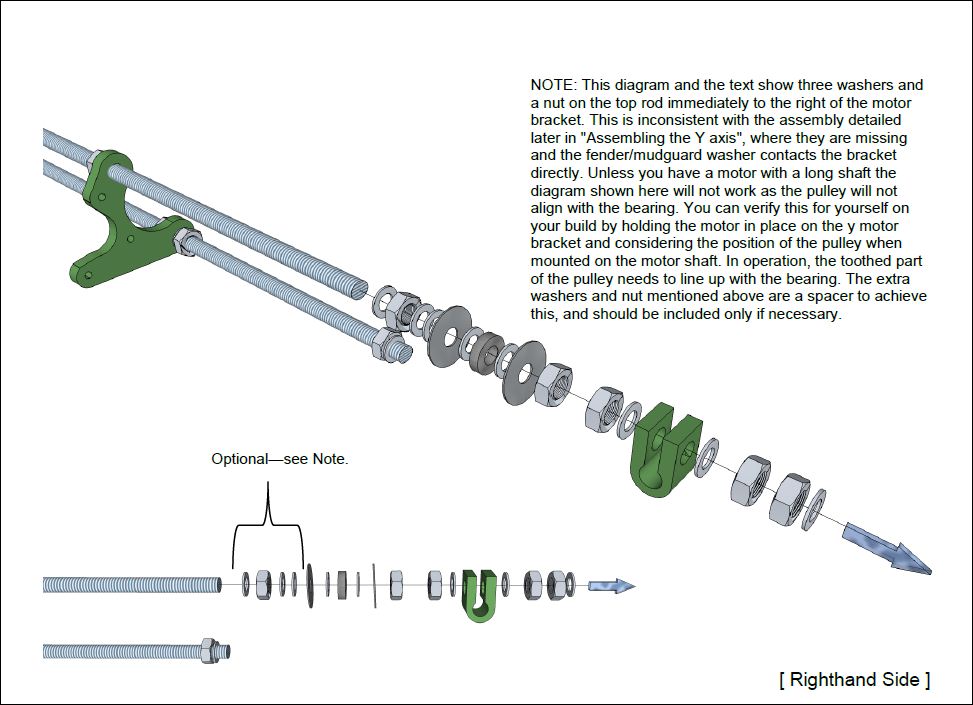
interferes when it's placed against the Y motor mount. There is a note
in the instruction to watch this area. The note calls your attention to
the need of a spacer or not between the mount and the fender washer. I
determined I didn't need it. It did not
call attention to this interference, though! The note tells you to hold
the motor in place. It should have said mount the motor with the screws
and make sure the fender washer clears.
This is a real ball buster. If you disassemble it, you lose all the work put into the alignment of the smooth rods the table rides on. If I had it to do over, I'd cut the side off the fender washer or drill a hole for clearance before it was assembled. As it stands, I guess I will remove the stepper and mask off most of the machine and grind it with a Dremel. This one thing makes it worth reading this if you build one.
I considered just leaving to top mounting bolt out, but it caused the pulley to sit at an angle. The motor frame adds strength to the Y axis motor mount. I'll grind it tomorrow.

The
next issue was minor. The axle for the idler bearing on the Wades
extruder was too long. I almost screwed up, here! I started to trim the
plastic to let the axle go in. That would have been a huge mistake. The
axle is trapped by thin walls and requires nothing else to hold it in
place.
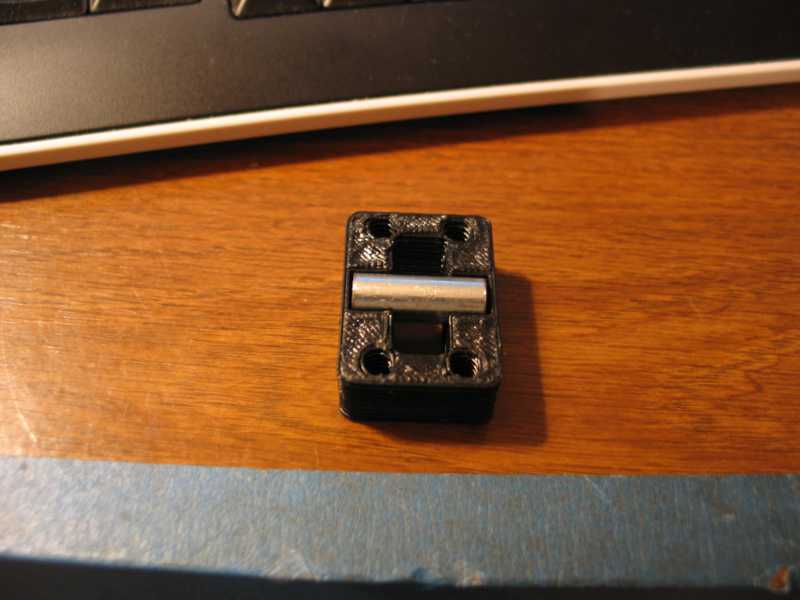
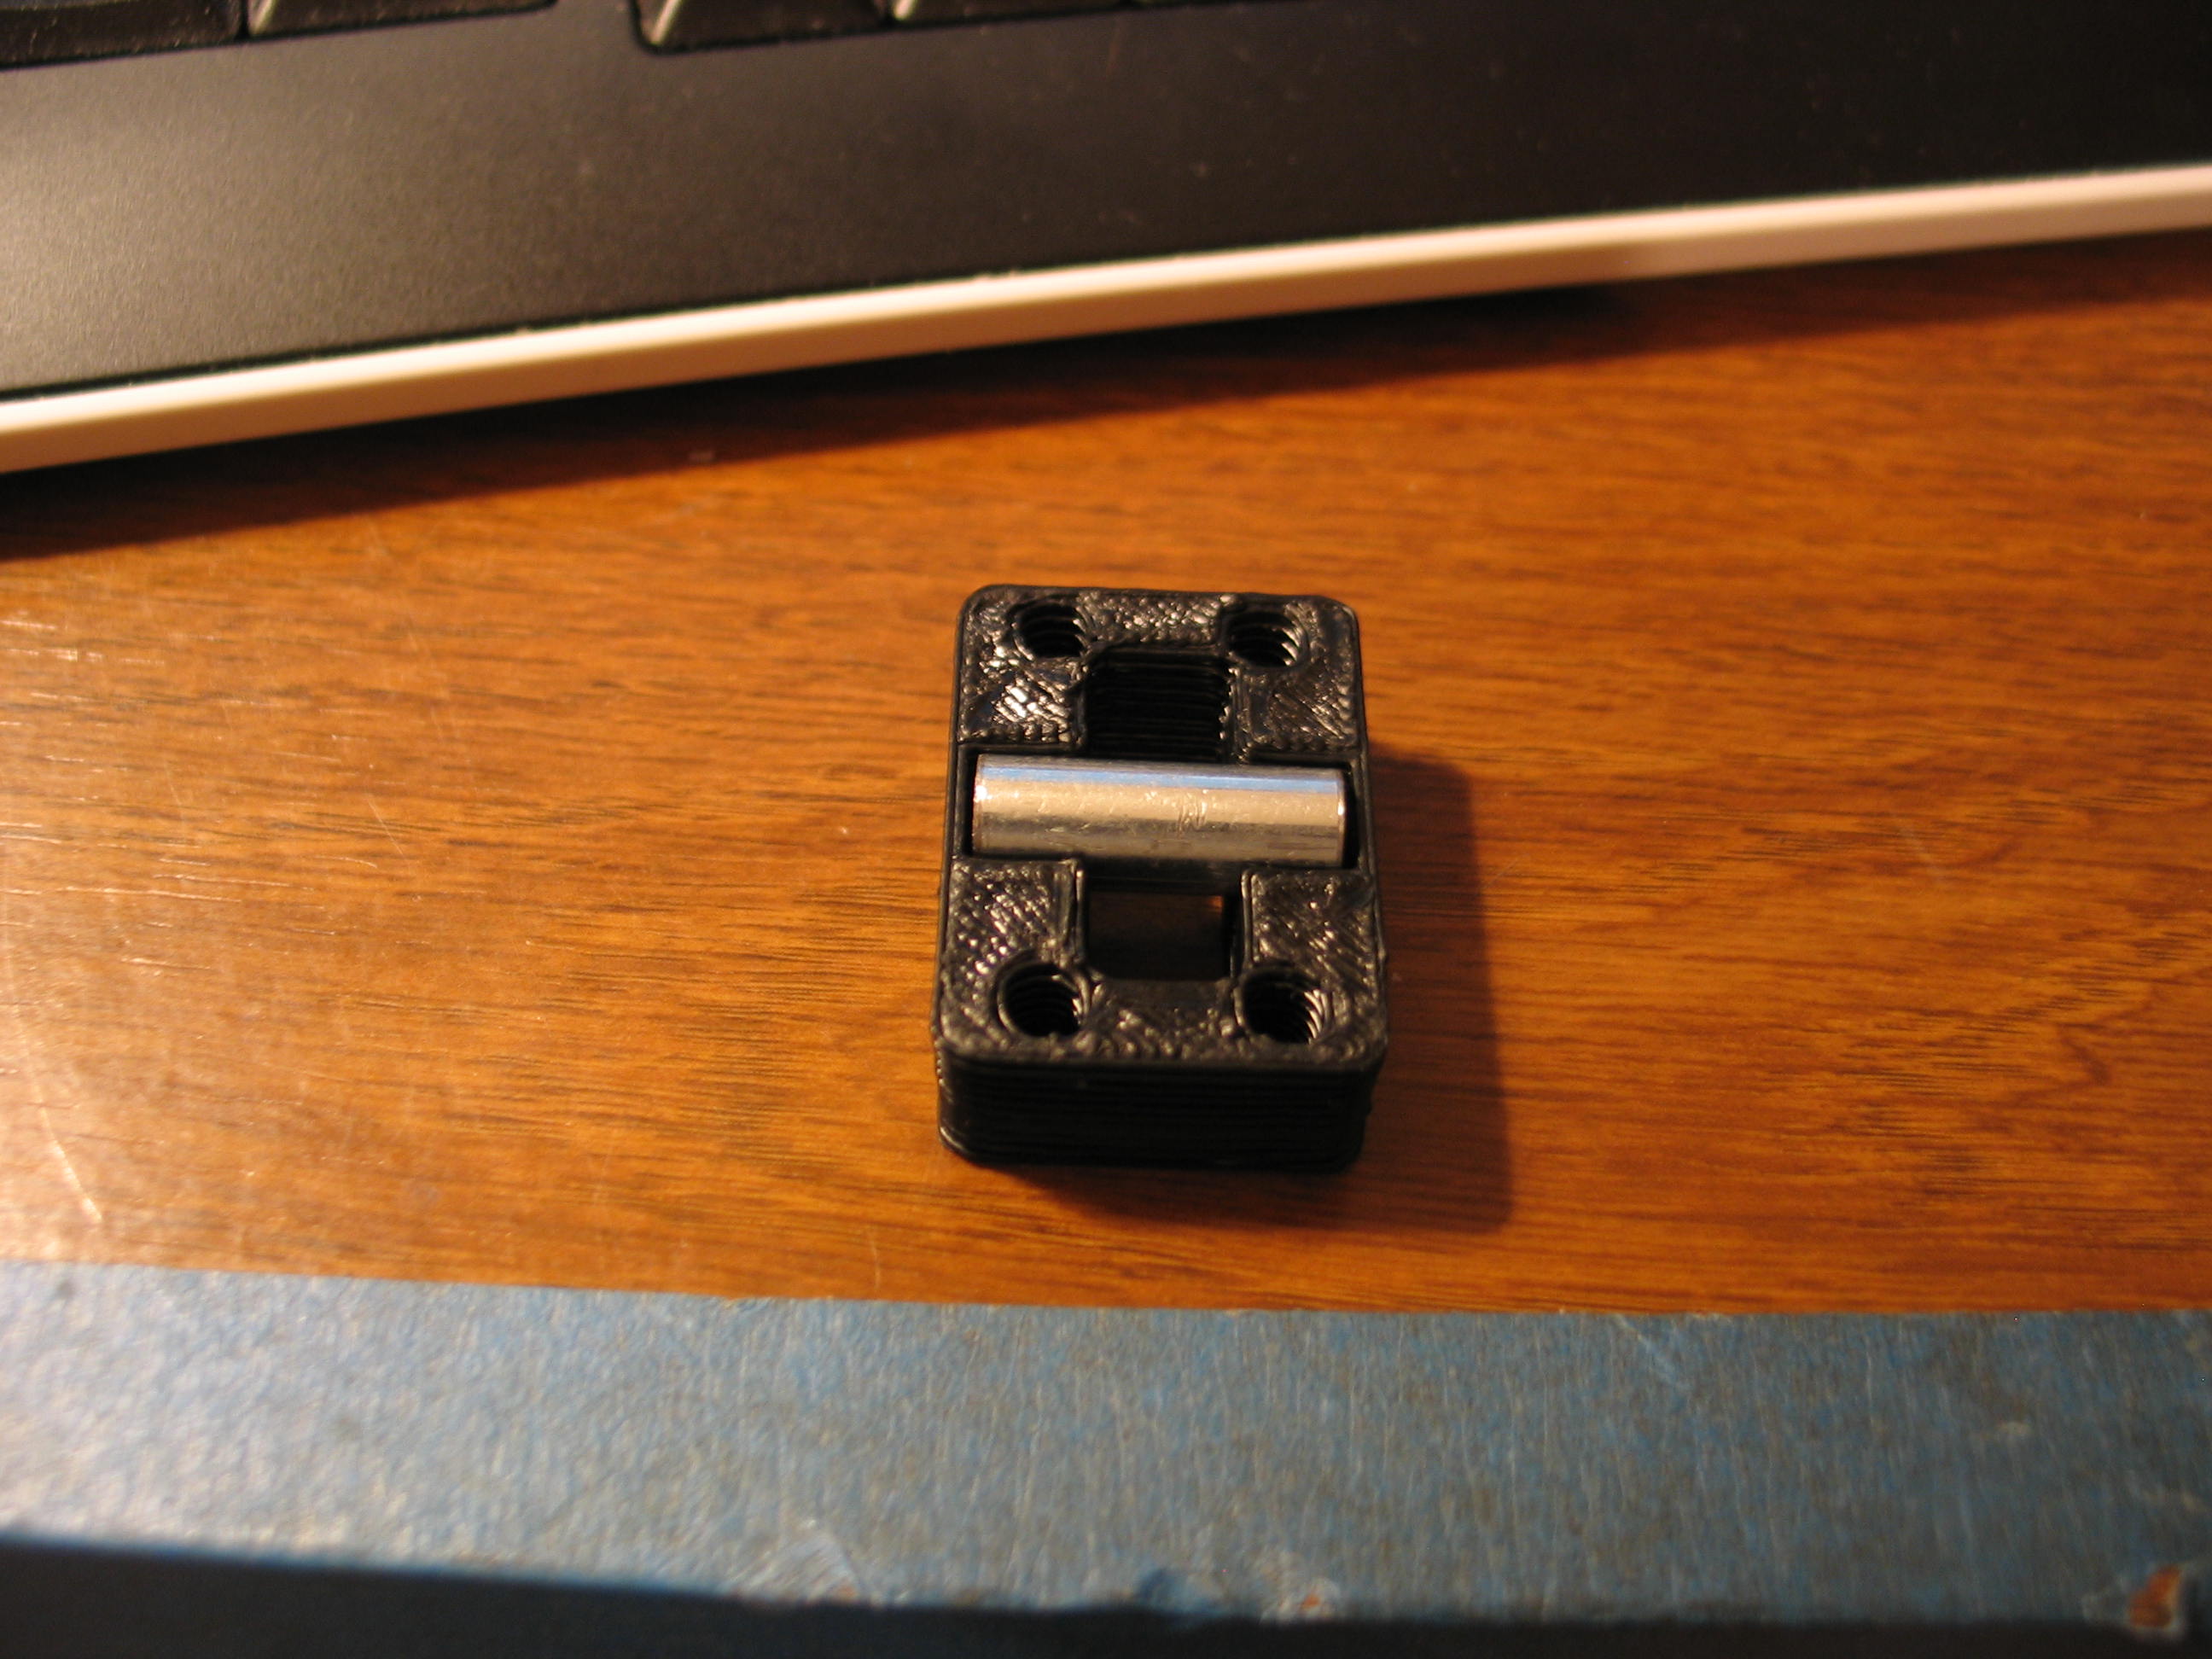
I put it in the lathe and faced off the length. You could also use a hack saw or grind it away. There's not too much worry about making it too short, but too long is a bummer.
Remember the small gear that is good to use the M3 nut? That requires an M3 set screw. Back to Ace. Their smallest was M4, so I wound up with a button head cap screw. Of course it interferes with the motor mount. The choice is to order a freaking set screw online, or modify the mount.
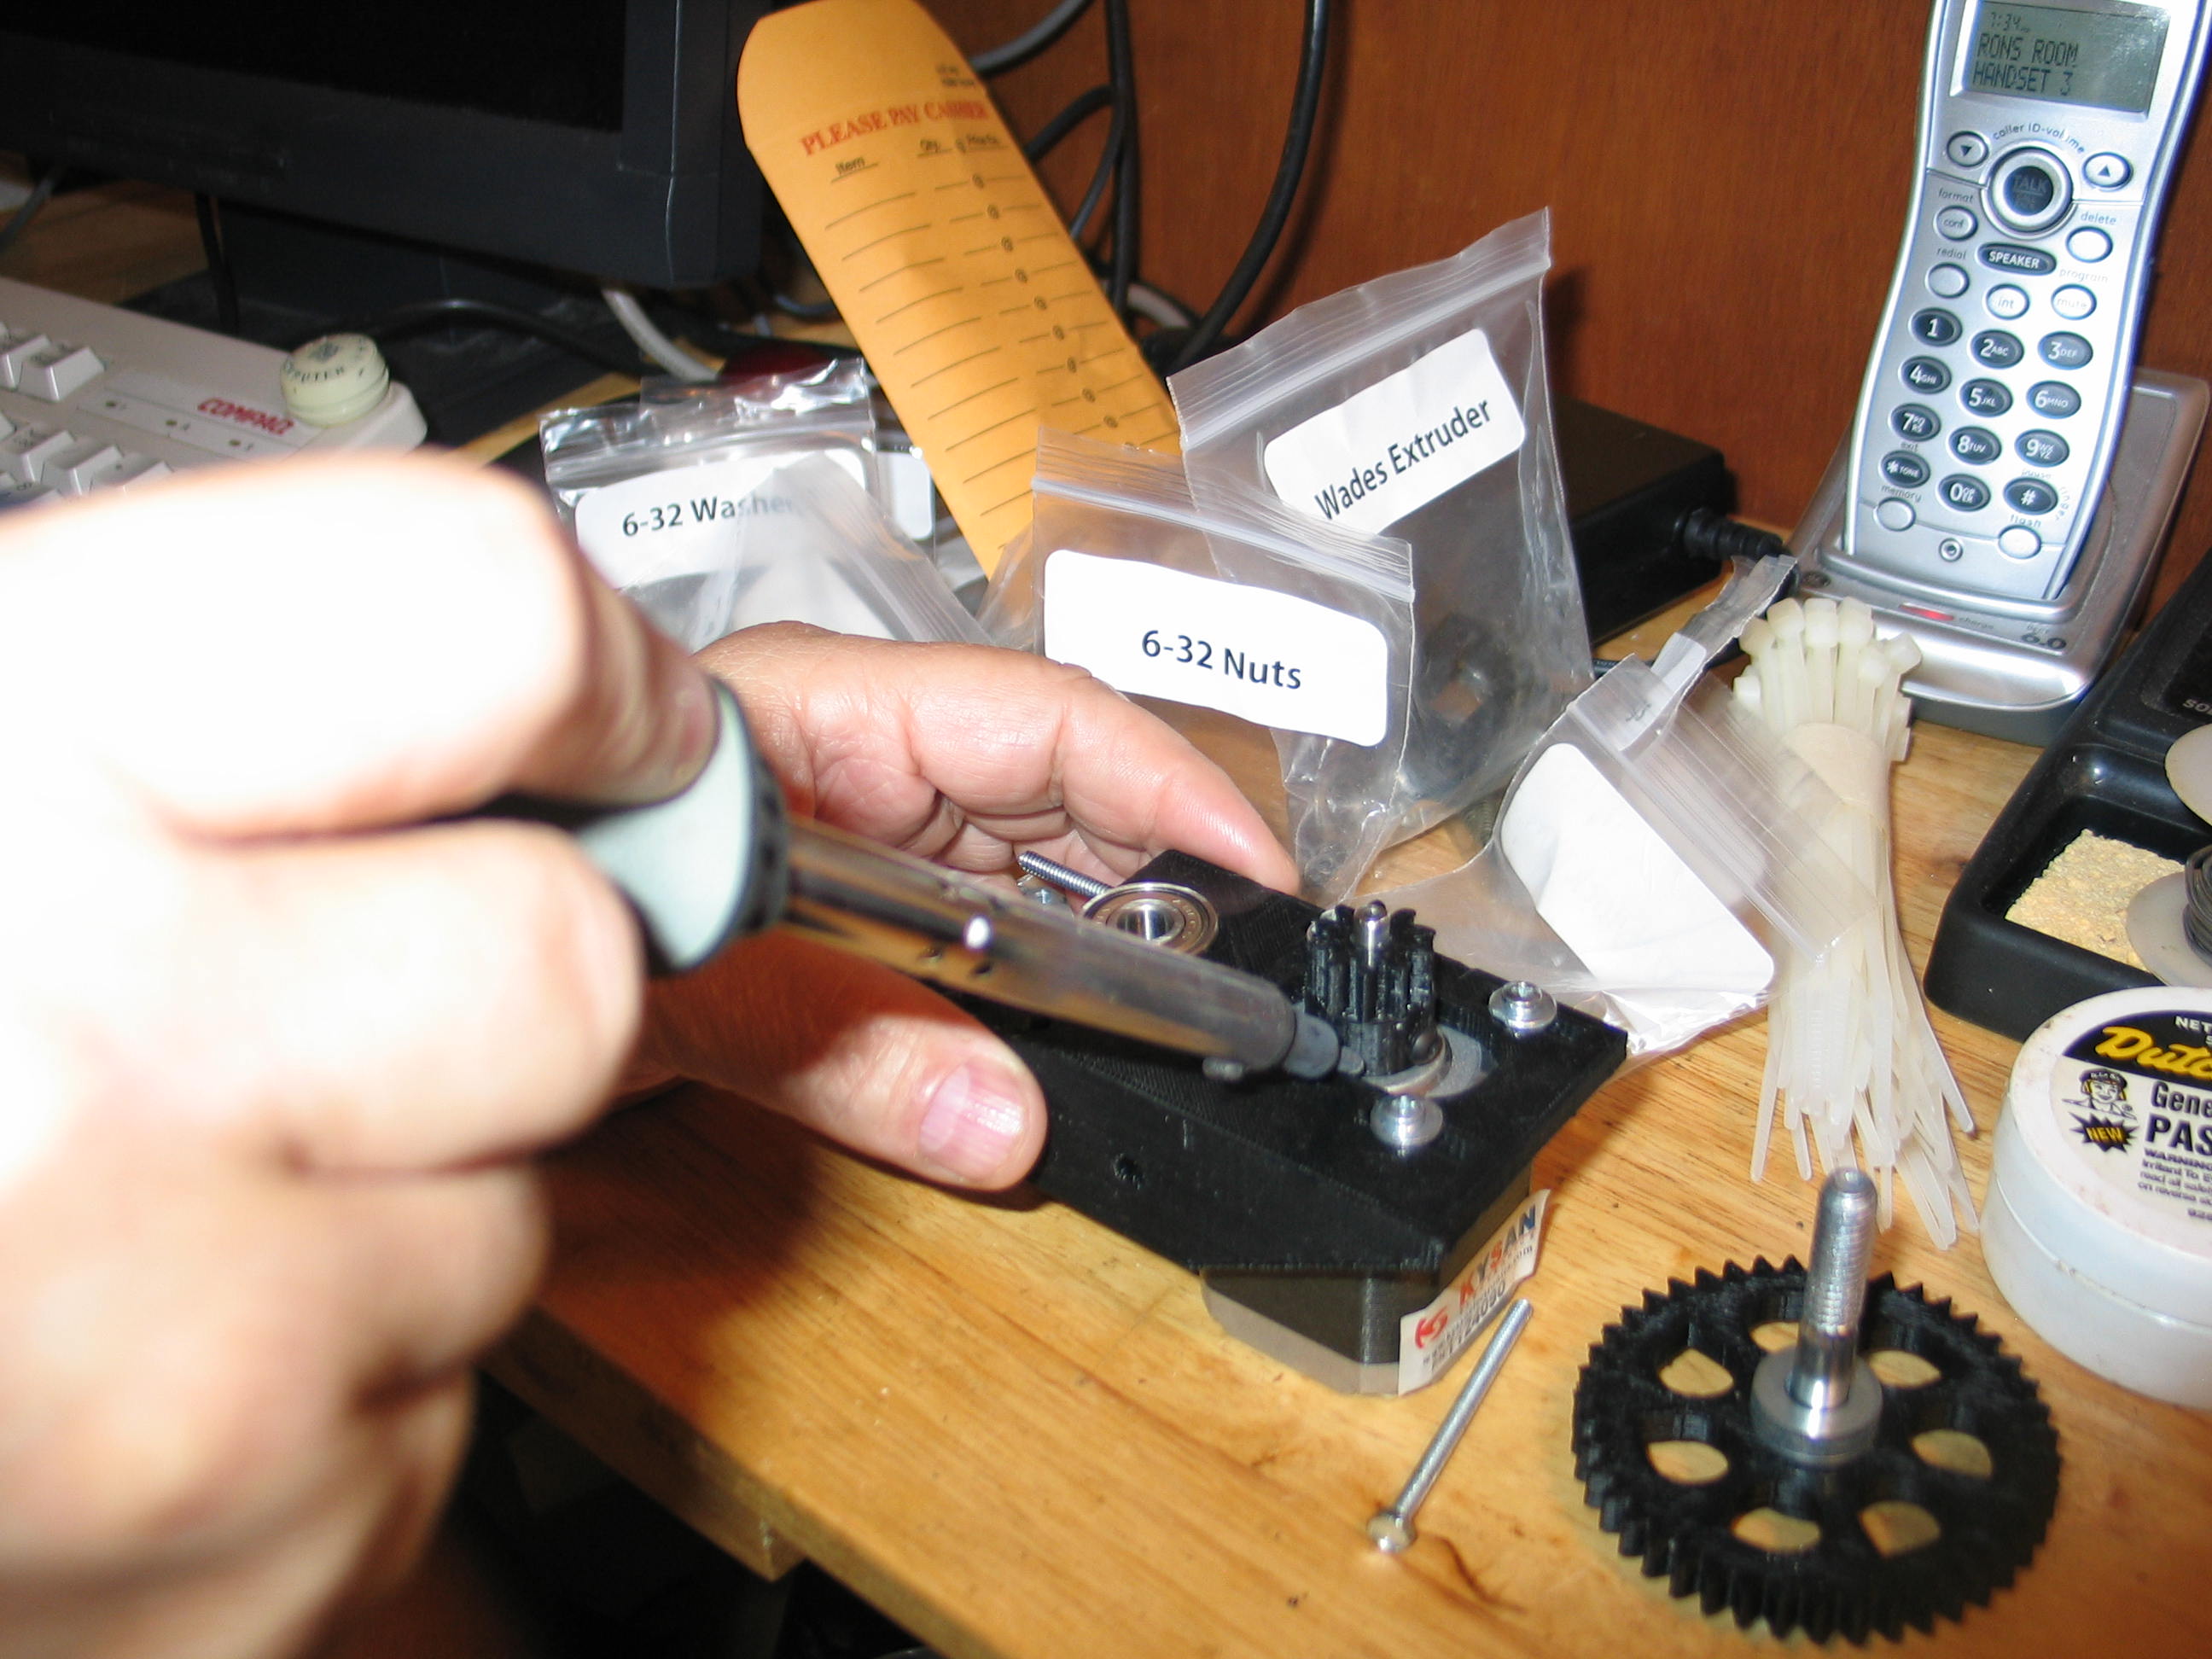
A soldering iron makes a quick fix.
I was amazed at how well the gears meshed. Pretty smooth operation rotating by hand.
Navigate
in this series
First
Previous
Next
Last
Please leave a comment on the bottom of the page. Was this useful? What would you like to see different? Thanks.